Showing posts with label pillows. Show all posts

Friday, June 8, 2012

sew & tell v3.34 - new york beauty swap

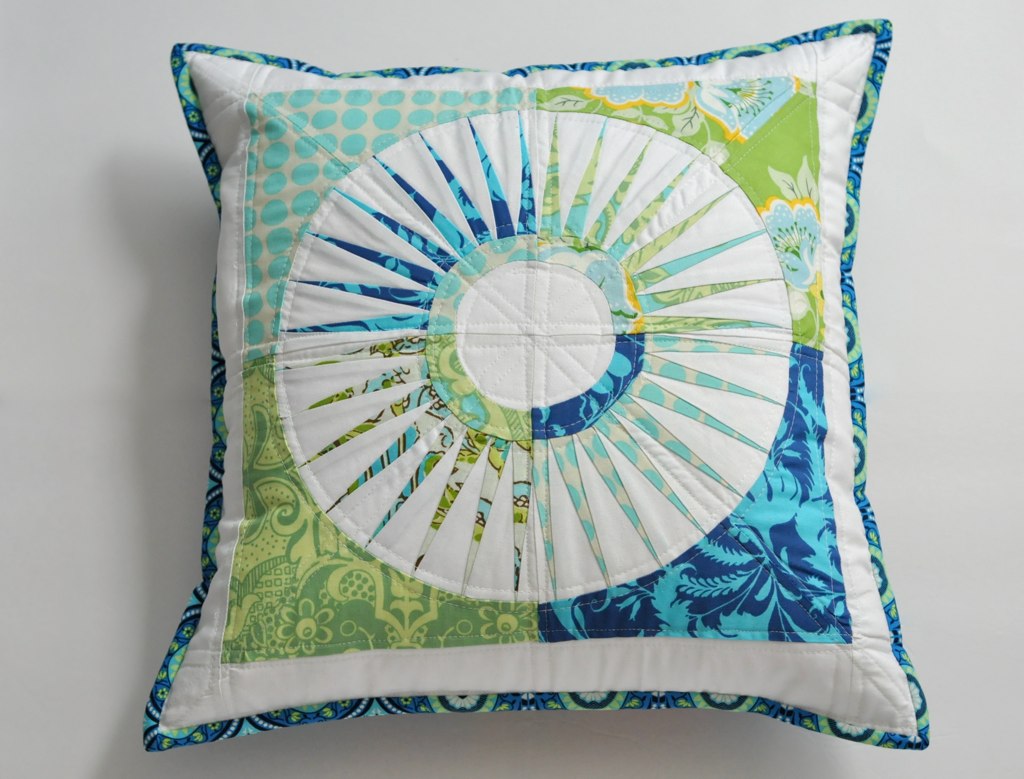
I am so excited to share this finish with you today!  This is probably one of the hardest projects I've done and I'm so thrilled with how it turned out!

When we were doing the New York Beauty quilt along a little swap got put together and I couldn't say no.  So my partner wanted a pillow and I used the first block I did for my tutorial as a jumping off point.  As I played with my fabrics I decided to go with my favorite color scheme (and favorite designer).
New York Beauty Pillow

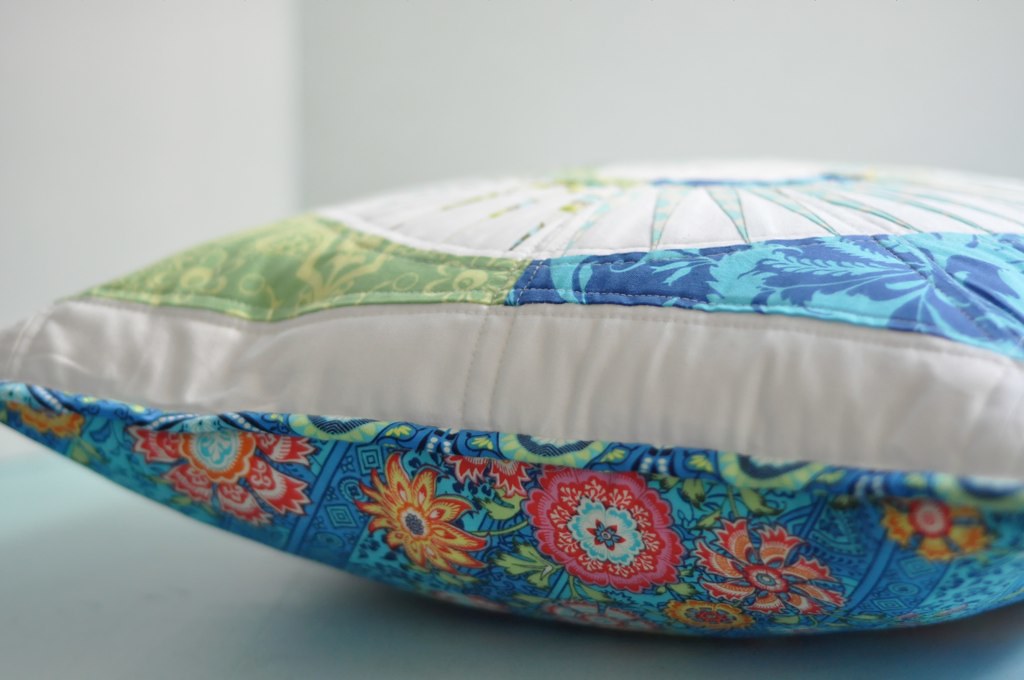
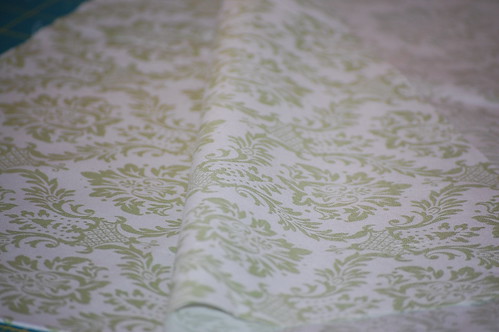
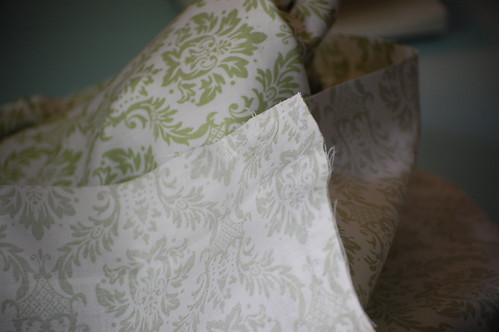
The binding and backing fabric were actually some I had in my stash that I had just bought for fun.  And they worked so perfectly (both from Amy Butler's Lark collection).
New York Beauty Pillow - back
You may be seeing a skirt made out of this fabric very soon!  I just love it!
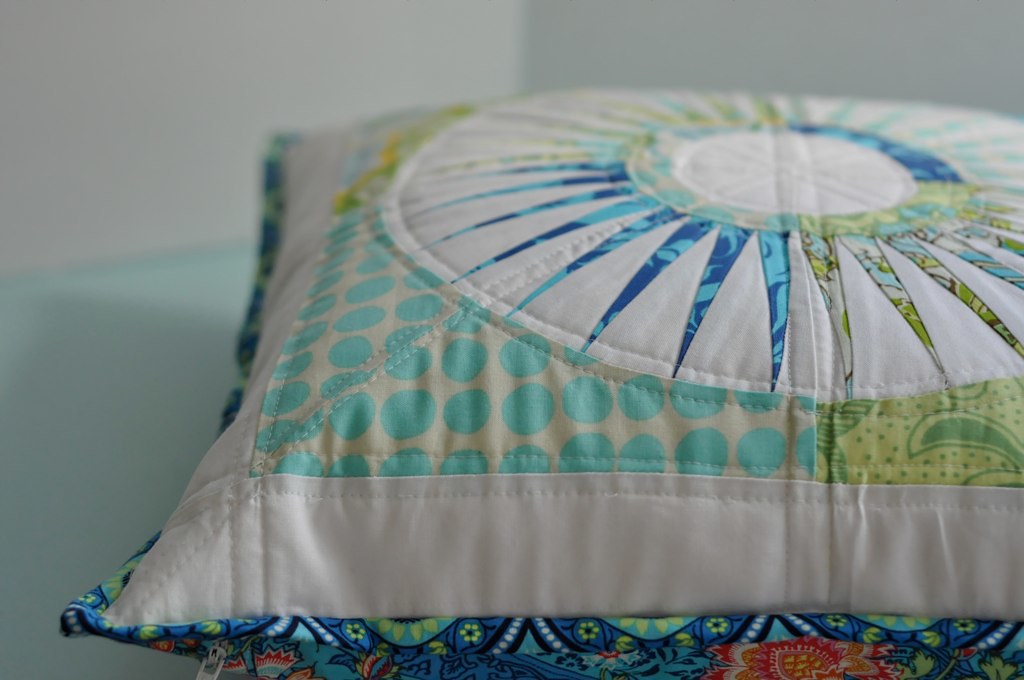
New York Beauty Pillow - side
And I like the suprise pop of pinks and oranges on the back with the blues and greens.
New York Beauty Pillow - quilting
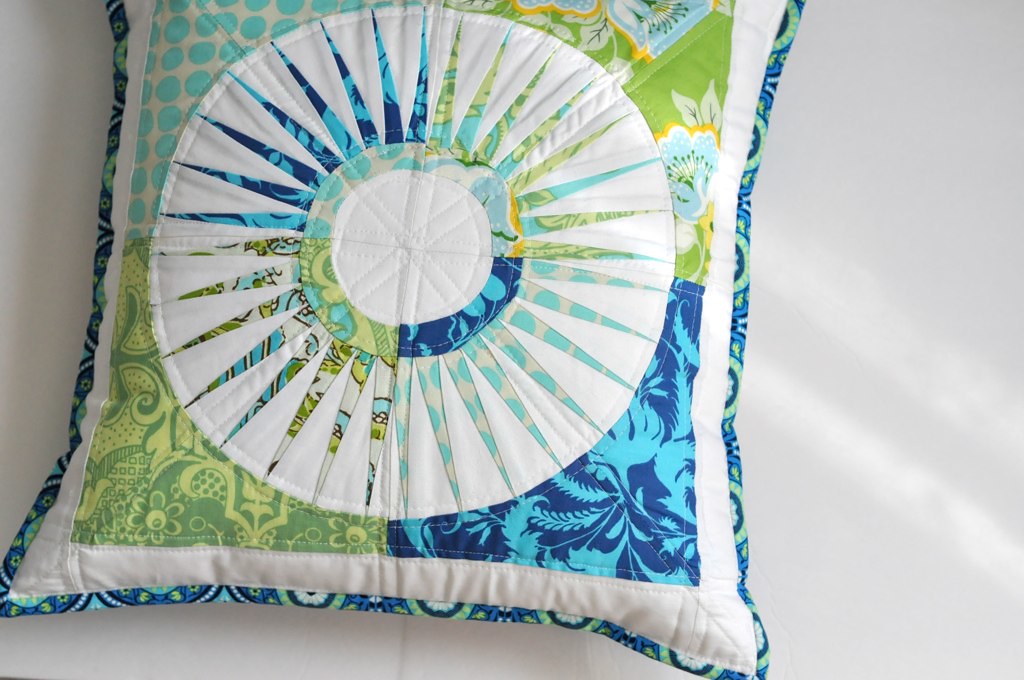
I didn't want to take away from the design with too much quilting, so I just did a straight line (without a walking foot) around the major seams.  I love the way it turned out.

New York Beauty Pillow

I really hope my partner loves it as much as I do.  And now I need to make one for myself!

What did you finish this week?
Linky Rules.  Please follow along for a fun party!
1. Please write the post for sew & tell - or add a blurb mentioning sew & tell to a post written since the last sew & tell.  If you are linking to a post with your own tutorial, please make sure it was a finish from this week and that the completed project is shown first.
2. One linky per person. (please put multiple projects in one post.)
3. Link to your specific post.  (See here for permalink instructions - or email me.)
4. Link back here with a link or a button (HTML on my sidebar).
5. Be sure to visit and leave comments on other's posts!

Please put your (blog)name instead of your project name, it helps us get to know each other better!

Friday, February 10, 2012

sew & tell v3.18: a tooth fairy pillow

Hey friends!  I hope you have all had a great week!  It's been super busy over here!  I was so excited to entertain my fun friend Karen I met blogging several years ago.  She traveled here to pick up her husband who was coming home from a deployment to Afghanistan.  It's a long fun story about how we met, and in short, I was reminded of the blessings of sweet friends that we may find in unexpected places.

So, I didn't get any sewing in.  But my fun friend Summer of Artfulife has been busy making these adorable tooth fairy pillows!
I love how she fussy cut this darling fabric to make this sweet little pillow.  She has the story of her own childhood tooth fairy pillow as well as a tutorial to make your own.  Go check it out!

And as a side note, Summer and I met online a few years ago.  Somehow she and my friend Karen that I mentioned earlier got to be friends on facebook.  Then the three of us plus another friend (that none of us has met in person yet) started up a little photography project blog (that's on hiatus currently - but maybe not for long!) and I just feel so lucky to know these ladies.   I am strongly reminded often of the blessings of like-minded friends and kindred spirits and I thank you all for being here!

I should have some finishes to share next week.  I'm so close to finishing up several things!


Your turn to share ~ Show us what you've got finished!
Linky Rules.  Please follow along for a fun party!


1. Please write the post for sew & tell - or add a blurb mentioning sew & tell to a post written since the last sew & tell.  If you are linking to a post with your own tutorial, please make sure it was a finish from this week and that the completed project is shown first.
2. One linky per person. (please put multiple projects in one post.)
3. Link to your specific post.  (See here for permalink instructions - or email me.)
4. Link back here with a link or a button (HTML on my sidebar).
5. Be sure to visit and leave comments on other's posts!

Please put your (blog)name instead of your project name, it helps us get to know each other better!

Friday, October 7, 2011

sew & tell: v3.3 ~ from kim

Happy Friday!!!  I am Kim from My Go Go Life. Amy is off at Sewing Summit and since I may be the only person in sewing bloggerworld to not be going, she very kindly asked me to guest host the Friday Sew and Tell. Thank you Amy! I hope you have an amazing time! 


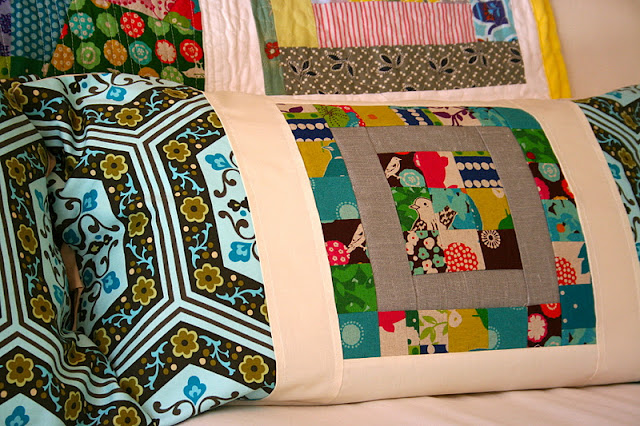
This week I was able to complete a couple of pillows for my sofa in the living room. I used some echino I have been hoarding, gray linen from Ikea, Kona and Amy Butler.  I love the one with the birds the most!


I made the pillows to go along with the surprise birthday quilt that Sara @Sew Sweetness organized with Amy and some other friends of mine. Too sweet!  The quilt is very inspirational and super LOVED.  I think this is my new happy place :o)


Cannot wait to see everyone's projects this week!!!!!


Please follow the guidelines as spaces are limited - linky will close after the first 30 entries. I will try to monitor the links to make sure everyone linking up is playing nice.  :)


Linky Rules.  Please read carefully.  The delete monster will be eating non-compliant links.
1. Please write the post for sew & tell - or add a blurb mentioning sew & tell to a post written since the last sew & tell.  If you are linking to a post with your own tutorial, please make sure it was a finish from this week and that the completed project is shown first.
2. One linky per person. (please put multiple projects in one post.)
3. Link to your specific post.  (See here for permalink instructions - or email me.)
4. Link back here with a link or a button (HTML on my sidebar).
5. Be sure to visit and leave comments on other's posts!

Friday, September 3, 2010

sew & tell - pillows + pom pom fringe

 *****Sorry!  I goofed on the linky, but it's up now!*****

If you are new or need a refresher for Sew & Tell guidelines you can click on the tab above for details on linking up!
Just a few quick items before we get to the good stuff!
I got some great feedback from a lot of you on the sew & tell survey I posted last week.  Go check it out and give me your 2 cents if you haven't yet!
*****
You can find us all here on Facebook now too.  Go to the Facebook tab at the top to click over if you feel so inclined.
*****
Please show good bloggy manners and only link up if you can adhere to these guidelines.  One of the best parts of sew & tell is the encouragement we get from one another.  Try and visit others and not just link up and leave!  I know it's not possible every week, but that's part of the fun, right?
*****
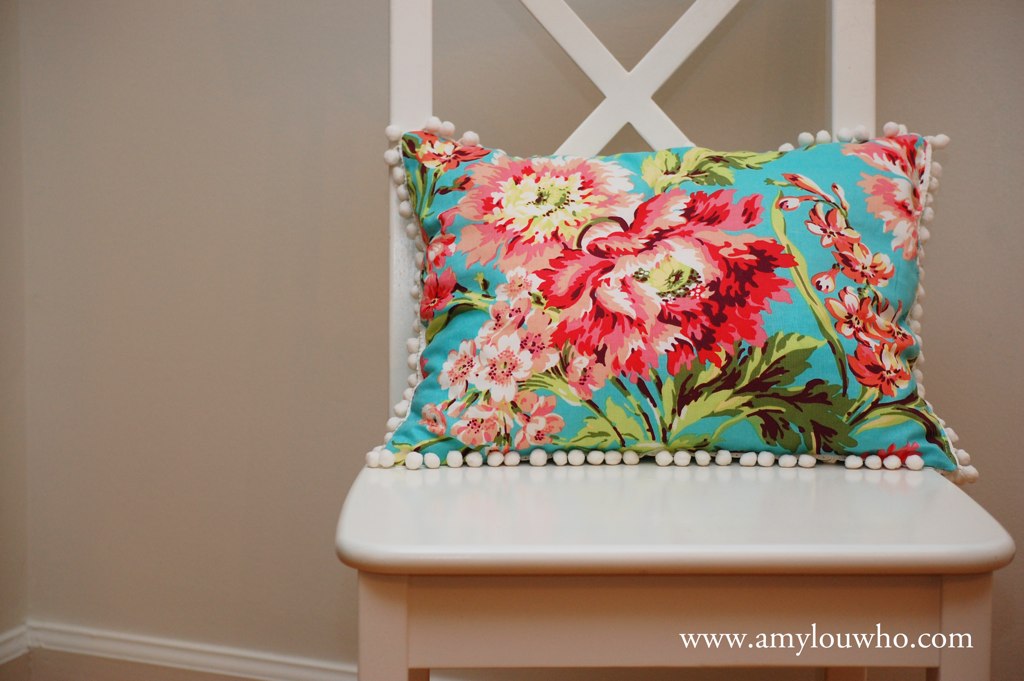
So you do you want to see what I made this week?  Actually yesterday?  While I was waiting to see if Hurricane Earl was going to pay us a visit?  I was working on another project that needed a little more time than I wanted to spend on it.  Plus it wasn't made out of Amy Butler fabric.  I knew I wanted to get this little number done to go with the LOVE quilt.  So I put the other one aside (for next week) and I whipped this up!

Seriously, I love making pillows.  They are so fast and satisfying!  You will probably be seeing some more of them in the next few weeks.

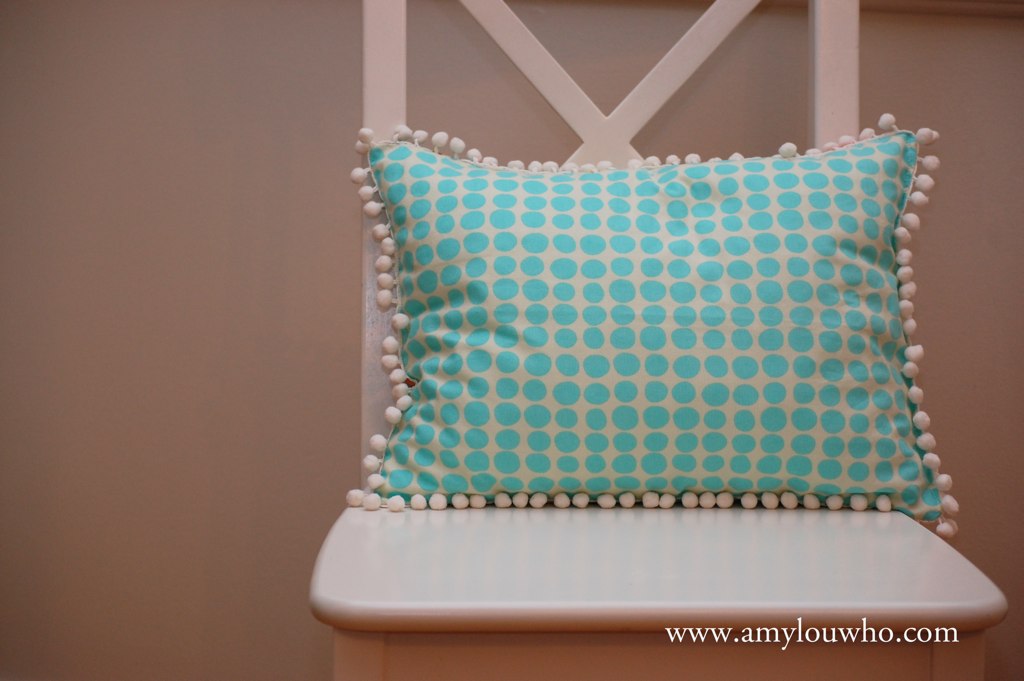
And I can't stress enough how much I. LOVE. POM-POM. FRINGE.  Doesn't it just make it look so happy?

And the dots?  Oh how I love Amy's dots.  All of them.  Every time she comes up with new ones - I have to have them in all colors.  Or at least I think I do.

I used this awesome filler called Cluster Stuff by Morning Glory.  It's little pellets of stuffing so it's very soft and not lumpy at all!  (I may or may not have found it at a big blue box store that still had its sewing department.)


What sewing project did you finish this week?

Please show good bloggy manners and follow the linky rules.  Refer to the sew & tell page   if you have any questions or wonder why your link may have been  deleted.
1. Link to your specific post about a sewing related finish you had THIS week.
2. Please mention sew & tell in your post and link back to this  post (link or button) so everyone can join in.
3.  Pat each other on the backs in the comments! Please, don't just link up and leave, we all want to hear from you!


Friday, March 12, 2010

sew & tell - a pregnancy pillow!

First off, I have to say a BIG THANK YOU, to all of you for your support and kind words after my last post.  I was feeling really overwhelmed and seriously, you all helped me feel so much better.  Someone pointed out that the benefit of moving is that your blogging friends go with you!  YAY!  I'm so glad.  Thank you again, dear friends.

So, when I'm cramped for sewing time (or don't use my time wisely because I'm watching this), (but I was cleaning/organizing/prepping for the move while I was watching)(not that I'm trying to justify it....)

Okay, so when I get to Thursday and don't have anything ready for Sew & Tell I always try and find something in my to-do pile that will be quick!  Lately, as you may have noticed - clears throat - I have made a lot of pillows (and bags).  I'm like a two-trick pony!  I can't wait until I have a big project finished to show you (How about a baby?  I think I'm having her on a Thursday - just. in. time.).
Anyway, I had some scraps left over from my huge pillows that I made for my bed.  Just enough for two bolster pillows to match (but I only finished one because I ran out of stuffing.)!  Which will actually come in handy as I want to lay on my back, but I'm not supposed to - so I can use this little beauty to wedge me sort of on my side.
I really like body pillows, but they cause a lot of confrontation!  Our bed isn't big enough for the three of us!  (Not that it matters - I've developed a snoring problem and I often find my better half sleeping on the couch.  Poor guy.)  So this is a great solution.  I found out too I can use it to almost lay on my stomach (which I'm not supposed to be doing either).

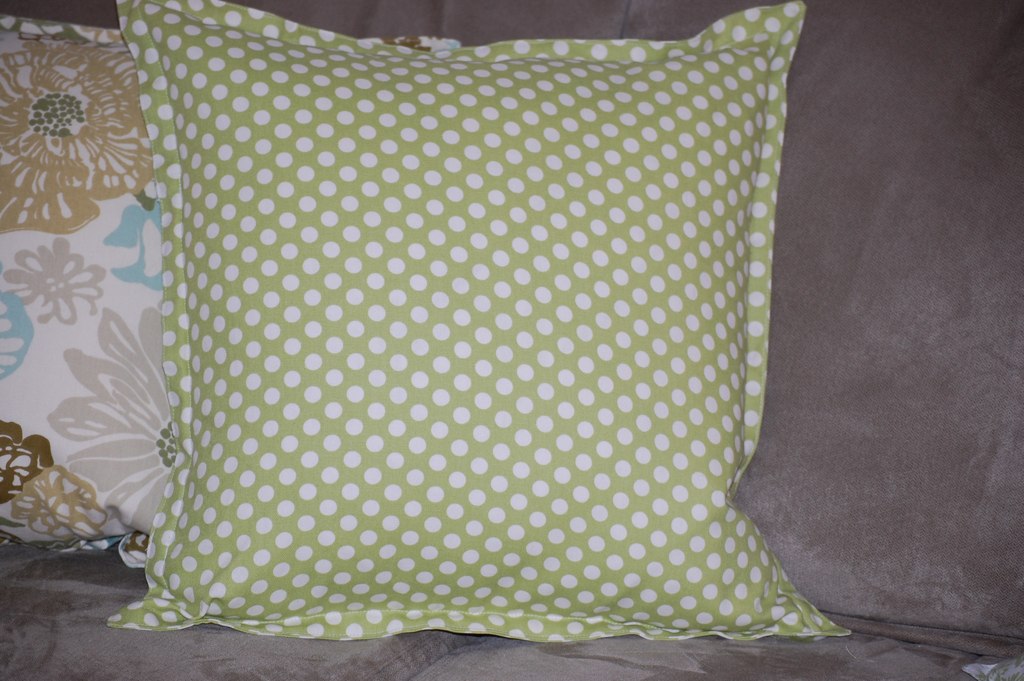
While I was on a roll, I decided to make the last pillow (for now anyway) for my couch.  I bought the fabric and form a while ago and would rather move the pillow finished, than the fabric and form separate.  Is that odd?
I love the green and the polka dots!  And I think it looks great with the rest of my collection!
Yay for pillows!  Fast and easy!  You can find the tutorial for how I make them in my tutorials tab up there at the top of my blog.

If you are new or need a refresher for Sew & Tell guidelines you can click up there on that tab too.  Can't wait to see what you've been doing this week!

Your turn!

Please refer to the sew & tell page if you have any questions or wonder why your link may have been deleted.
1. Link to your specific post about a sewing related finish you had THIS week.
2. Please mention sew & tell in  your post and link back to this post (link or button) so everyone can join in.
3. Pat each other on the backs in the comments!

Friday, February 5, 2010

sew & tell: more pillows?

Can you ever have TOO many pillows?  I don't think so! (my husband some people in my house may disagree with you.)  I think they are an awesome way to bring color or some signature to an otherwise boring space.  Which my whole piece of garbage rental happens to be.

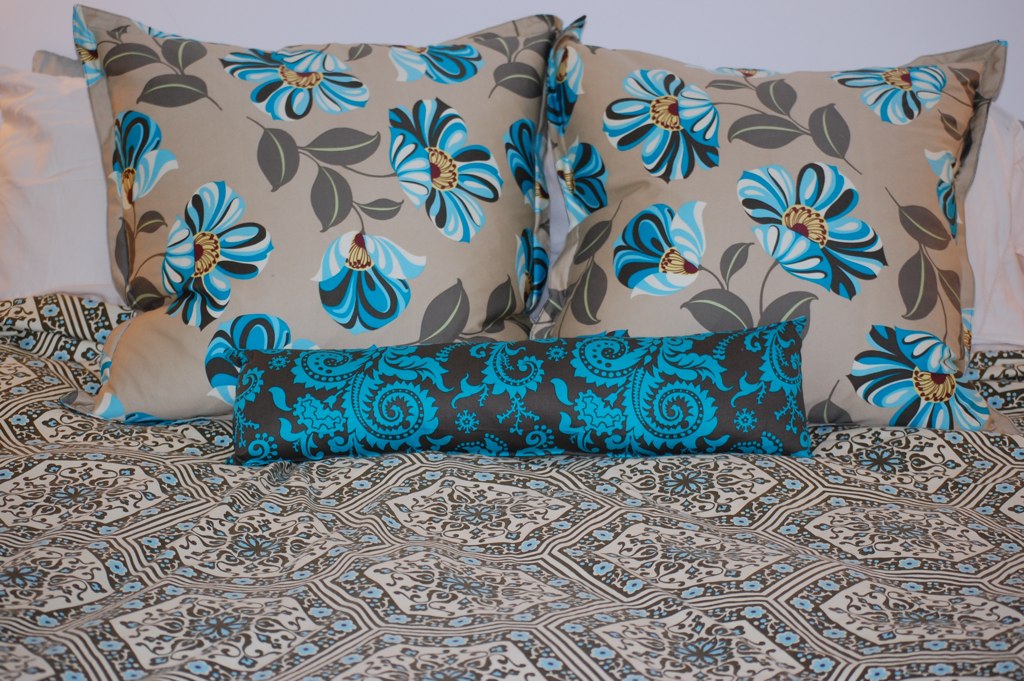
I finally made these pillows for my bed this week!
I. LOVE. them.  More than I thought I would.  I wish you could see the scale of those flowers - they are huge!  The fabric is from Amy Butler's Nigella collection, as is my duvet.  These pillow forms are 26" down from IKEA. FOR TEN DOLLARS!!!  Seriously.  I'm going to be so sad when we aren't so close to an IKEA.  I might have to stock up before we move.   I actually think I need to make one more - these will kind of serve as the backdrop for the other pillows I'm going to make.  Yes, there will be more!

Oh, but I almost forgot.  Did you want to see the reverse?
I found some Nigella on clearance last year and wanted to buy some more to match my duvet.  I didn't want to be all matchy-matchy, but it was a little hard to decide without actually seeing the fabric in person.  So, I went to Amy Butler's site to look at what she did with the fabrics.  She paired these two together and although I wasn't drawn to it initially, in person and finished and on my bed - awesome.  I have some of these too - to complete the 'pillow montage'. 
I'm so happy to have these finished!  Makes me want to get the other pillows/shams finished too!  Soon.  I promise.  I don't want to move without these finished.

Thanks everyone for your link-ups each week.  Things are so busy lately that I feel bad I haven't been able to reply to every comment and post.  Bear with me!  I am checking in on your posts and you guys are amazing! And productive!  And you're welcome to all of you who thank me each week for doing this.  I wish I could say it's purely selfless, but it keeps me going too!  so THANK YOU! Really, I mean it.

What did you finish this week?
(Following the rules will ensure a good time for all!)
1. Link to your specific post (email me if you have questions about that.)
2. Please mention us here and link back to this post so everyone can join in.  (You can mention Sew & Tell in your post and have the button on your sidebar or blog, that works too. )
3. Pat each other on the backs in the comments!


Tuesday, September 1, 2009

just a little pillow tutorial

edited: in case the pictures weren't working earlier, they should be now!  Thanks!

Well, the pillow isn't that little (although it can be any size you want) but this pillow is super easy to make!  I'd say if you are an experienced sewer you can whip this up in 30 - 40 minutes!  And if you are newer - give yourself an hour!
I made theses pillows for a bridal shower gift.  I had been scoping out her tastes and furniture so I could do something quick and easy.  I didn't have time for the throw quilt I wanted to pull off.  So I made 2 pillows and the day after the shower she came over and I taught her how to make another one.  
Teach a woman to buy fabric and she'll be buried in it.  Teach her to sew and at least she might keep her head above the top of the pile!
I'm not known for my very clever jokes, so pardon me if that was a little silly.  :)
I have a little secret (besides the bad joke telling.  Oh wait!  I don't think that's a secret).  I'm sort of lazy.  I like shortcuts.  I dread cutting things out with regular scissors (thank heaven for rotary cutters) and putting in zippers is tricky (I'll do it if I must), AND if I can avoid hand sewing things closed - I do.  (With the exception of quilt binding - which is always finished by hand.)

The pillow I made for this tutorial is 20" x 20".  Therefore, your supplies are as follows:
one  20" x 20" pillow form - I prefer feather.
2/3  yard fabric (44/45" width)
matching thread for topstitching
rotary cutter, mat and ruler (scissors and measuring tape will work too)
pins (if you want.  If you are lazy like me then, well, then.....)


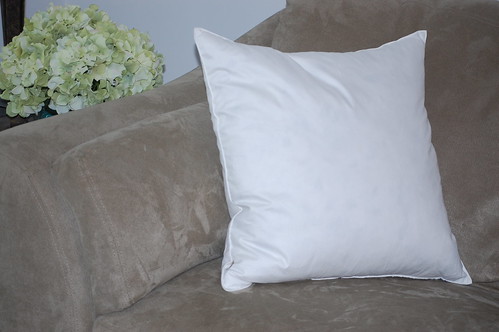
1. I start out with a nice fluffy pillow form like this:
I buy mine at IKEA - they are only $6.99 and are feather.  I ♥ IKEA and their cheap inexpensive, fluffy pillows.  The reason I suggest feather is that they pack down really small so when you are doing your last top-stitching, which is also sewing the pillow inside the cover, you can get the pillow out of your way!  It's so great.  It's a little harder to do with fiberfill forms.  You can still do it, it's just a little trickier.  And remember me? Hi! I'm lazy!

2.  With your fabric ironed and folded selvage to selvage, square it up on your mat.  Then cut the 2 layers into 22" squares (or if you are using another size - 2 inches bigger than your pillow form)  We are allowing a half-inch seam allowance on each side as well as a half-inch flange around the edge.

3. Lay your two squares right sides together.  Make sure if you have a one-way directional print, that you have them going the same way.
 

4.  Pin your squares together on 3 sides.  On the 4th side only pin 2" in from each corner.  We will be leaving this side open to put in the pillow form.  If you have a one-way print, I like to leave the bottom open.

5. Starting at the 2" mark on the 4th edge, Line your fabric up for a 1/2" seam allowance.  Start stitching, taking a quick back-stitch to secure the loose threads.  Stitch to the edge of the fabric.  Turn the cover and continue down the adjacent side.  Continue until you have stitched the full length of 3 sides.  On  the last corner start at the edge and stitch in 2" with a quick back-stitch at the last pin.  Don't forget to take out your pins while you sew.  I refuse to admit how many needles I've broken by sewing over pins.
When you look at your pillow you will have 3 edges sewn with the last edge having a large hole in it.  The important thing is that the corners are all stitched on the machine so they look like....

6.  Trim off a little of the edges around the corner so you will get a nice clean point when we turn the cover right side out.

7.Turn the cover inside out!  We are ALMOST finished!

8.  Using something pointy, push out your nice crisp corners.  There are tools for this.  I just couldn't find mine at the time.  If using scissors, be careful you don't poke a hole in your fabric.  Not that I've done that...

9.  Wrong sides together, press your seams and corners flat. Work the seams with your fingers rolling them to the edge so you don't end up ironing folds into your fabric.  You'll know what I mean once you start doing this.  On the side that is open, press 1/2 inch on both sides.  This will prep the cover for stitching it closed on the machine.

10.  Now for the top-stitching.  With the cover facing you, open end on top, start with the upper right hand corner.  
Find the edge of the opening and line up the edge of the cover with the 1/2" seam allowance line, back-stitch a stitch or two and then sew.  Stop when you reach a 1/2 inch from the next edge.  Lower the needle to the down position, lift the presser foot, and turn the fabric so that you can stitch down the next side without breaking the stitch line.

11.  Continue on until you pivot the last corner, stitching to other edge of the opening and back-stitching.  (click on the image to enlarge and get a better view.  I should have used a better contrasting thread!)
I don't have pictures,  but next, do the same top-stitching, this time just at the edge of the cover.  I like to gauge it by keeping the edge right on the inside of my presser foot.  (I actually did this on the second pillow I made - wait, I'll get the pic..... there we go.  See how there is stitching on the very edge as well?  This makes closing the pillow THAT much easier.)
12.  Fold your pillow form in half or thirds.  Insert it into the cover.  Match up the top two corners of the pillow with the corresponding corners of the cover.  This will ensure that the pillow sets right in the cover and doesn't get all twisted.  Mmmm, yes, maybe I have learned from experience.


13.  Squash the pillow down so that you can pull up the edge that needs to be sewn shut.  Pin the edges together where you pressed  your seam allowance in.

14.  Starting at your back-stitch point, top-stitch the opening closed, 1/2 inch away from the edge.  Again, back-stitching on both ends of the seam.
Repeat top-stitching on the very edge of the opening.  Isn't that sneaky?  No zippers, no hand-stitching....

15.  Now grab the top two corners and shake the pillow down into the rest of the cover.   This is fun - if you have any frustrations to get out, take them out now!  (please not in my comments section - just let me know if I need to explain something more clearly!)
And there you go!  A very cute and (hopefully) easy pillow!
If it needs a fancy little sister you can always add some pom-pom fringe!
Let me know if you make any pillows! 
In fact....  because you needed another Flickr group, you can add them here!  amylouwho tutorials
I'm just warning you, Flickr is addicting!
PS - I found a 30% off coupon code for Fabric.com 2PLTRY9,  you're welcome!
PPS - This is my first tutorial, so any help in making it easier to follow is welcome!

Thursday, August 27, 2009

sew-n-tell!

Amy - Park City Girl and I had a little blog comment/email exhange earlier this week.  It went a little something like this:
amy: (in a blog post)  I haven't been on the sewing machine lately...I need to get some things done.
amy:  I need to get motivated too - let's have a sew-n-tell on Friday!
amy:  great!  I need some accountability.
amy:  me too!  I have some stuff cut out I need to get done.  okay - sew-n-tell Friday -  post by noon. 
----a day later ----
amy: what if we do a Mr. Linky thing too?

(I know, 2 amy's is confusing.  But I promise I wasn't talking to myself!!)

SO,  I got 3 bags cut out, and a curtain started, but because of some other things getting in the way, this pillow (which wasn't on my to-do list until I bought the fabric on Wednesday) was the only thing I got done.
I picked up the bolt as soon as I saw it.  Isn't it pretty!?  I'm in the process of giving all my pillows makeovers.  Right now they are too matchy-matchy.   I have a tutorial planned for next week on my super easy, no hand-sewing, anyone-can-make-this-in-less-than-an-hour pillow.  Really, anyone.

Do you have something you'd like to share for sew-n-tell today?  I realize this is what our blogs consist of all the time, but if you have something you completed this week - link up!  We'd love to come visit and see what you are up to.  (In case I'm not already blurking around your url...)  Maybe we can make this a more regular feature, to help keep us motivated in the finishing department!

Just sign up in the Mr. Linky box below and link back here in your post.  Just remember, please link to a specific post and not just your blog.

ie:  not www.amylouwho.com  but www.amylouwho.com/2009/08/sew-n-tell.htm  is great!  (this is called a permalink - I'm learning all sorts of useful things today!)

In short:
1. sign up in Mr. Linky with a permalink
2. share a post from THIS week of a COMPLETED project
3. link back to this post so everyone can join in!
4. enjoy getting motivated and inspired by what everyone else is doing!

Friday, July 10, 2009

and the pillow

Another sneak -


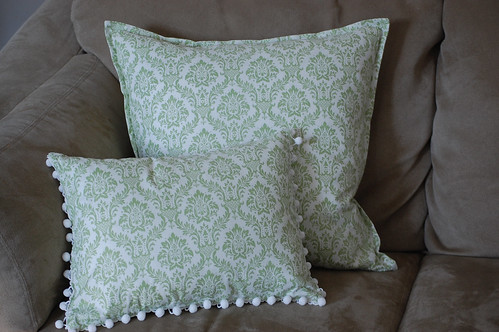
I decided this little number needed a little pizazz. Enter the pompom fringe!

I'm delivering all of the bedding today! Can't wait to take some pictures of the whole nursery. Will post soon!
Stay tuned for my first ever theme-week: Painting Makeovers! (mr. linky will be making an appearance!)

Thursday, June 25, 2009

more from my mentor

aka, my mom.

So yes, we are suffering from Grandma Suzie withdrawl. My daughter has said on numerous occasions, "Grandma needs to come back to our house!" and we all agree!

Here are some the fun things she made during Sewing-fest 2009:

This shadow embroidery was a project she did with her quilt group. She pieced it and put it together one of the first nights we were here. I love how that embroidery on the back shades (hence the term shadow) the muslin. That and it's cute. I wish I would have hid it so she would have "accidentally" left it here.
If I remember correctly, this quilt pattern is called Yellow Brick Road. This was whipped up in an afternoon from 6 fat quarters and a bunch of strip piecing. It turned out very cute - it's a baby quilt size.
This is the same pattern only bigger and with brighter colors! I think it's adorable!

And look at all the cute kitties! This one is closer to a twin size and only used 12 fat quarters. Now that I've seen it done, I really need to make one myself.
mais, La piece de resistance. are you ready? This is a McCall's pattern (I think) It didn't look like much when I saw the drawing on the envelope, and I wasn't sure about the fabric choices, until I saw it!
yes! that whole thing is trimmed in bias tape. She worked it on there like she does it everyday! When I asked her to show me how you do it, it was another one of those moments, "things my mom thought she taught me....." you know the rest.

Speaking of which, did you know that store bought bias tape has one fold longer than the other? It's to use on the backside so you will catch the back when you are stitching on the top! You learn something new every day. And maybe now I won't hate working with bias tape!

She's amazing - now if I could just plug an external hard drive into her brain to download all the information that's in there....

Tuesday, December 16, 2008

christmas is the best

and the busiest! Things have been so crazy around here. Along with shopping for birthday and Christmas gifts, ear infection visits to the doctor and pharmacy and a myriad of other errands and parties . . .

We've been doing a little decorating,


making more placemat pillows (I think I'm addicted),

this one is a microsuede, way too nice for food to be spilled on it! But perfect for a pillow. Plus I have a thing for snowflakes.

eating a little birthday cake with peppermint ice cream,

and maybe I had cake for breakfast this morning

visiting with Santa,


playing with those foam sticker thingies,


and exchanging hand-made gifts with friends.


My friend Megan gave me this little gem. She is so creative and fun! She raided my scraps and used some of my favorites! I love it so much! It will hang in my sewing corner forever (it really is just a corner - until we get to a house where I can have my own room).

Here' s a closer look:

Then she handed me another package and told me this was a gag gift. I opened it and saw Amy Butler paper and thought, "Huh? How can THIS be a gag gift?"


Click on the image to read what's written on the package.

Remember the dream I had? That Megan, she sure makes me laugh! What a great friend.

oh and I was wondering if anyone else finds that their definition of the 4 food groups changes this time of year. Here's mine:
M&Ms - mint chocolate and peanut
Clementines
Cheese balls and crackers
Cookies, cookies and more cookies (this is a whole different category than just cookies)