Showing posts with label new york beauty quilt along. Show all posts

Friday, June 8, 2012

sew & tell v3.34 - new york beauty swap

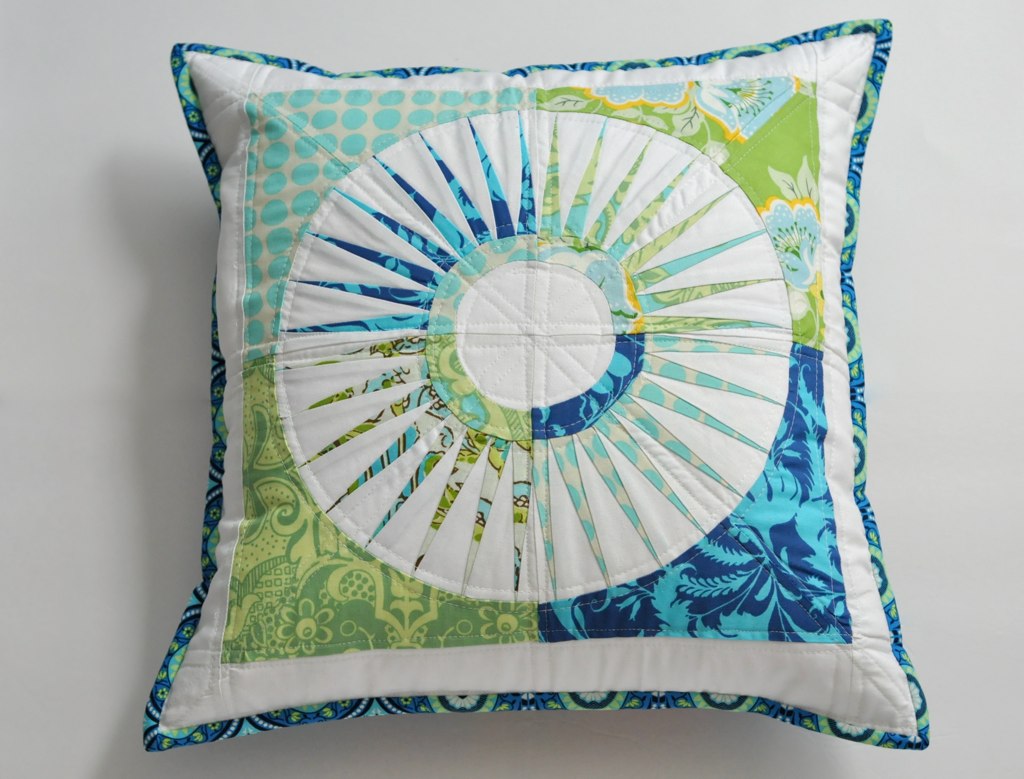
I am so excited to share this finish with you today!  This is probably one of the hardest projects I've done and I'm so thrilled with how it turned out!

When we were doing the New York Beauty quilt along a little swap got put together and I couldn't say no.  So my partner wanted a pillow and I used the first block I did for my tutorial as a jumping off point.  As I played with my fabrics I decided to go with my favorite color scheme (and favorite designer).
New York Beauty Pillow

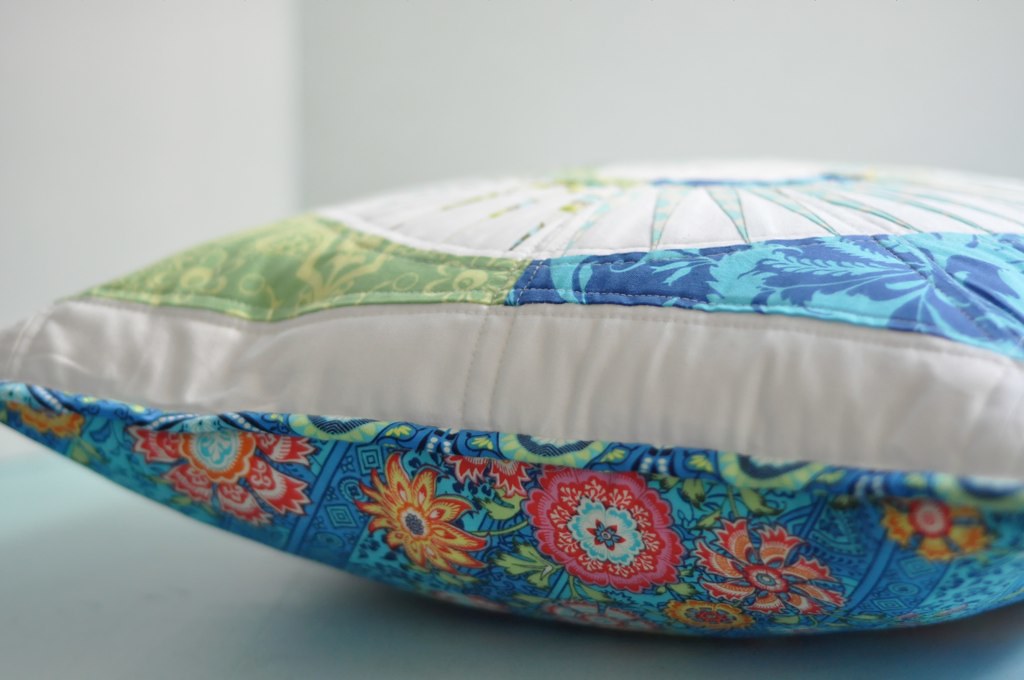
The binding and backing fabric were actually some I had in my stash that I had just bought for fun.  And they worked so perfectly (both from Amy Butler's Lark collection).
New York Beauty Pillow - back
You may be seeing a skirt made out of this fabric very soon!  I just love it!
New York Beauty Pillow - side
And I like the suprise pop of pinks and oranges on the back with the blues and greens.
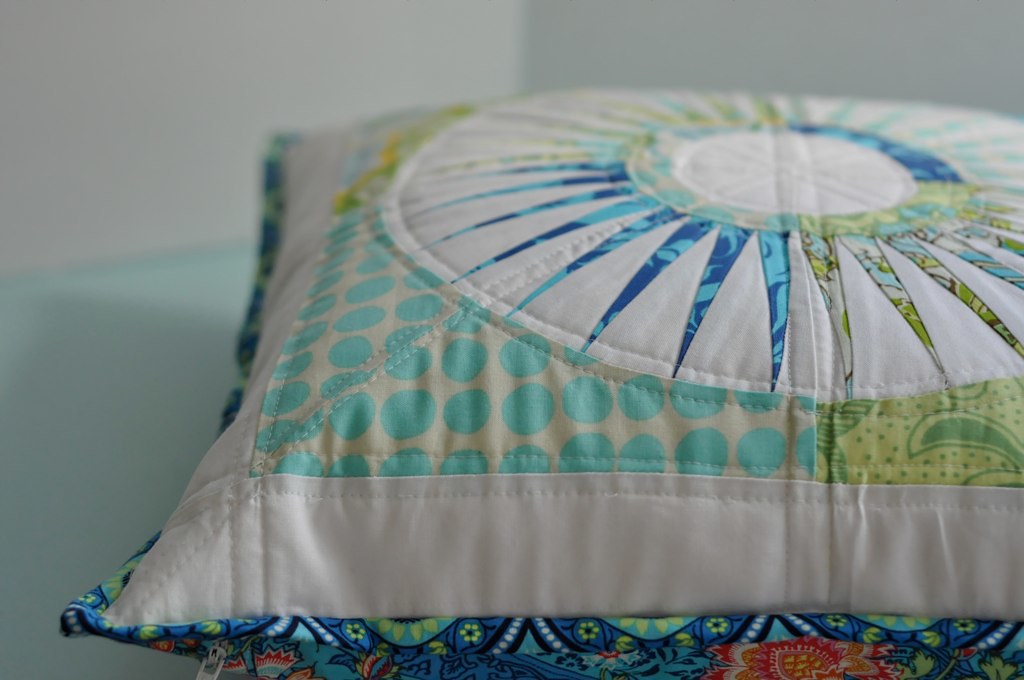
New York Beauty Pillow - quilting
I didn't want to take away from the design with too much quilting, so I just did a straight line (without a walking foot) around the major seams.  I love the way it turned out.

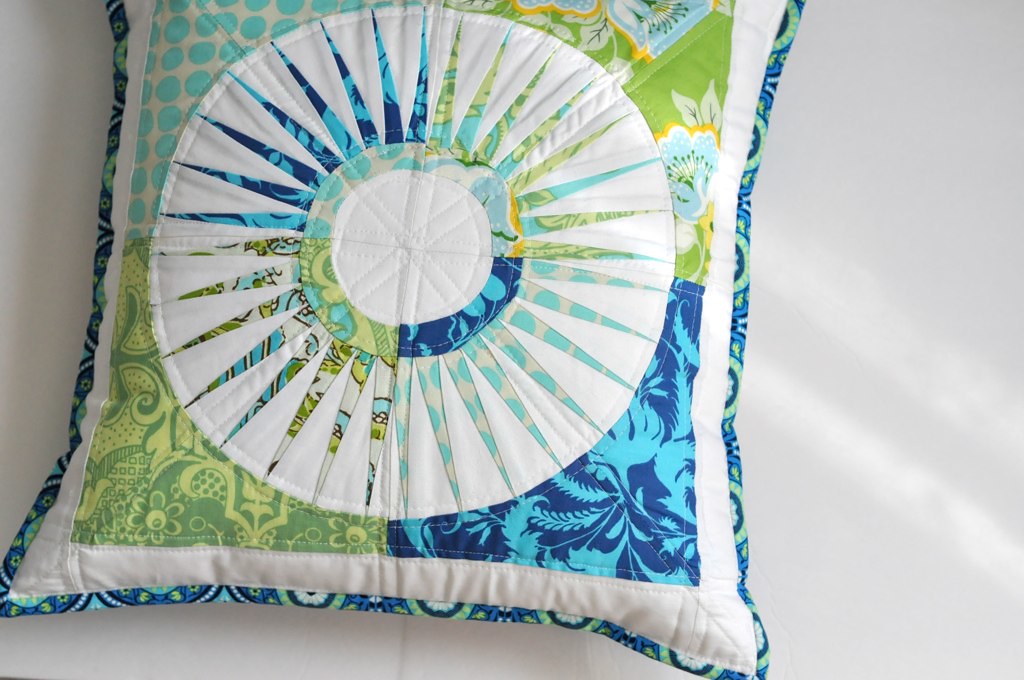
New York Beauty Pillow

I really hope my partner loves it as much as I do.  And now I need to make one for myself!

What did you finish this week?
Linky Rules.  Please follow along for a fun party!
1. Please write the post for sew & tell - or add a blurb mentioning sew & tell to a post written since the last sew & tell.  If you are linking to a post with your own tutorial, please make sure it was a finish from this week and that the completed project is shown first.
2. One linky per person. (please put multiple projects in one post.)
3. Link to your specific post.  (See here for permalink instructions - or email me.)
4. Link back here with a link or a button (HTML on my sidebar).
5. Be sure to visit and leave comments on other's posts!

Please put your (blog)name instead of your project name, it helps us get to know each other better!

Thursday, May 31, 2012

WIP wednesday (thursday report!)


I actually worked on a few projects yesterday while we had a bunch of rain from a little tropical storm.  No big deal.  Something about a rainy day and no committments makes me want to make a mess with my fabric!

First up, I've been working on some New York Beauty blocks for a little swap I'm in.  I'm afraid I'm liking it so much I'm not going to want to send it off. I guess I'll just have to make my own.  I just LOVE it!  Can I say that or does it sound lame?


I've been hemming and hawing about this fabric forever.  At one point I decided I'd do a tunic.  Then I decided to make another skirt.  But then my trusty tiered skirt would cut up that big gorgeous floral more than I wanted to. So I've been concocting yet another alteration to that pattern.  It's actually working and I'm rather tickled. 

Come back on Friday for sew & tell and the finishes!

Friday, May 25, 2012

sew & tell v3.32 - a pot pourri

Hi friends! I'm sorry I'm a little tardy in getting this post up today.  It's been a super busy week and I fell asleep on the couch last night before I got to this.  Plus, I wasn't sure what to share, but I had a few things I've been working on over the last couple of weeks.


My baby quilt collaboration finished another project that was gifted last week.  Fabric selection and piecing by Brynn, quilting by me, and binding by Teri.  Be sure to click on Brynn's blog so you can see her amazing Central Park quilt!


It was a straightforward strip quilt with Anne Kelle, Full Moon Modern and some Echo.  I love the striped binding!  Teri also made an awesome cake with a cute whale on top that matched! I wished I'd gotten a picture of that!

Next up another New York Beauty block.  This is going to turn into a pillow here in the next few days after I sew up a couple more blocks.  I love a little monochromatic color scheming! You can see my (not a) tutorial for this block HERE.
Kona white, Amy Butler Sunspots in Aqua, and Amy Butler Lark (not sure the name of the print).  I'm trying to decide if I make two more of the same blocks or add some more fabrics in.  What would you do?

And then yesterday while I was on a little day trip I stumbled across a Joann's and picked up a few prints.  And I actually have plans for each of them!
Dish drying mats (lemons), Purse (black and white), tunic type top (floral swiss dot).  Maybe I'll be super productive this week!

What have you been up to this week?  Looking for some eye candy?  Sara and Kim both have some awesome Quilt Market Recap posts!  And I have some things I made hanging in one of the booths!  Can you guess where?

What finishes do you have this week?  Can't wait to see!
Linky Rules.  Please follow along for a fun party!

1. Please write the post for sew & tell - or add a blurb mentioning sew & tell to a post written since the last sew & tell.  If you are linking to a post with your own tutorial, please make sure it was a finish from this week and that the completed project is shown first.
2. One linky per person. (please put multiple projects in one post.)
3. Link to your specific post.  (See here for permalink instructions - or email me.)
4. Link back here with a link or a button (HTML on my sidebar).
5. Be sure to visit and leave comments on other's posts!

Please put your (blog)name instead of your project name, it helps us get to know each other better!

Monday, April 30, 2012

new york beauty quilt along: block 2

Hey Everyone! Welcome to my week for this fun quilt along!


Sew Sweetness
I'm not going to lie. I've never done paper piecing before. I was intimidated. And so I did what any good self-proclaimed procrastinator does when faced with something they're not sure about. I procrastinated! Hence, the pictures are dark because I worked on this last night. I'm glad I didn't mess up too bad or this post may not have gotten up today!

So that should be a good indicator that if I can do this under pressure and have it turn out okay, so can you!  And since we are so far along in the bee, you probably will see the same steps here that everyone else has done, just for this slightly different block.  I love the skinny points on this one.

*And a quick disclaimer - because I've never done this before I may do things in an unconventional way, but we can just add this to my {not a tutorial} list and remember that it's just the way I did it.  :) And I'm afraid maybe I didn't take the right pictures...but for me this is sort of one of those things that you just have to start doing and then it makes sense!

I started by printing off my pattern pieces for block 2 (all of the blocks in the quilt along can be found HERE) and cutting some rectangles of my two fabrics.  8 blue  and 9 white for the points.  When I printed out my pattern the 1 inch mark was slightly shy of an inch, but I couldn't figure out how to scale it, so I just left it alone. The finished block ends up being around 7 inches for my print out.

The rectangles I cut were about about 1/2" bigger on each side than the widest point of the point.  I figured a little more waste than I was used to was better than having to redo it because my pieces weren't big enough.

Since I was working at night I couldn't use my window to see my layers I decided my iPad would work.  You could also use a lit up computer monitor ~ just to make sure you were placing your fabrics in the right place.  To start out I placed one white and one blue piece, right sides together, underneath the pattern making sure there was enough seam allowance on the line right of the number 1.  In this picture I don't have it over far enough, but the fabrics are at a good angle.

I liked to open the fabrics before I sewed the together to make sure I had them in the right order and in the right position.

Here the fabrics have plenty of left over for a seam allowance. So I moved it over farther to the right and made the first seam along the line to the right of number 1. Use a small stitch length as this will make pulling the paper off easier.
Then I flipped the fabrics open, trimmed the seam allowance to approximately 1/4" and pressed the seam.
Here you can see how it was flipped open as I added a strip of white to create the point.
After stitching along line 2:
And opening and pressing it.

Here's what it looks like after I trimmed the seam allowance and pressed it open. And can you see how the shadow of the white doesn't fill in all of space 3?  Yep! Major goof! 

I had to take it out and redo it.  The piece of white was long enough I just didn't angle it properly. So as you alternate back and forth you have to angle your pieces parallel to the stitching line so that when you fold them open you have enough to fill in the space.  Like this.

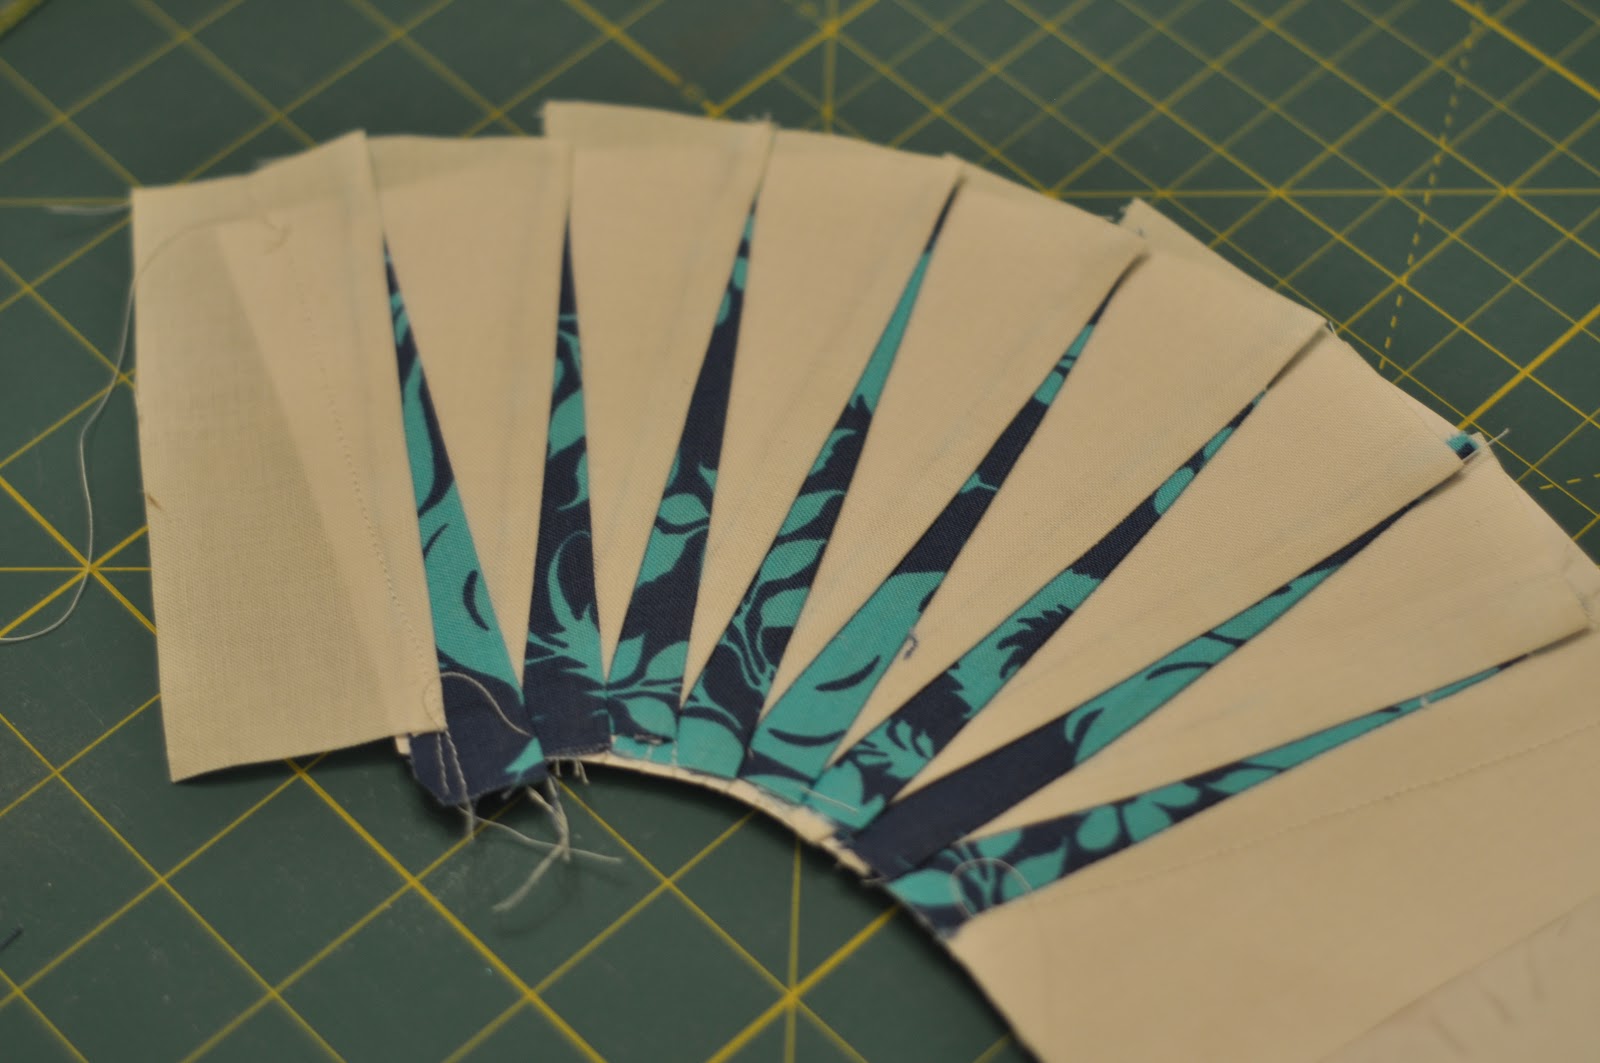
So then to finish the fan I kept adding blue then white then blue, in the manner above,
Until I reached the end of my template!


After the first 3 or 4 points, it really starts to make sense.  This is what your paper will look like when you are done stitching.
I didn't take a picture of this next step, but you can now trim on the outside line and pull the paper off.


Next, cut out the inner circle pieces.

Fold them in half and press to find the midline.

Pin the sections together starting in the middle and then on each end and then as much as you feel you need to keep the edges together.  This is what this side looks like:
And the reverse:
Sew with the smaller section (the corner piece) on the top.  Your pieces will cup like a bowl (sort of) as you sew a 1/4" seam.

Clip the seam allowance (there is a picture below) and press.

Next, find the centers of each piece and start pinning together. Line up the edges next and just work to get the edges all lined up.

And then pin the dickens out of it!  See how it curves up?  That's the side you will sew on.
Again, clip the seam allowance and press.

Next you will cut out the two pieces which you will sew to the top of the fan and complete the square.  I used one pattern piece and folded my fabric to cut two pieces at once.

Sew these two pieces together at the fattest part to form the curve. Press.  (I press to the side, but you can do what works for you.)
Next we will sew the last seam!

Again, find the middle of each section and pin.  The pin the edges together lining up the sides.


And then pin it some more.  The curve allows the fabric to stretch and have a little more movement with the bias.  This seam is actually easier because the pieces are bigger.  I like saving it for last!
Sew a 1/4" seam with the fan piece on top and in the direction that will keep the seam allowances laying flat.
And if you don't have an overabundance of machine needles - you should probably take the pins out as you go.  Ignore the evidence to the contrary in my picture above!

And here is what a clipped seam allowance looks like!  It just helps the curve lay flat for pressing. So clip your seam allowance...


And then press it open!

I really do love how this turned out!  The  sides look a little wonky because I haven't squared it up yet.  But that is something that you can totally do to make up for that.  I just love love love how crisp those skinny little points are!

Fabric is Amy Butler Lark (the dark blue) and Sunspots from LOVE (dots).

Maybe one day I really will have a quilt like my mom's!

So next week is the last Monday for the Quilt Along!  You can check out all of the other tutorials at the following links:
March 5 - Kim from My Go-Go Life {Week 1 Block 0}
March 12 - Sara from Sew Sweetness {Week 2 Block 5}
March 19 - Megan from Canoe Ridge Creations (Week 3 Block 1}
March 26 - Kati from From the Blue Chair {Week 4 Block 8}
April 2 - Jeni from In Color Order {Week 5 Block 7}
April 9 - Amy from Sukie Don't You Know Who I Am? {Week 6 Block 6}
April 16 - Katy from The Littlest Thistle {Week 7 Block 3}
April 23 - Lee from Freshly Pieced {Week 8 Block 4}

Happy Sewing!!

Sunday, February 26, 2012

new york beauty quilt along


Sew Sweetness
I'm very excited to announce the New York Beauty Quilt Along! This quilt along is all about paper piecing. If you've never done paper piecing before, it might sound a little bit scary, but trust me, you can do it! The quilt along will feature step-by-step photos and instructions for each block by some very talented quilters, to give you the confidence to get off and running!
New York Beauty block from Kati of From the Blue Chair
We will be working with 10 New York Beauty blocks, and you can get a preview of the blocks here. Each block instruction makes one 8" x 8" block (as shown in the graphics); you can either assemble 4 of the same block to make one large 15.5" x 15.5" block (as pictured above), or you can mix and match to make something beautiful! Here are the approximate fabric requirements if you are planning on making all ten 8" x 8" blocks: - 10 fat eighths for main fabrics (or 5 fat quarters or scrap fabric) - 1-1/2 yards background fabric
Sew Sweetness
And here is the schedule for the block tutorials:
March 5 - Kim from My Go-Go Life {Block 0}
March 12 - Sara from Sew Sweetness {Block 5}
March 19 - Megan from Canoe Ridge Creations (Block 1}
March 26 - Kati from From the Blue Chair {Block 8}
April 2 - Jeni from In Color Order {Block 7}
April 9 - Amy from Sukie Don't You Know Who I Am? {Block 6}
April 16 - Katy from The Littlest Thistle {Block 3}
April 23 - Lee from Freshly Pieced {Block 4}
April 30 - Amy from amylouwho {Block 2}
May 7 - Lindsay from Lindsay Sews {Block 9}

 If you are thinking about participating, please join the Flickr Group!We'll be sharing fabric choices and help along the way!

(This announcement brought to you by Sara of Sew Sweetness!)