I've decided to start sharing some methods or tips here on my blog. I hesitate to call them tutorials, because that makes me nervous.
So I thought I'd call them {not a tutorial}s, just {the way I do it}.
There are so many talented sewers out there and tons of tutorials, so I don't profess to be the authority on anything, but wanted to share my process.
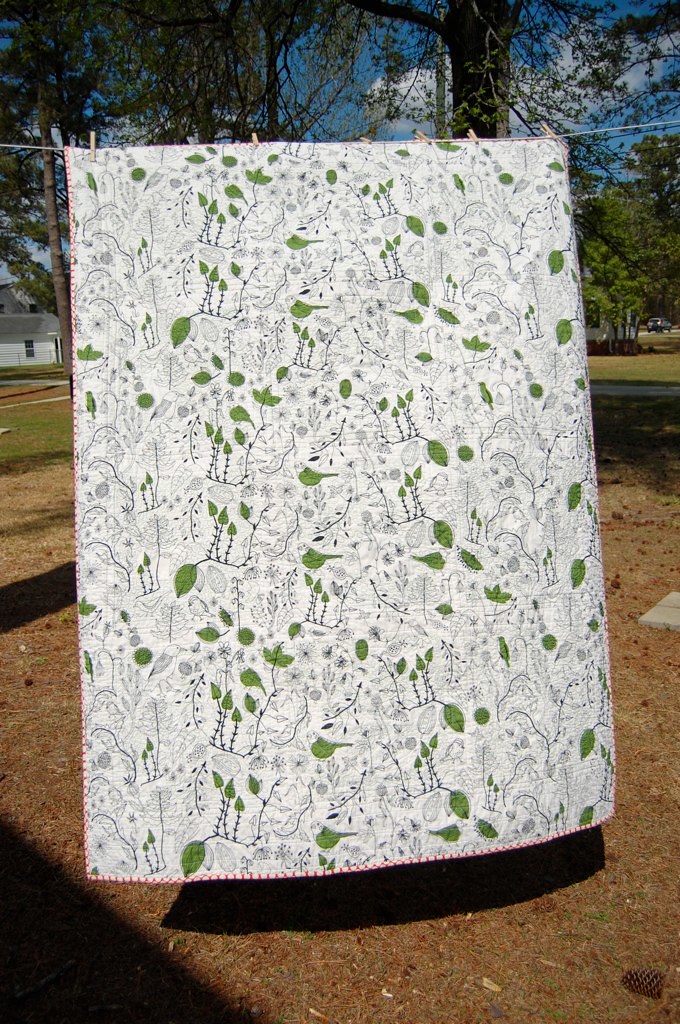
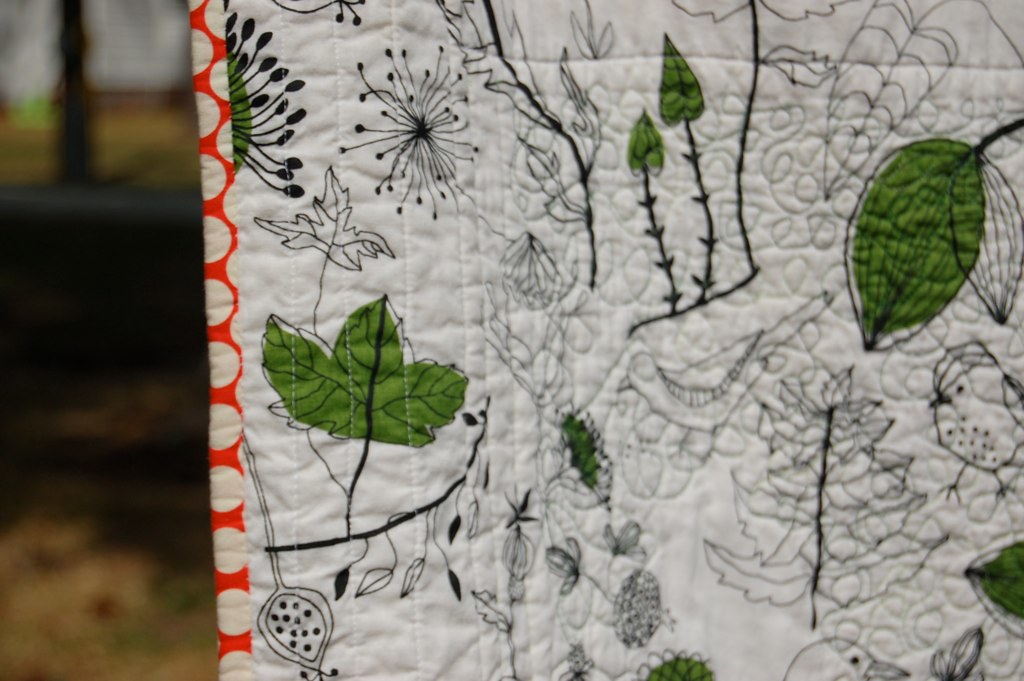
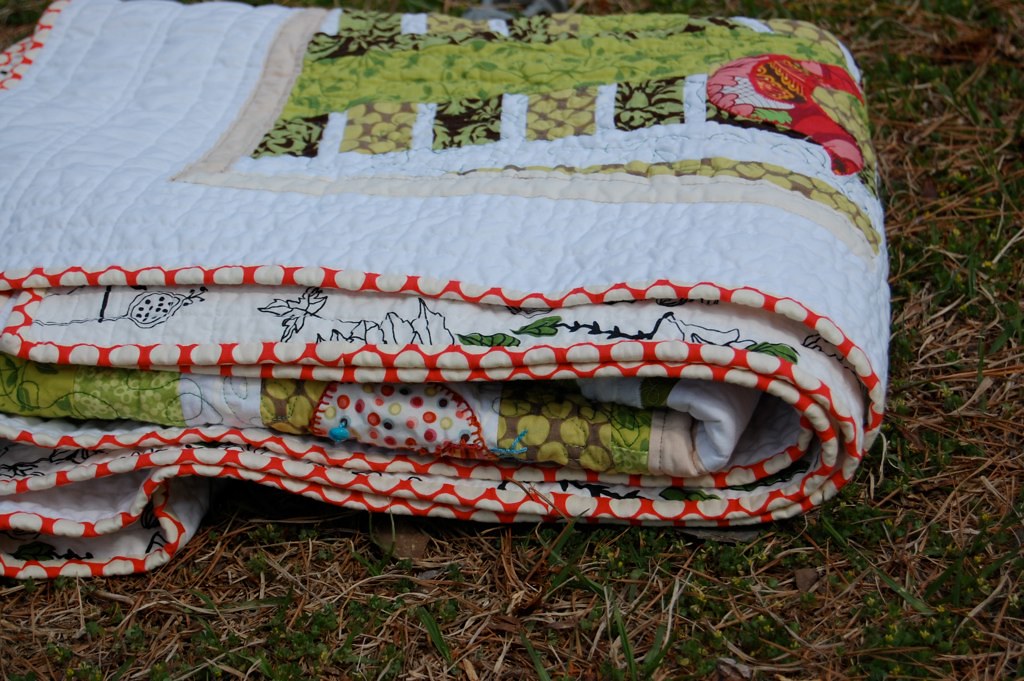
I've talked to a lot of quilters who have never used a basting spray. When I was getting ready to quilt my bird quilt - the first thing I ever quilted on my little machine - I bought a bunch of safety pins to baste it with.
But I'm going to be honest. The thought of pinning that whole thing and then trying to quilt around the pins~well, UGH!! It just seemed a little daunting. I mean, I'm horrible about taking out straight pins!! So I decided to just use a basting spray. And I have to say I LOVE IT!!
I can't give you an honest comparison vs. pin basting but it works for me and gives me a nice clean surface to quilt on without having to worry about running into a pin every 3" or so. So here you go.
Quilt Basting {the way I do it}.
Supplies:
1 Quilt Sandwich
Packing tape
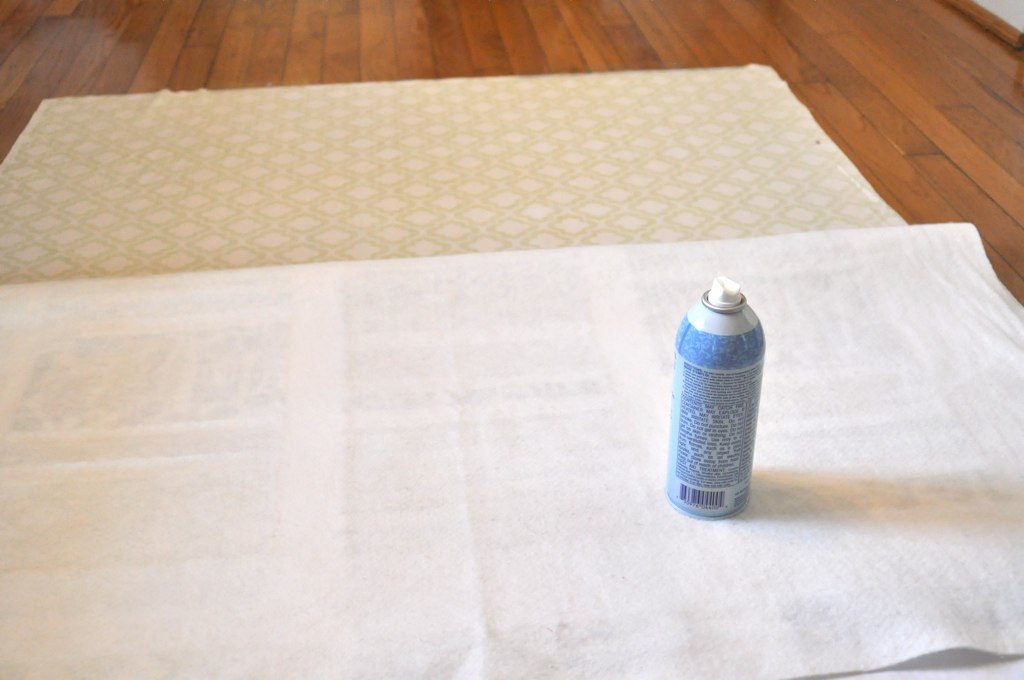
Basting Spray
* a note on basting spray. I just bought a can at Joann's (or Hancock's) using my 40% coupon. I know there are different brands but this is just what was easily available to me.
edited to add: I've gotten some great feedback already! I do usually open my windows when I spray. And I also don't use a ton of the spray because a little goes a long way and the fumes ARE stinky!
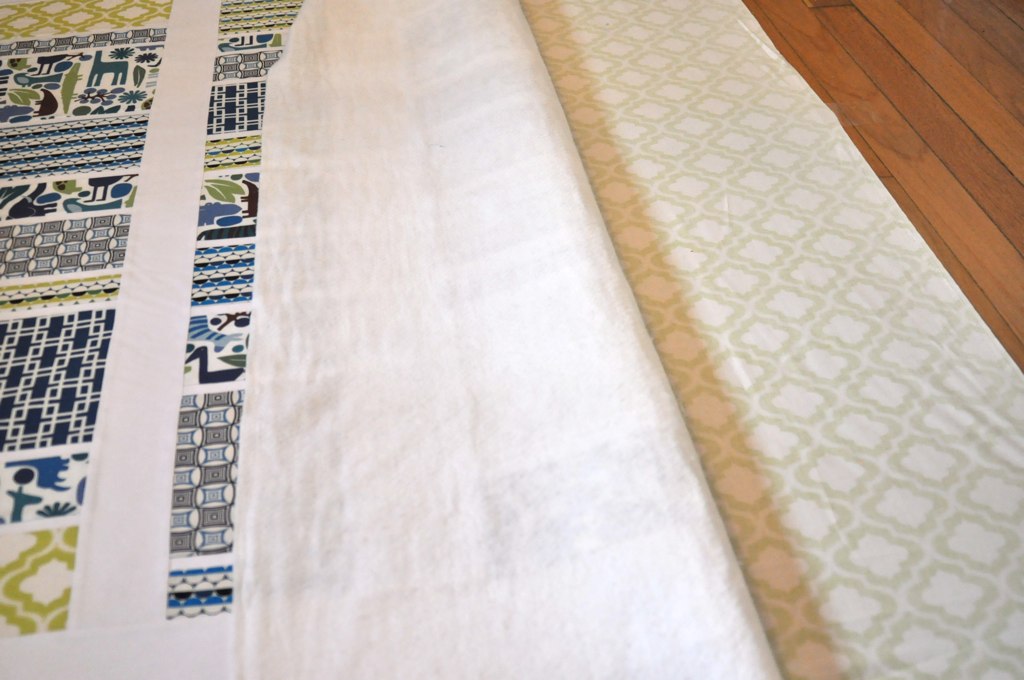
Step 1. Tape the quilt back wrong side up to the floor.
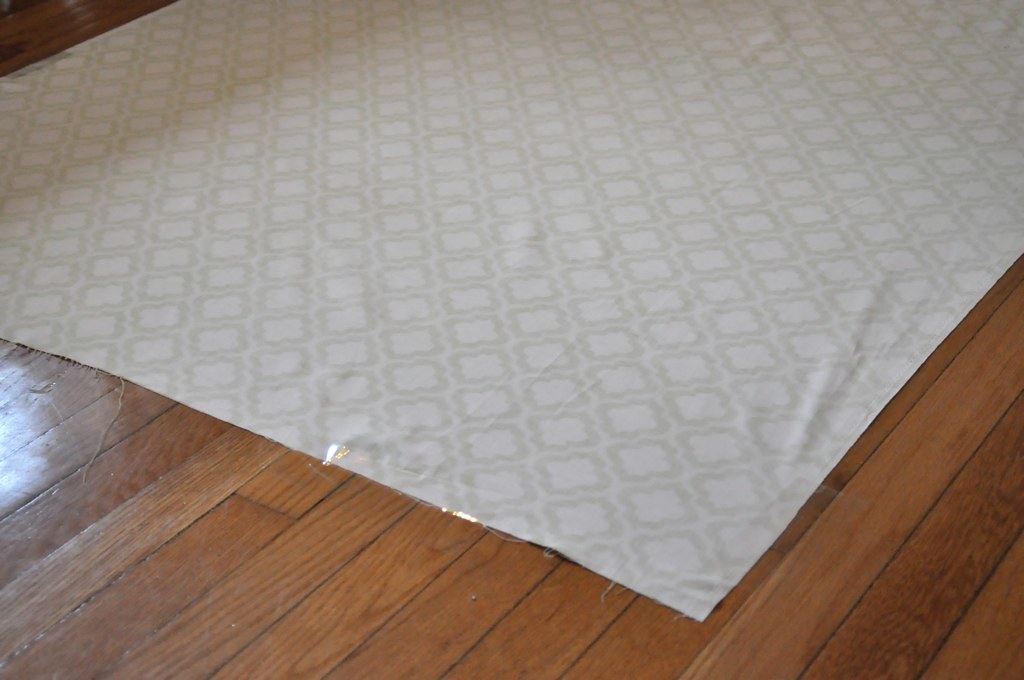
Depending on the size of the quilt I use several large pieces of packing tape to secure each corner and several spots on each side. Work from one side and smooth the fabric out as you tape.
Step 2. Lay and smooth out a similar sized piece of batting on top of the back.
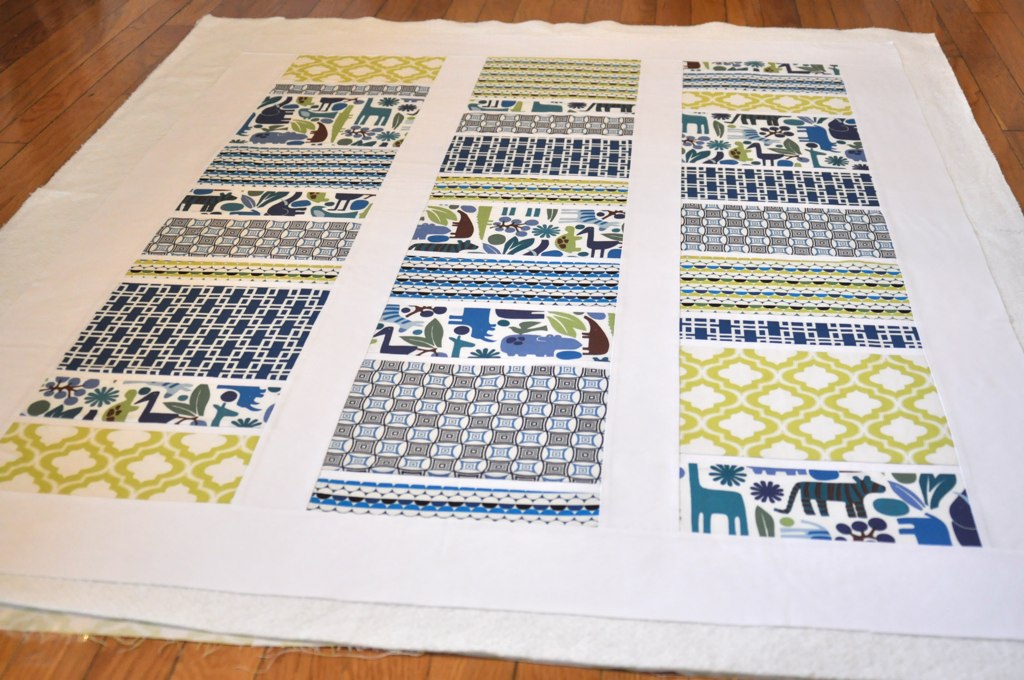
Step 3. Center quilt top to complete the quilt sandwich.
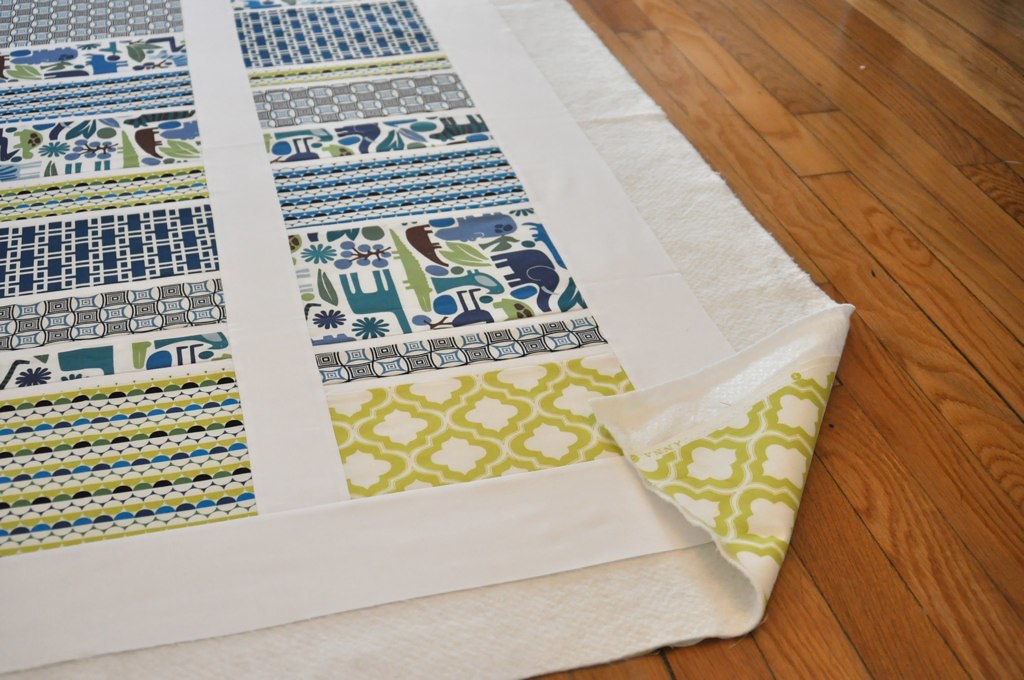
Make sure everything is smoothed out. And that you have backing and batting under every part of your quilt top.
Step 4a. Fold back one side of the quilt top only. Lightly spray the wrong side of the quilt top and exposed batting with the spray in a back and forth motion.
4b. Unfold that section back over the batting, smoothing it as you go.
4c. Repeat as necessary to baste the whole quilt top to the batting.
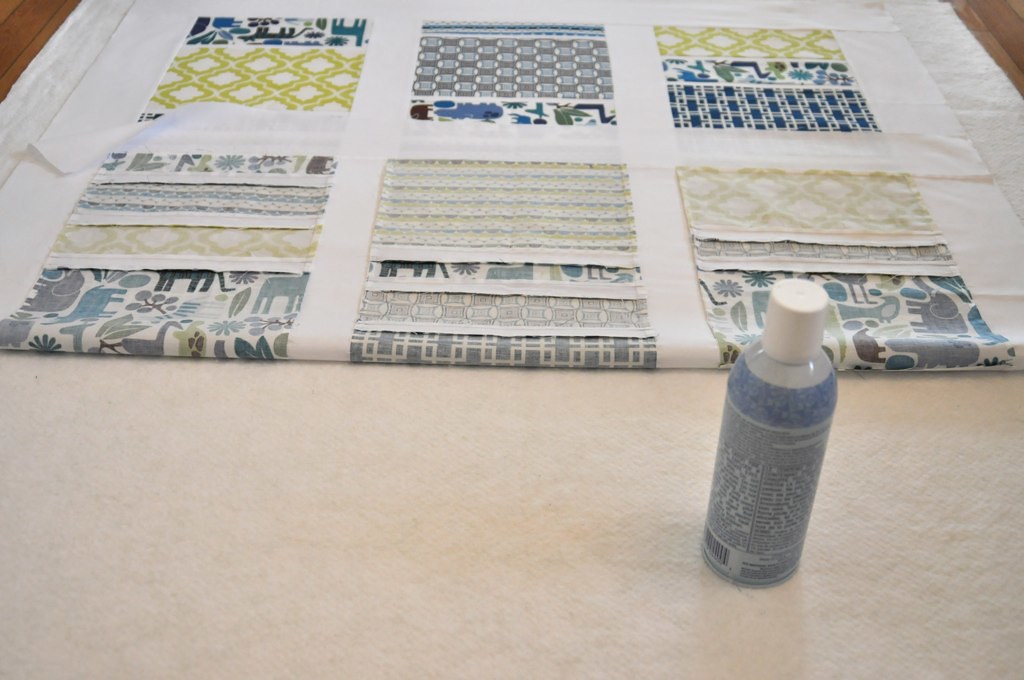
You may get some overspray on the floor but it clean ups easily.
Step 5. Fold back the batting AND the top and lightly spray batting and backing.
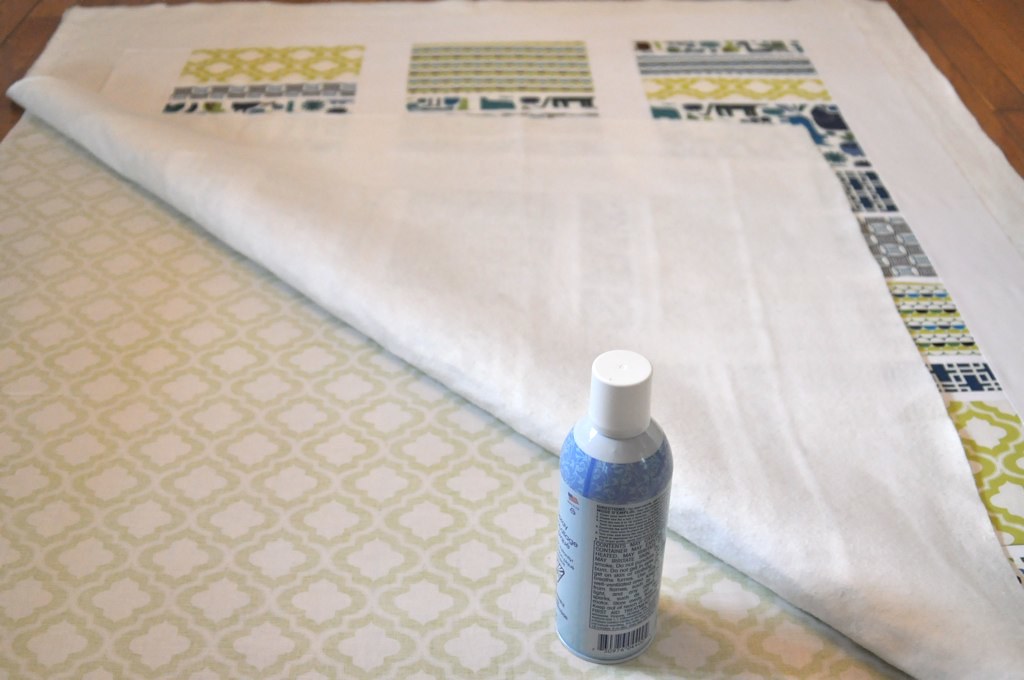
Keep folding back batting and quilt top together until everything is sticking together.
Repeat.
6. Smooth everything out.
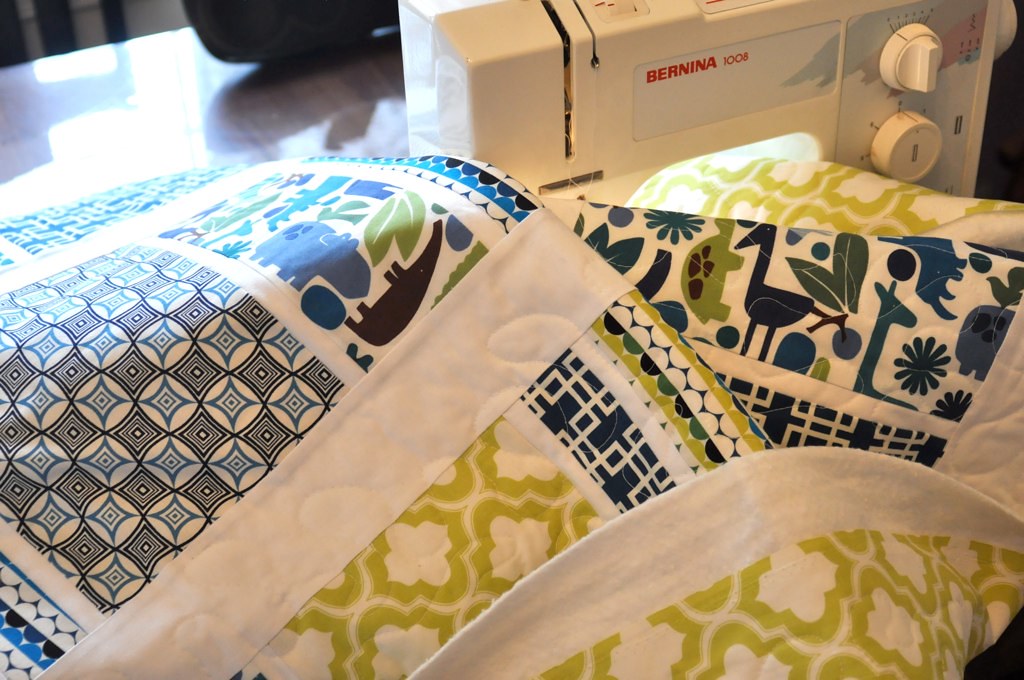
7. Get quilting!!
Have you tried spray basting before? Do you pin? Which do you prefer? Let me know if you try this!
(I'll be blogging more about this quilt soon!)
Showing posts with label quilting. Show all posts
Wednesday, March 14, 2012
Friday, January 6, 2012
sew & tell v3.13 - giant vintage star
Welcome back everyone! I hope everyone had a joyful, restful and happy holidays!

I wanted to share with you a quilt I made for my sister-in-law for Christmas. I decided that I really wanted to sew something for her and asked my Tweeps (twitter friends) if anyone knew of a quick easy quilt I could put together in time for Christmas. Jeni at In Color Order suggested her lovely Vintage Star Quilt Tutorial. It was a match made in heaven for the fabrics I had in mind.
I had the 4 Amy Butler prints (Daisy Chain) for quite some time, but alone, they just weren't doing much for me. Which may be why I had never used them! When paired with some AB Lotus Full Moon Dots in Lime, and 3 Sandi Henderson prints (Henna Garden in Chocolate and Leaf and Garden Gate in Fuschia), I was in LOVE. Seriously.
I was worried that the Kona snow I was using for the background would be too stark, but I actually really like it.
And I think the quilting on those sections really pop. I love a nice wrinkled fresh from the dryer quilt!
The back is a Robert Kaufman Pimatex Basics. I was able to pick it up at my local Hancock Fabrics. Even though they had already closed, I was able to sweet talk my way in to make the quick transaction.
I machine quilted on the binding. I had never tried this before, but I was kind of in crunch time mode. Jeni also has an awesome tutorial for machine binding. It wasn't as bad as I thought it would be, and I wouldn't have finished the quilt in time otherwise! I still enjoy hand stitching the binding, but in a time crunch, I'm totally not going to shy away from this.
This quilt was a first for me in another way. Started and finished within 3 weeks. It's a Christmas miracle!! I'm pretty sure she liked it! Which always makes me happy!
Did you do any gift sewing? What have you got to share with us today? Can't wait to see what you all have been up to!
Please put your (blog)name instead of your project name, it helps us get to know each other better!
I wanted to share with you a quilt I made for my sister-in-law for Christmas. I decided that I really wanted to sew something for her and asked my Tweeps (twitter friends) if anyone knew of a quick easy quilt I could put together in time for Christmas. Jeni at In Color Order suggested her lovely Vintage Star Quilt Tutorial. It was a match made in heaven for the fabrics I had in mind.
I had the 4 Amy Butler prints (Daisy Chain) for quite some time, but alone, they just weren't doing much for me. Which may be why I had never used them! When paired with some AB Lotus Full Moon Dots in Lime, and 3 Sandi Henderson prints (Henna Garden in Chocolate and Leaf and Garden Gate in Fuschia), I was in LOVE. Seriously.
I was worried that the Kona snow I was using for the background would be too stark, but I actually really like it.
And I think the quilting on those sections really pop. I love a nice wrinkled fresh from the dryer quilt!
The back is a Robert Kaufman Pimatex Basics. I was able to pick it up at my local Hancock Fabrics. Even though they had already closed, I was able to sweet talk my way in to make the quick transaction.
I machine quilted on the binding. I had never tried this before, but I was kind of in crunch time mode. Jeni also has an awesome tutorial for machine binding. It wasn't as bad as I thought it would be, and I wouldn't have finished the quilt in time otherwise! I still enjoy hand stitching the binding, but in a time crunch, I'm totally not going to shy away from this.
This quilt was a first for me in another way. Started and finished within 3 weeks. It's a Christmas miracle!! I'm pretty sure she liked it! Which always makes me happy!
Did you do any gift sewing? What have you got to share with us today? Can't wait to see what you all have been up to!
Linky Rules. Please follow along for a fun party!
1. Please write the post for sew & tell - or add a blurb mentioning sew & tell to a post written since the last sew & tell. If you are linking to a post with your own tutorial, please make sure it was a finish from this week and that the completed project is shown first.
2. One linky per person. (please put multiple projects in one post.)
3. Link to your specific post. (See here for permalink instructions - or email me.)
4. Link back here with a link or a button (HTML on my sidebar).
5. Be sure to visit and leave comments on other's posts!Please put your (blog)name instead of your project name, it helps us get to know each other better!
Friday, March 25, 2011
sew & tell - march 2011 - the bird quilt
EDITED TO ADD: I fixed it so the linkies are showing!! I'm so sorry! I'm out of practice and just forgot to check a little box!! And I've been gone all day! Come back and link up! :)
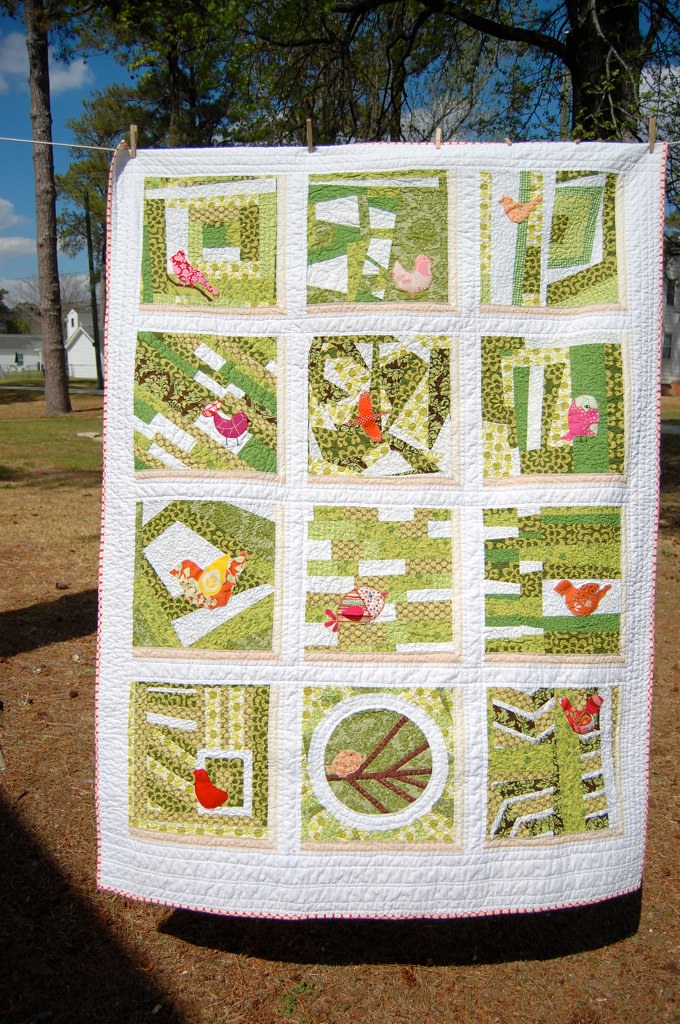
It's finished. FINALLY! And I don't think I'm going to do it justice in this post. I learned SOOOOOOO much doing this quilt.
The biggest thing I learned was not really about quilting so much but about myself. And I've known this somewhat already but it was totally reinforced. I AM NOT A RISK TAKER! If I haven't done something before I procrastinate doing ANYthing because I don't want to mess it up. That's part of the reason this quilt has been TWO years in the making. Really, if you added up the amount of time I spent on it, it's probably only about a really full week, not doing anything else. If you count all the time I spent hemming and hawing over it and thinking about it, it's totally a 2 year quilt!
Some things I did for the first time on this quilt:
a little stippling,
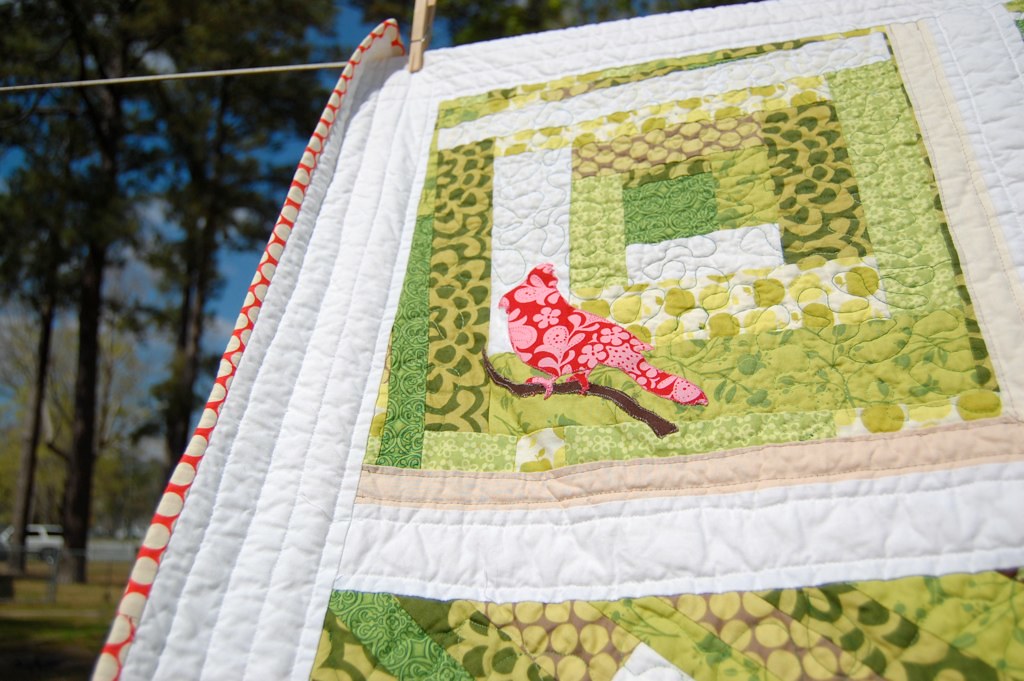
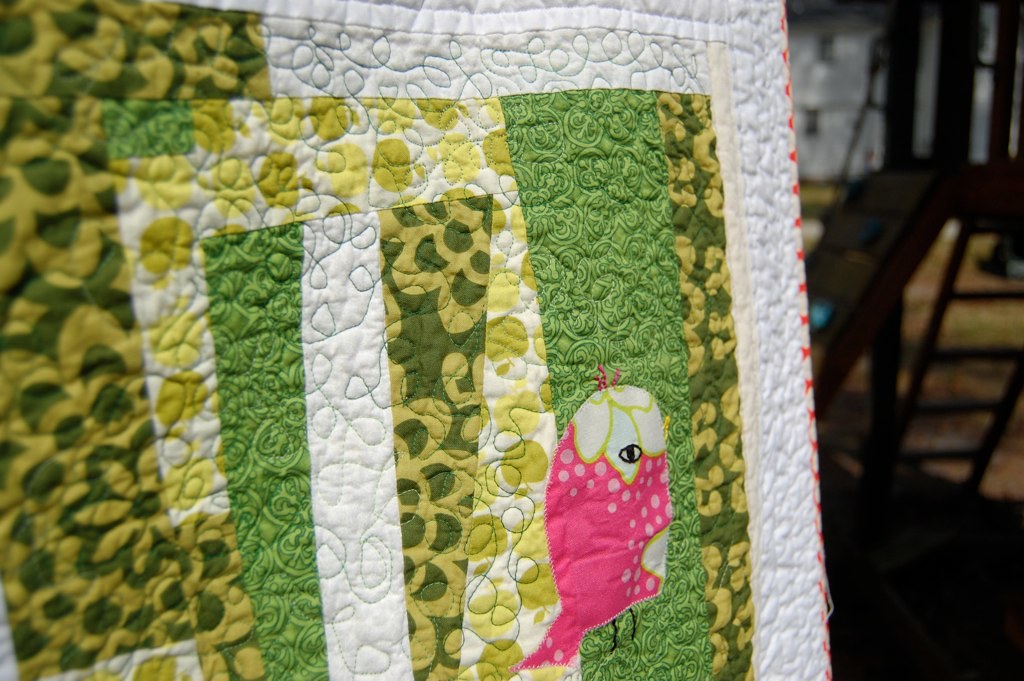
a lot of loop-de-loops, (which I think hides more mistakes)
and I even tried my own pattern of leaves, trying to convey the birds in a tree idea. But this design was trickier and I only did a couple like that.
There are a few things that I would do differently if I had it to do over.
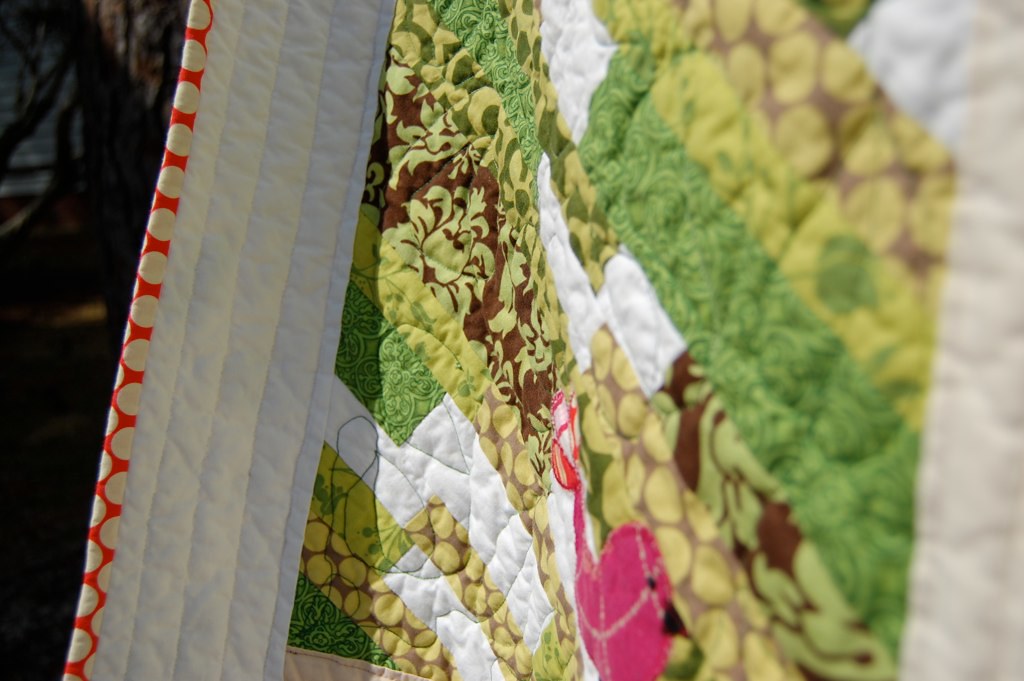
Sometime last summer I took a poll on how I should bind it. I took many of your suggestions and went with the Amy Butler Full Moon Dots in Cherry. And I LOVE it! And I really have learned to love hand-stitching down a binding. And Burt's Bees Shea Hand Repair cream works just as well as beeswax or thread heaven to condition your thread. In case you don't have the other two in the car with you but have some lotion in your purse!
There have been many times during the making of this quilt that I was so sick of thinking about it, sick of looking at it, and sick of quilting it. I told a friend yesterday I was going to stick it in a closet so I didn't have to look at it for a while. But really, Ilike LOVE it. Just not how long it took me to finish it.
And I do love how crinkly it is fresh out of the washer!!
My new goal: start and finish a couple quilts in a few months instead of a few years. But, oh yeah, I have another top I made 2 summers ago. I'm going to get on that.
What are you going to share with us today?
It's finished. FINALLY! And I don't think I'm going to do it justice in this post. I learned SOOOOOOO much doing this quilt.
The biggest thing I learned was not really about quilting so much but about myself. And I've known this somewhat already but it was totally reinforced. I AM NOT A RISK TAKER! If I haven't done something before I procrastinate doing ANYthing because I don't want to mess it up. That's part of the reason this quilt has been TWO years in the making. Really, if you added up the amount of time I spent on it, it's probably only about a really full week, not doing anything else. If you count all the time I spent hemming and hawing over it and thinking about it, it's totally a 2 year quilt!
Some things I did for the first time on this quilt:
- Put together blocks that other people sewed. There was some trimming and fixing to make them all the same size.
- Mitered corners for the window pane effect (that I'm not even really sure works).
- Free-motion quilting on my machine. This is the first quilt I've ever done the whole thing on my machine. (With the exception of a few block's I did at Kim's - who by the way, now has a BLOG!!!)
a little stippling,
a lot of loop-de-loops, (which I think hides more mistakes)
and I even tried my own pattern of leaves, trying to convey the birds in a tree idea. But this design was trickier and I only did a couple like that.
There are a few things that I would do differently if I had it to do over.
- I used a varigated green Gutterman thread. I love the thread, and I think it looks great on the back, but because of all the white in the blocks, some of the dark green REALLY shows my mistakes.
- I would scrap the shadow paned idea, since I don't think it really worked.
Sometime last summer I took a poll on how I should bind it. I took many of your suggestions and went with the Amy Butler Full Moon Dots in Cherry. And I LOVE it! And I really have learned to love hand-stitching down a binding. And Burt's Bees Shea Hand Repair cream works just as well as beeswax or thread heaven to condition your thread. In case you don't have the other two in the car with you but have some lotion in your purse!
There have been many times during the making of this quilt that I was so sick of thinking about it, sick of looking at it, and sick of quilting it. I told a friend yesterday I was going to stick it in a closet so I didn't have to look at it for a while. But really, I
And I do love how crinkly it is fresh out of the washer!!
My new goal: start and finish a couple quilts in a few months instead of a few years. But, oh yeah, I have another top I made 2 summers ago. I'm going to get on that.
What are you going to share with us today?
NEW RULES FOR LINKING UP! Please read carefully. The delete monster will be eating non-compliant links.
1. Please write the post for sew & tell - or add a blurb mentioning sew & tell to a post written since the last sew & tell. If you are linking to a post with your own tutorial, please make sure it was a finish from this week and that the completed project is shown first.
2. One linky per person. (please put multiple projects in one post.)
3. Link to your specific post. (See here for permalink instructions - or email me.)
4. Link back here with a link or a button.
5. Be sure to visit and leave comments on other's posts!
Wednesday, March 3, 2010
design advice - i need help
Remember this quilt top?:
I really want to finish it. Originally I had thought I would put another border on it. At first I was thinking this, with the red dot binding:
But I don't think I have enough of the fabric to make a wide enough border. And I don't think I want another really wide border (should I cut the white border down?)
But I do have enough of this:
But I'm not sure I want the brown in the border (it makes it so dark).
So now I'm wondering if I should forget the dark border and just bind it with one of the greens. Or maybe still the red.
I'm leaning towards the wallflower in green and just bind it, no dark border....
sheesh - do I sound a little indecisive? I just want to make a decision so I can finish it!!
Any opinions? I really appreciate it!!
Thursday, October 1, 2009
finally a block
I had a few battles with this - mostly because I haven't done many of these and I'm the planner type and these are definitely not planner-type blocks. But it's okay. I think I actually like it! I figure I can get one a day done for the next couple weeks and have enough for the top!
I'm pretty sure i need to sash this in white too. For brightness' sake!
Remember sew & tell tomorrow! (I guess I have to get something done since I already showed you the block.....)
I'm pretty sure i need to sash this in white too. For brightness' sake!
Remember sew & tell tomorrow! (I guess I have to get something done since I already showed you the block.....)
Tuesday, August 25, 2009
a very cool opportunity
My sister-in-law told me about this awesome contest going on. She asked me to pass the word along to all my quilting friends. So ladies, here's your chance to have your work displayed at the Textile Museum here in D.C. There's also an actual cash prize!
Hurry! There's just under 3 weeks until the deadline!
The American Quilt 2009 - Enter your IDEA for a quilt square to win prizes and a chance to be displayed at The Textile Museum!!!
edtied to add: There are only 3 entries right now - I think we could show a tour de force from the "little" blogging quilting community!
Subscribe to:
Posts (Atom)