Showing posts with label machine quilting. Show all posts

Sunday, July 10, 2011

teacher gifts

I whipped these dishmats up the night before the last day of school.  I love a quick, easy and unique teacher gift. In another life when I taught school, the handmade heartfelt gifts were always my favorite.  I hoped my daughters PreK teachers would feel the same way. 
Dishmat #2

I reeeeeeeeeeaally wish I'd ordered some more of this Meadowsweet 2.  Sandi Henderson, if you ever read this, I love you for making such amazing fabric.
dishmat #1

And thanks again Kim for the amazing chenille.    If fabric addiction were illegal we'd both be in jail. Kim is my 'supplier'.

This time I put some cotton batting in the middle to give it some heft and absorbency.  Then a little stippling and a super easy rustic serged edge.
all wrapped up!

And you don't really need any wrapping paper for presentation.

Wednesday, March 30, 2011

on a roll! {Spicing up the Kitchen Swap} update

Wow, 3 posts in one week! Are you sick of me yet?

I finished up and sent off my Spicing Up the Kitchen swap package a few weeks ago.  I wanted to wait to blog about it until my partner had received it.  And then I realized that I deleted the pictures of the completed project off my camera before I had actually downloaded them. Whaaaaaa?? I've never done that before and I am kicking myself!

This project was a lot of fun.  I love it so much I cut out a bunch of these so that I can make at least one more, probably 2.  I need to go get some more red polka dots.

When I started I was thinking I would make a cute half apron out of it.  But Barb is about to have her 3rd baby and I remember how I felt about tieing anything around my midsection postpartum.  I thought a table topper would be a better fit. Plus she has the coolest retro red table!

Here's a process pic I took, I got a little fancy free-motion quilting a flower in the center.  I just straight line quilted around the blades and zig zagged the circle in place. 
SUTK - a flower in a flower
Then I stippled around the background and bound it in the red dot.
SUTK - almost finished

For batting I actually used insulbrite so this is heat resistant.  And the perfect size for a 9x13 casserole dish!

Luckily my partner, Quilting Barbie, took some great pictures of the package and the table topper on her table.  Here's one of the pictures:
SUTK Received - Back
The apple and pear fabric was a theme in her inspiration mosaic, I was so happy that I have it in my stash!  It's so cute on the back!

You'll have to go over to her post to see the rest.  And go to this post to see the dresden she made for the doll quilt swap!

This swap was so much fun and I hope to have it together enough to do another one soon!

Friday, March 25, 2011

sew & tell - march 2011 - the bird quilt

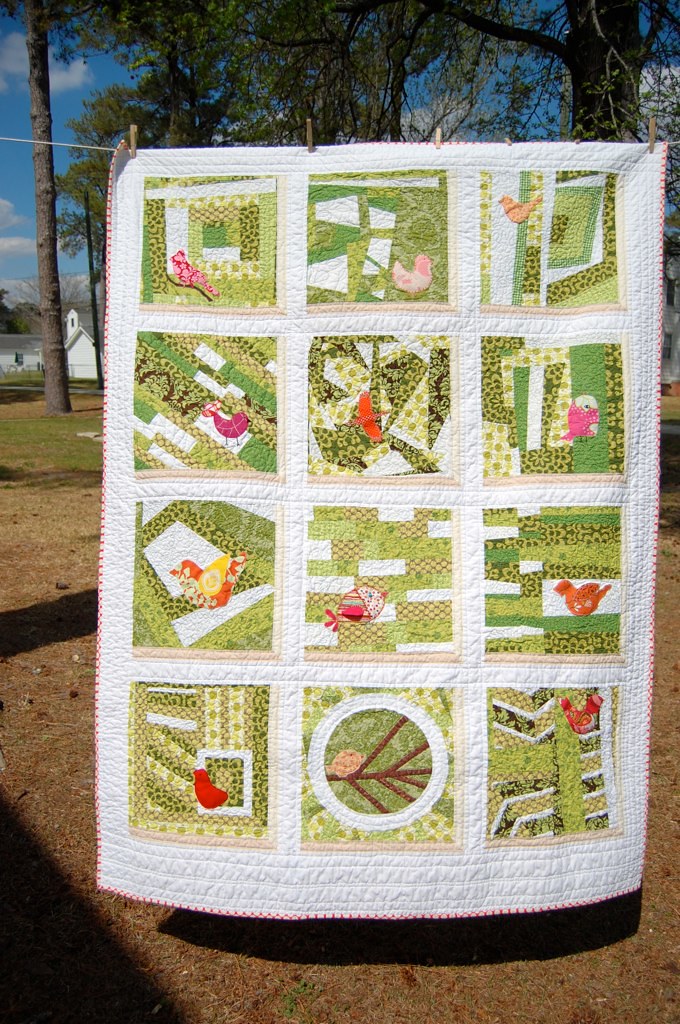
EDITED TO ADD: I fixed it so the linkies are showing!! I'm so sorry!  I'm out of practice and just forgot to check a little box!! And I've been gone all day! Come back and link up!  :)
It's finished.  FINALLY!  And I don't think I'm going to do it justice in this post.  I learned SOOOOOOO much doing this quilt.

The biggest thing I learned was not really about quilting so much but about myself.  And I've known this somewhat already but it was totally reinforced.  I AM NOT A RISK TAKER!  If I haven't done something before I procrastinate doing ANYthing because I don't want to mess it up.  That's part of the reason this quilt has been TWO years in the making.  Really, if you added up the amount of time I spent on it, it's probably only about a really full week, not doing anything else.  If you count all the time I spent hemming and hawing over it and thinking about it, it's totally a 2 year quilt!
a notion or two inaugural quilt


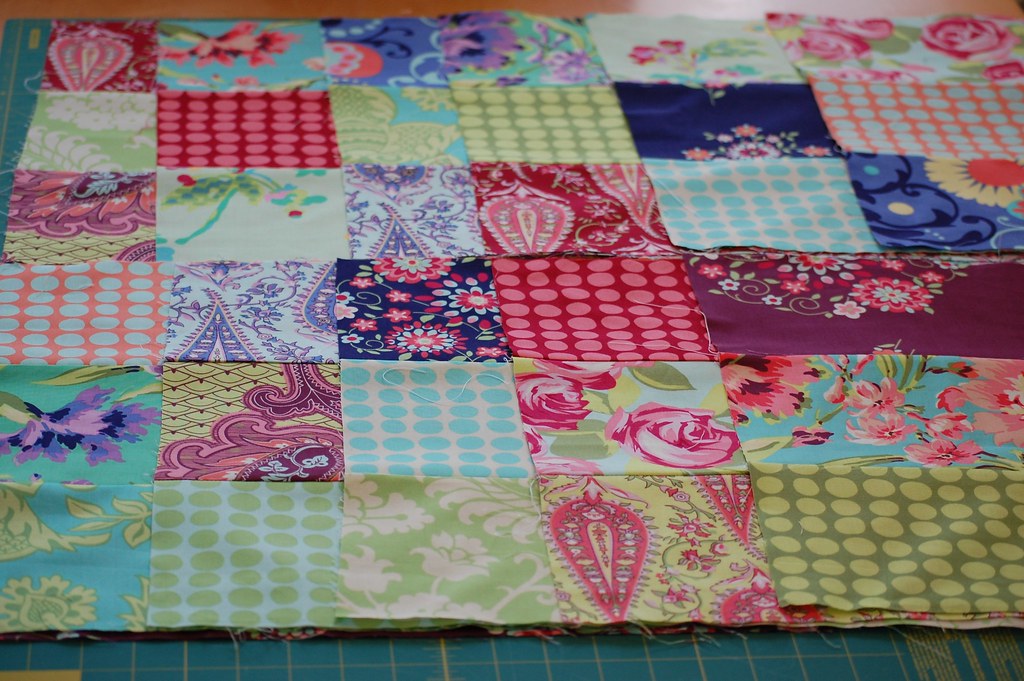
Some things I did for the first time on this quilt:
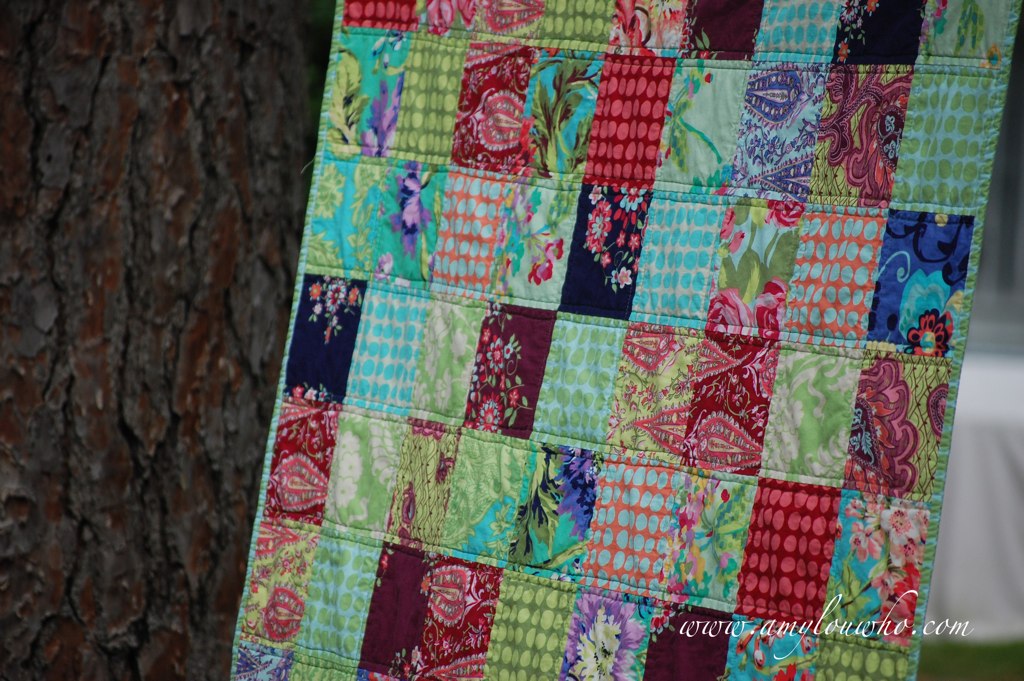
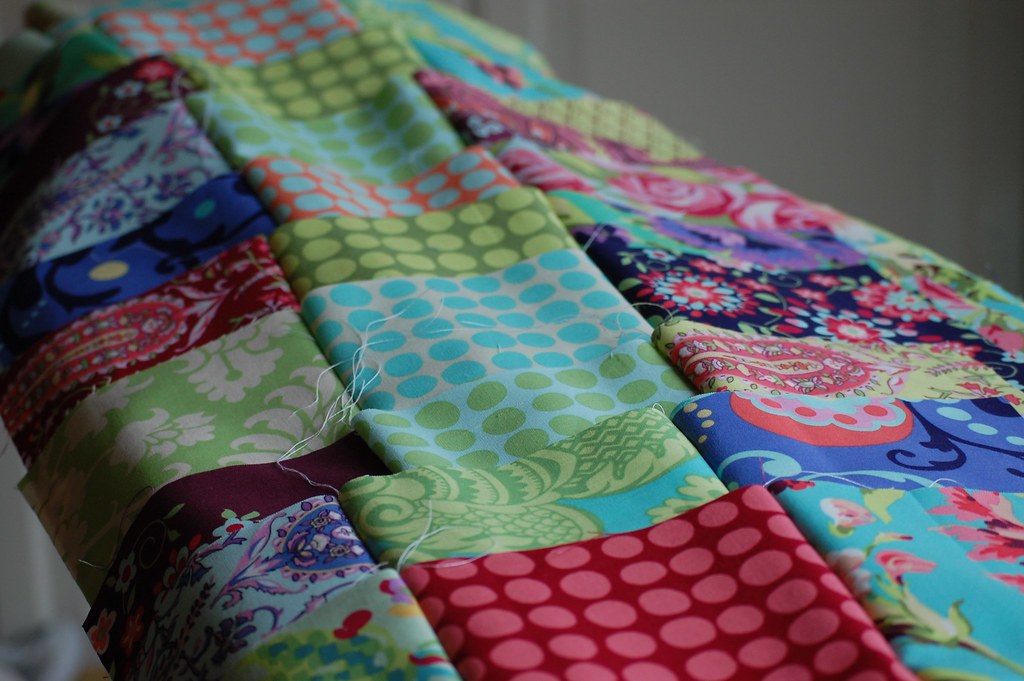
  • Put together blocks that other people sewed.  There was some trimming and fixing to make them all the same size.
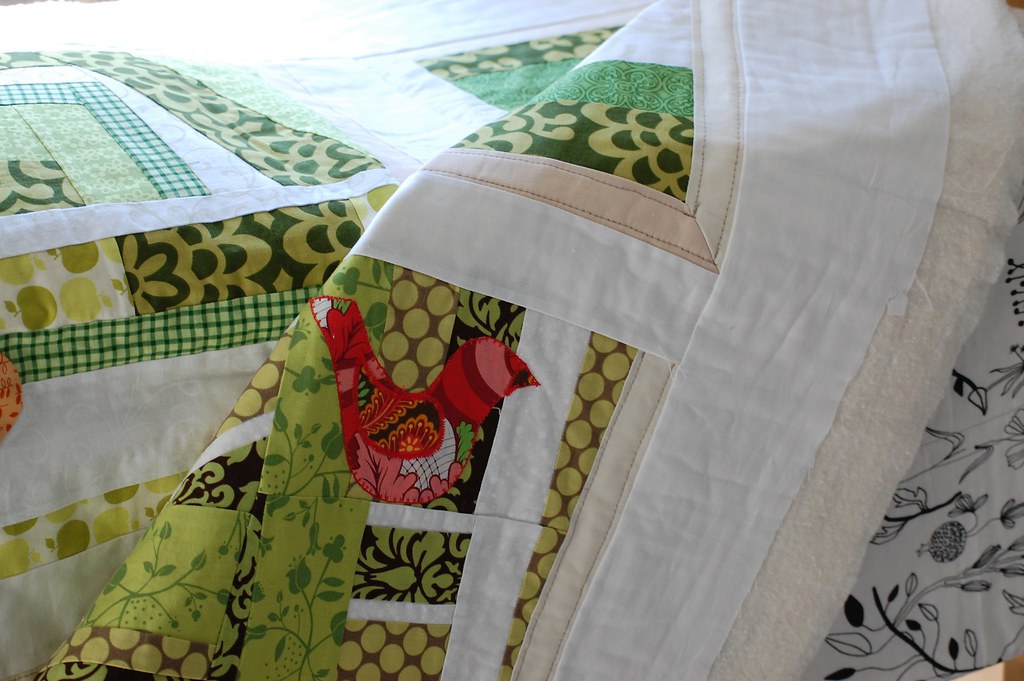
  • Mitered corners for the window pane effect (that I'm not even really sure works).
  • Free-motion quilting on my machine.  This is the first quilt I've ever done the whole thing on my machine.  (With the exception of a few block's I did at Kim's - who by the way, now has a BLOG!!!)
So, on the FMQ I tried a few different things.
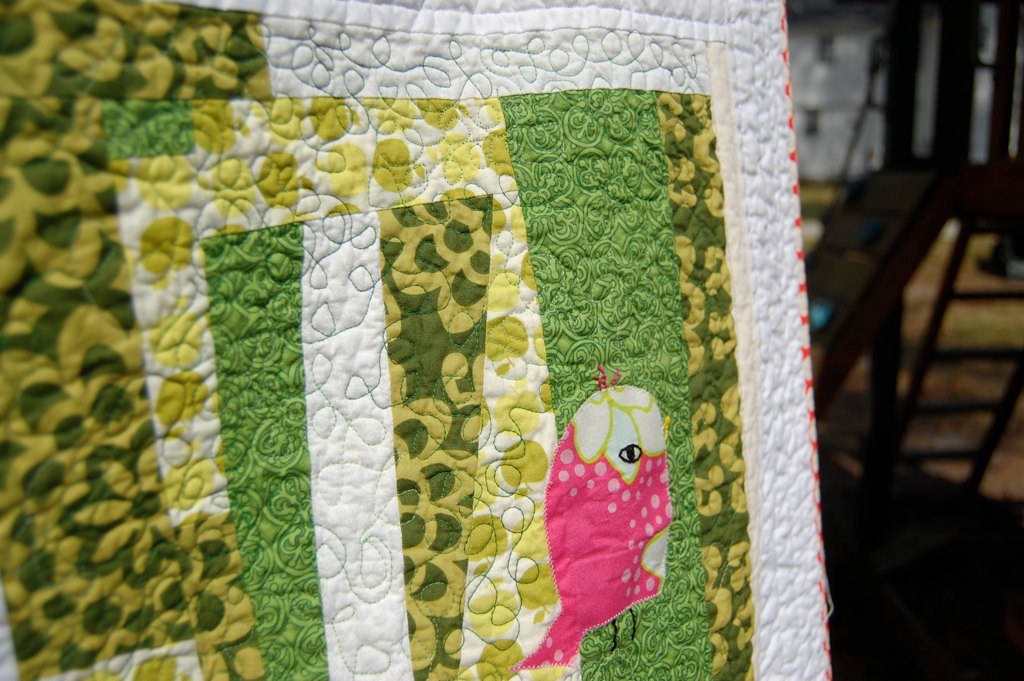
a little stippling,
Some stippling

a lot of loop-de-loops,  (which I think hides more mistakes)
Loop-de-loop quilting

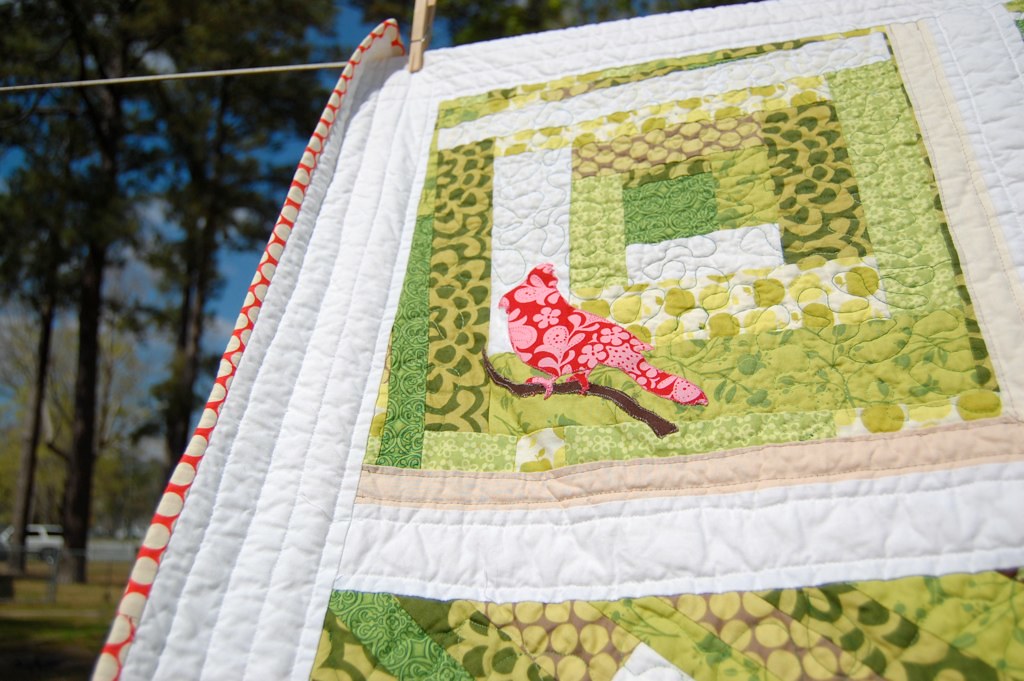
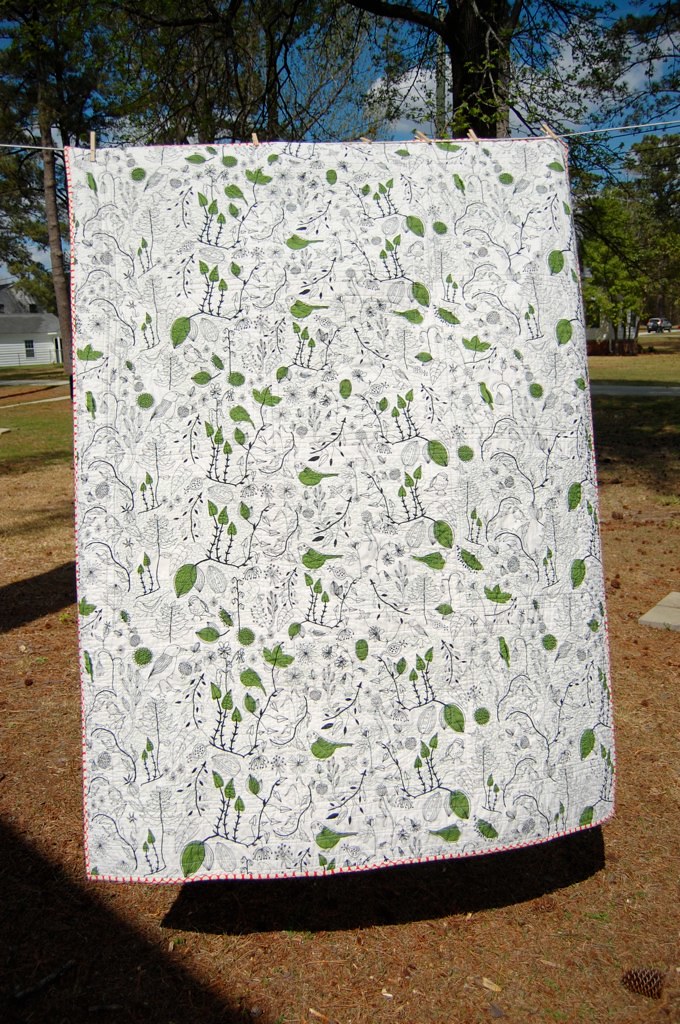
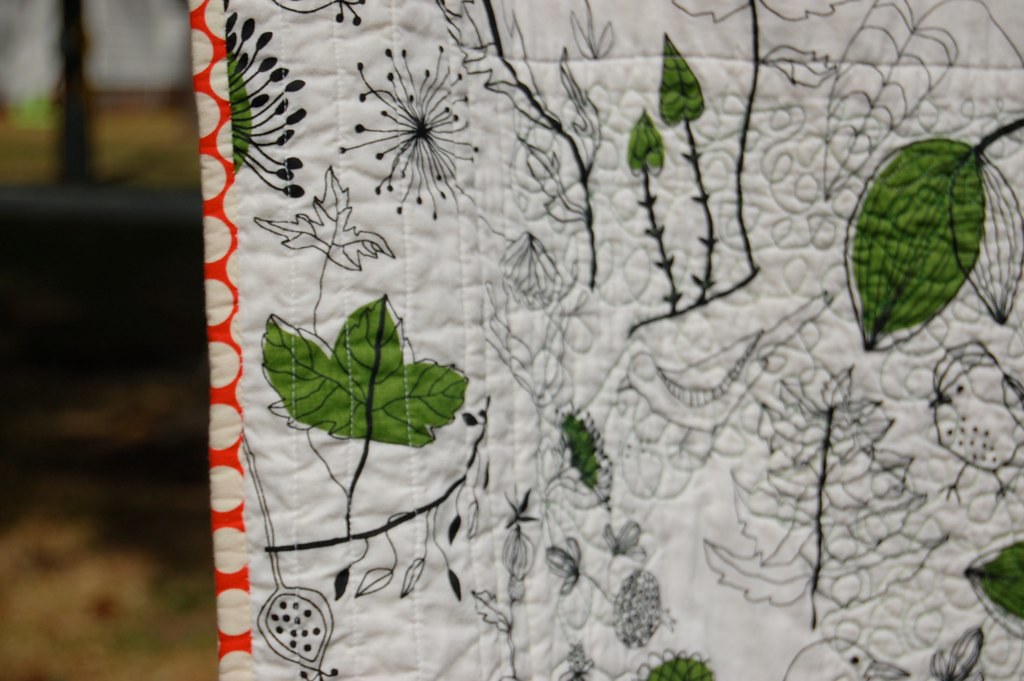
and I even tried my own pattern of leaves, trying to convey the birds in a tree idea.  But this design was trickier and I only did a couple like that.
Leaf quilting

There are a few things that I would do differently if I had it to do over.
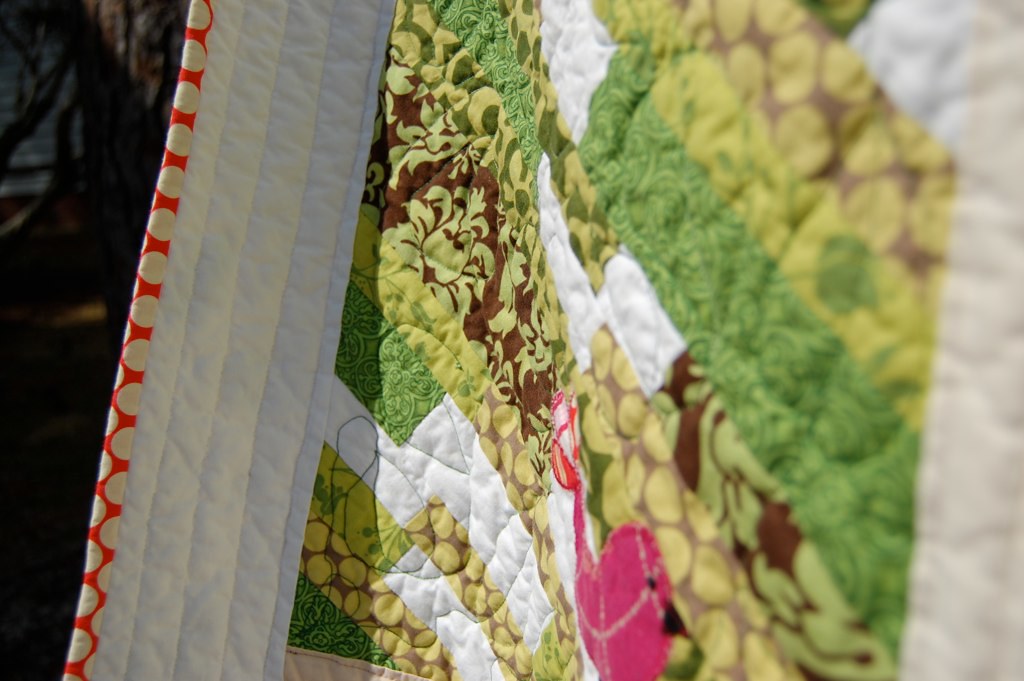
  • I used a varigated green Gutterman thread.  I love the thread, and I think it looks great on the back, but because of all the white in the blocks, some of the dark green REALLY shows my mistakes.
  • I would scrap the shadow paned idea, since I don't think it really worked.
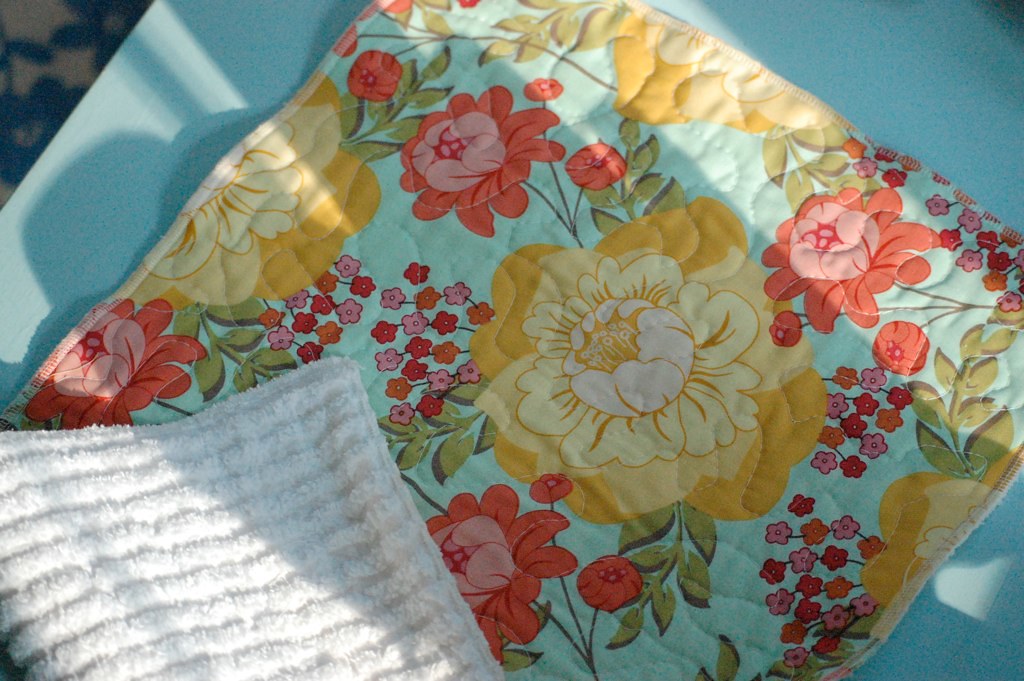
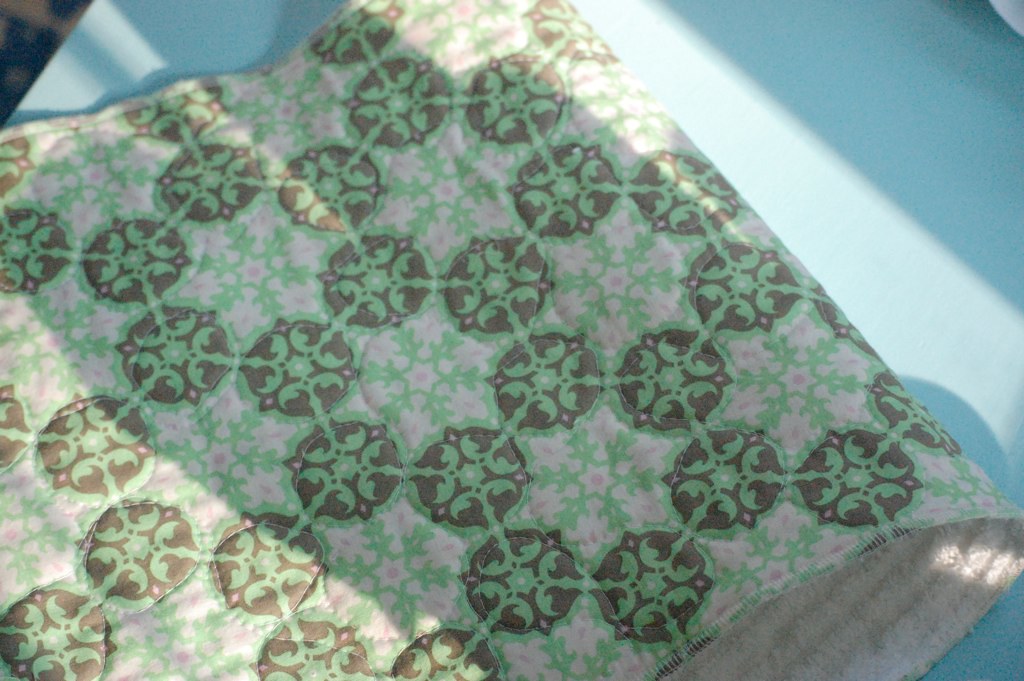
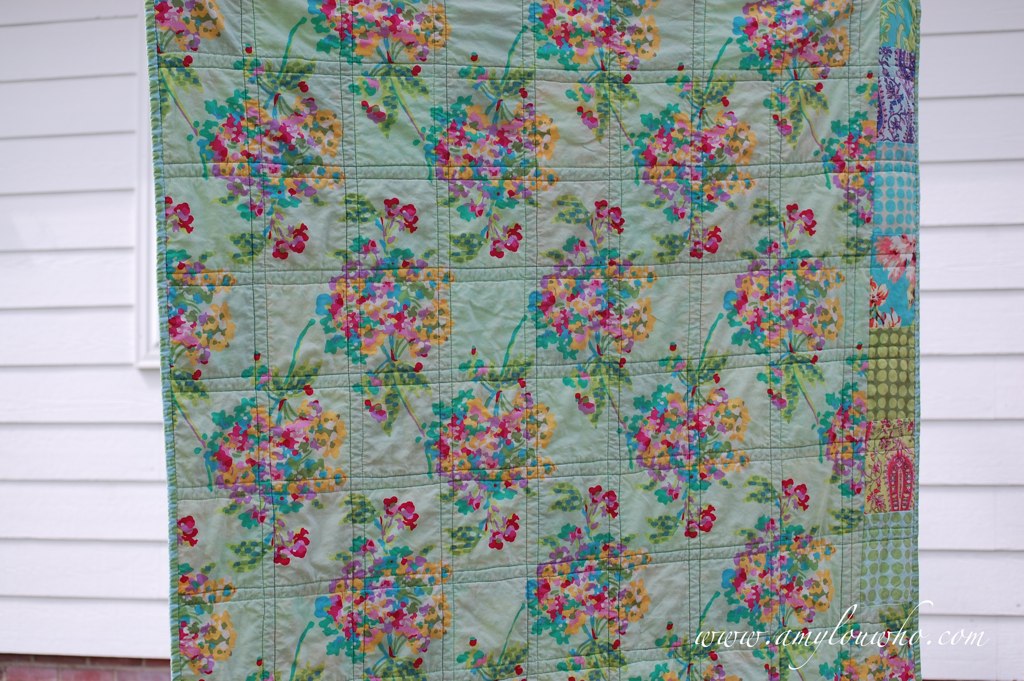
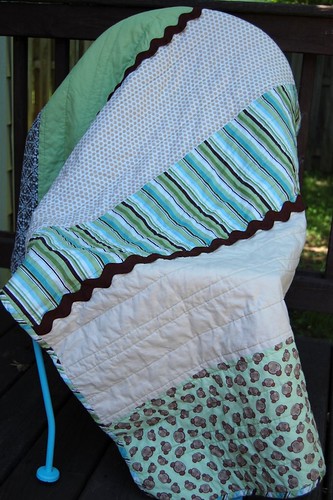
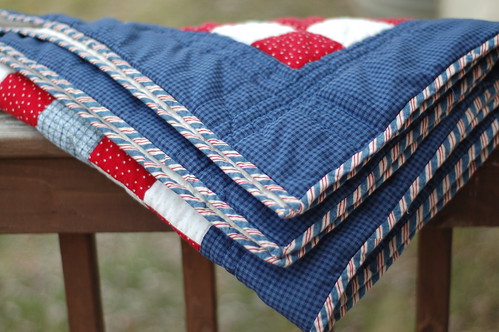
I do love this fabric on the back.  It's from IKEA.  I originally had a large brown bird print and bought the green for a friend.  But I HAD to go back and get this for the back because of the green, it was just too perfect.  Next time I'm near an IKEA, I'm stocking up.
The back

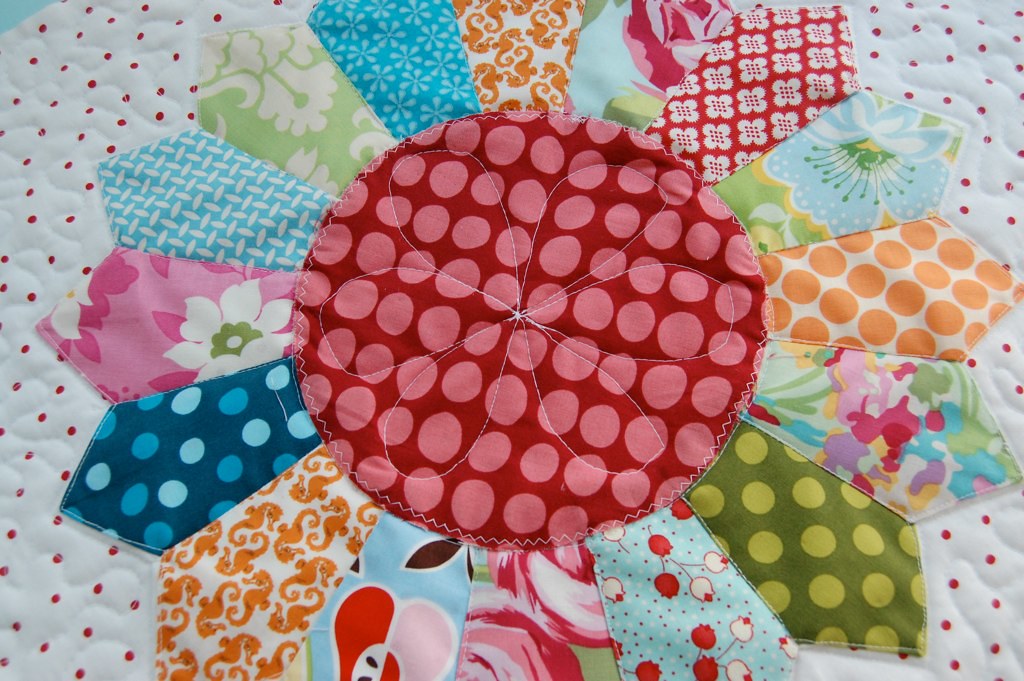
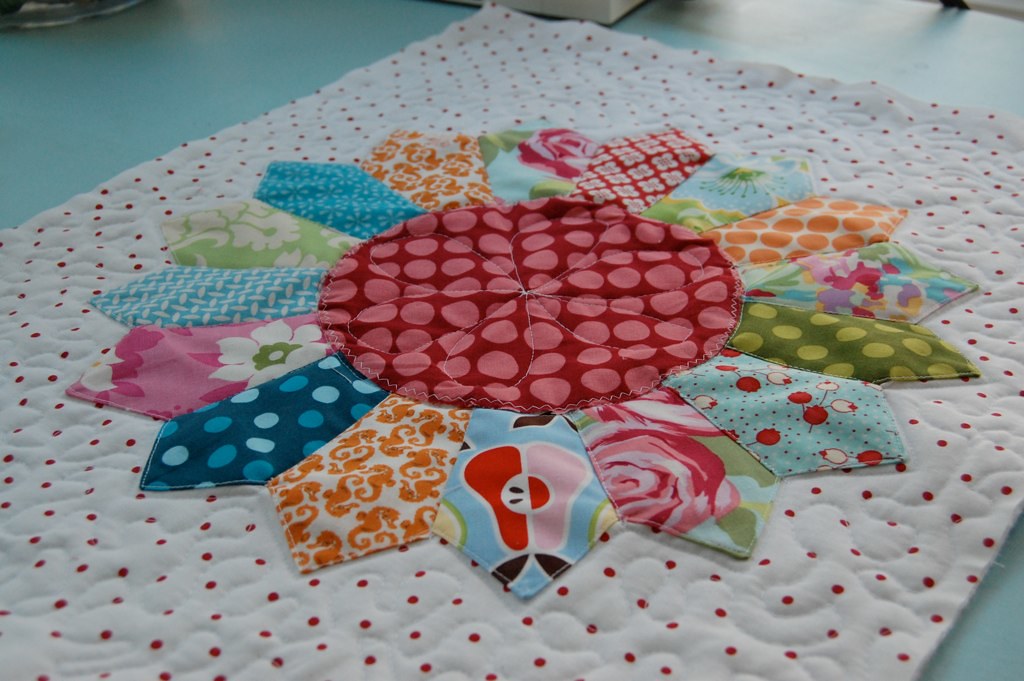
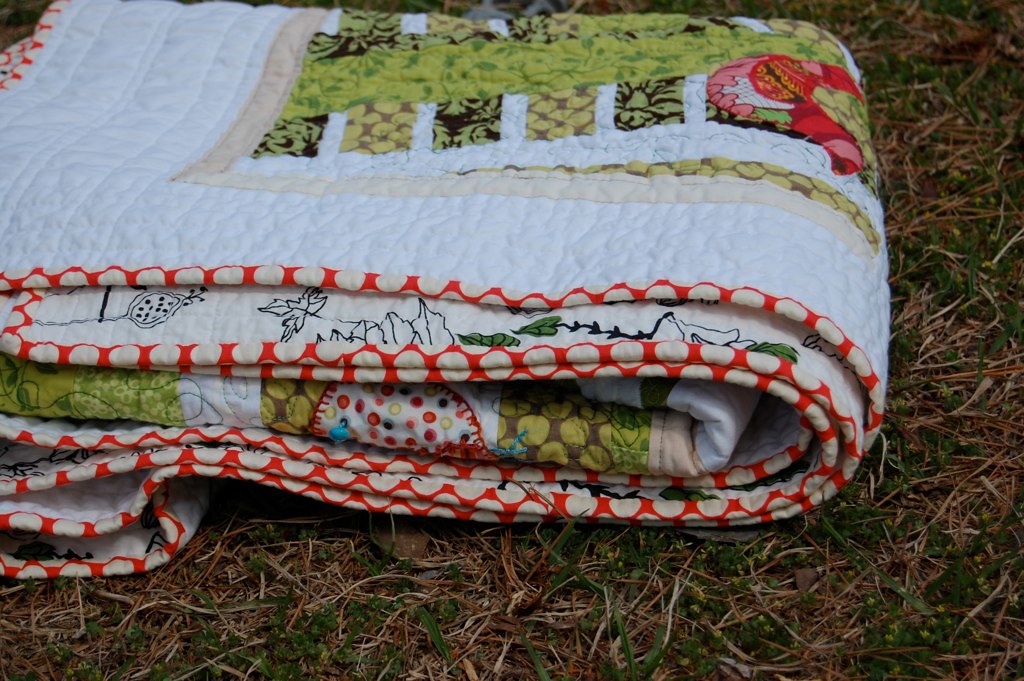
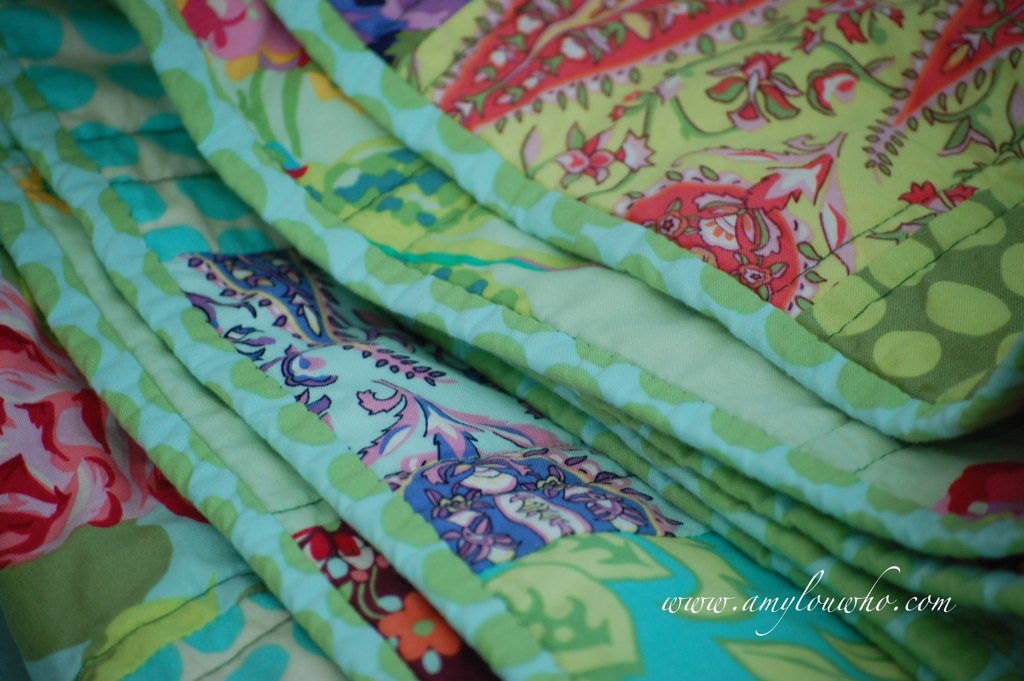
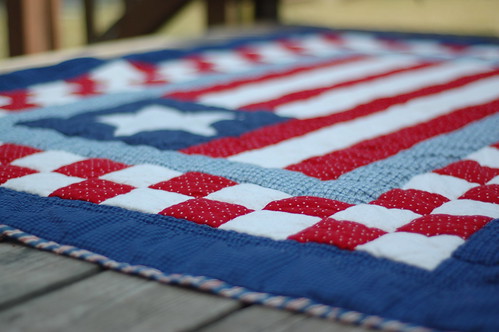
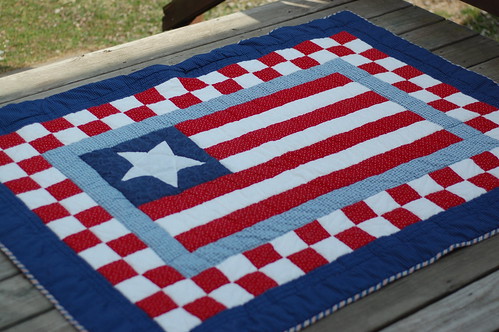
Sometime last summer I took a poll on how I should bind it.  I took many of your suggestions and went with the Amy Butler Full Moon Dots in Cherry.  And I LOVE it!  And I really have learned to love hand-stitching down a binding.  And Burt's Bees Shea Hand Repair cream works just as well as beeswax or thread heaven to condition your thread.  In case you don't have the other two in the car with you but have some lotion in your purse!
Full moon binding
There have been many times during the making of this quilt that I was so sick of thinking about it, sick of looking at it, and sick of quilting it. I told a friend yesterday I was going to stick it in a closet so I didn't have to look at it for a while. But really, I like LOVE it. Just not how long it took me to finish it.
Love a folded quilt pic.
And I do love how crinkly it is fresh out of the washer!!

My new goal: start and finish a couple quilts in a few months instead of a few years. But, oh yeah, I have another top I made 2 summers ago. I'm going to get on that.

What are you going to share with us today?
NEW RULES FOR LINKING UP!  Please read carefully.  The delete monster will be eating non-compliant links.
1. Please write the post for sew & tell - or add a blurb mentioning sew & tell to a post written since the last sew & tell.  If you are linking to a post with your own tutorial, please make sure it was a finish from this week and that the completed project is shown first.
2. One linky per person. (please put multiple projects in one post.)
3. Link to your specific post.  (See here for permalink instructions - or email me.)
4. Link back here with a link or a button.
5. Be sure to visit and leave comments on other's posts!


Friday, August 20, 2010

sew & tell - all you need is LOVE

**I've had to delete some links today :(. Check with the requirements for linking on that tab up there!  Thanks!!**

Amy Butler LOVE that is.

Speaking of love.  Do you see that little button with those cute faces on it.  Over there? On the right? At the top?  That is my sister-in-law's sister and husband, Rachel and Ryan.  They are wonderful people hoping to start their family.  Most adoption placements are found word of mouth, so keep them in mind if you hear anything.  You can read about their daily life on their blog here. Or click on the button to go to their adoption profile page.

I did finally finish the quilt, and washed it, and hung it up to photograph!  I love it! No pun intended.
I loved the look I've seen on simple square patchwork quilts where the quilting is done in straight lines on either side of the seams.
 It gives a great window pane look.  I used a varigated green Gutermann thread with a walking foot on my little machine.  I probably could have gone with just a light green, but in the end it doesn't really matter.
What is surprising to me is how I obsess over every little stitch and think it's not straight enough or hidden enough or something-enough, and when you step away - you don't really see any of it.  Sewing is so forgiving.
I prefer to hand stitch my bindings down.  I'm getting better and faster and I really love the way it looks.
I really do love it.  My baby looks so sweet sleeping under it.  I'll get pictures of it on the bed when I have the other projects finished...


ARE YOU READY TO HAVE SOME FUN???
The generous folks at Amy Butler's studio sent me a nice stack of patterns to giveaway!  I am giving one away today!  You get one entry for linking up (follow the rules!  Please only finishes from this week!) and one for leaving a comment - tell me what your favorite Amy Butler fabric/pattern/product is and tell me you love my quilt.  So if you link up AND leave a comment you get 2 entries!

The winner will receive this awesome pattern!
Heck, I'll throw in some scraps big enough to make one with too!

As always the linky will expire tomorrow, but comments may be left until Tuesday morning - 24 August!  A winner will be drawn later that day!


And now the challenge!
On September 24, 2010 we will have our first ever Amy Butler exclusive Sew & Tell!  There will be more patterns, fabric, and handmade items to giveaway and you will earn entries similar to today!  Along with Amy's studio, Fabricworm and the Material Girls Quilt are sponsoring the event by donating the prizes!

Get out your Amy Butler patterns and fabrics - only linkies featuring her fabric or patterns for projects completed in the next month will be accepted that day!  It will be loads of fun!  I have lots of her fabric tucked away for different projects.  I'm hoping to get one finished each week until then!

Let's have fun with this!  I'm so excited! Can you tell?!  I've only used 100 exclamation points this post.


What sewing project did you finish this week?

Please refer to the sew & tell page   if you have any questions or wonder why your link may have been  deleted.
1. Link to your specific  post  about a sewing related finish you had THIS week.
2. Please mention sew   & tell in your post and link back to this  post (link or button) so  everyone can join in.
3.  Pat each other on the backs in the comments!

Wednesday, March 31, 2010

some quilting updates - aka, fatal design error

I finally got the backing fabric for my bird quilt.  And thread to quilt it.  I decided I wanted to quilt this myself.  It can't be that hard, right?

Well, straight lines are harder than they look.  Luckily, my mom sent me the plexiglass table the fits my machine arm so I should have better maneuvering of the quilt now.  I think I might have to take some of these out, but that's okay.

I also spray basted it and I LOVE IT!  I've never really safety pinned a quilt (whatever, I've never quilted really quilted a quilt on this machine), but I can imagine not really liking it.  It was bad enough crawling around on the floor with this enormous belly to get the fabric smoothed out.  I'm excited to keep going on this and see how it turns out.

*****
I also sewed my strips together for the baby's quilt.  And I thought I was being clever with my strips.  Do you see my fatal error?
I made sure in selecting my sets of 3 that each set had a dot in it (except for 2).  Then I smugly thought it would be great to have all the dots in the middle.

Oooooops.  When I layed them out like this, I realized that meant I would have stripes of polka dots running down my quilt.  Not exactly the scrappy unplanned image I had in mind.

Then I realized I could just take a strip off one end and sew it to the other side. This moved the dots  from the middle to an end.  Does that make sense?  I did this for half of my strip sets.  Crisis averted.

Then when I layed it out to get an idea how it's going to look, I saw this:

Much better.  Don't you think?

Sunday, June 14, 2009

a quilt for baby grant

My good friend just had another baby boy. I was excited to try something new in terms of a baby quilt. Now that I know how to properly use my walking foot and machine quilt in a straight line.
And I wanted to get my hands on some JUMBO ric rac! I was excited to find out she was decorating his room in green and brown - with monkeys!!

And I can't really help myself when it comes to stripey bindings!! If at all possible, it must be done!


I feel like doing a tutorial - is anyone interested in one for this quilt? It's super simple! And I did learn a few things. Like:
  • Put the ric rac on right before you sew the binding on, after you have quilted, otherwise the ends fray so much they may not fit into the binding. I guess you could just use fray check on them too., but that would require some foresight. Which I seem to be lacking lately.
  • Disappearing ink markers are great for marking quilt lines - but do it right before you sew, or you they may dissappear!
  • If you think you have used too many pins to baste, you haven't. ADD MORE.
*****
Thanks for the nice comments on my photos and entering them into the photography show. Bad news is, they decided they had too many entries and by the time we got our forms in they had stopped accepting them. Oh well, one less thing to worry about! I'll try again next year.

*****
I'm really excited about my quilt along quilt - but I'm resisting the urge to post the photo of the blocks laid out. I really want to show it once the top is all sewn up! It's cute. I promise.

*****
I am really excited about an etsy order I made. Amy is a friend of mine and I'll tell you more about it all when it comes. So stay tuned! There may just be something in it for you!

Wednesday, March 11, 2009

it's about time


I mentioned this little unfinished project a few posts back. Actually, it's been almost a month. I finally finished up the binding yesterday and got it nice and crinkly in the washer. There were a few frustrations in working on it, but, in the end, I'm pretty happy with it, considering it's the first quilt I've ever designed and pieced, quilted, and bound all by myself (with a few tutorials from my mom!). That being said, if I were to make a quilt for my friend for her birthday this year - it would look nothing like this. Even if her birthday is on the 4th of July.


Since this was the first thing I have quilted with a walking foot I wasn't ever really sure I was doing it right, because it just seemed like there was something off. That it should have been easier than it was. My stitches were uneven and the fabric wasn't feeding well. I was borrowing my mom's foot and remembered not having this much trouble working with it when she was here.

So I was on the phone with her working on those minky baby blankets, with the walking foot and expressing my frustration - being the day AFTER I finished this quilting. Our conversation went a little something like this:

my mom: Do you have the little black arm attached to the presser foot screw?

me: what??! what little black. . . . (looking closer). . . oh, you mean that one. (attaching the foot properly - and grumbling)
Well that's interesting - it works just fine, NOW.

my mom: I didn't know you didn't know how to attach it.

me: you mean the way I also didn't know that a fat quarter measured 18"x22" until last fall?

my mom: (chuckles)

me: The problem here is that you know so much you just assume I've learned it all through osmosis! I'm totally going to blog about this. A post entitled: Things my mom thought she taught me, that I wish I had known.

my mom: Oh no you're not!

me: we'll see.


I guess we know the outcome of that one. (Thanks, mom!)


I love how the binding turned out. I think the stripes really complete it and make it a little fancier. I used to think I hated sewing on binding, but I knocked this out during a viewing of this. And it's not as hard as I used to think. I reccomend running your thread through beeswax to keep it from tangling. I learned that from Bend the Rules Sewing (and yes, I think my mom knew about that trick too).

Sunday, February 15, 2009

sick days

It's been one of those weeks. My husband was out of town and both kids decided to get REALLY sick. Which translated into me getting LITTLE sleep. So by Thursday I decided we weren't going ANYwhere the rest of the weekend. So even though I've managed (thus far) to not get sick - I declared some sick days. And settled into some projects.

I'm not ready to show you the whole thing yet - but here's a little birthday gift for a friend of mine who shares her birthday with a major national holiday. The supremely embarrassing part of this gift isn't that it's totally holiday-themed, it's the fact that I started this so long ago I can't remember exactly when it was!!! I think it was 2000. (or 2001 - like I said I can't be sure). I started it in Utah, before I got married. It stayed there while I moved to D.C., got married, and then it found it's way to me at some point while we were in California. (This story is becoming reminiscent of this quilt's story.) I had some trouble with the star and that's the last I remember. It made the move with us to Virginia almost 3 years ago and I JUST pulled it out. I was tired of the space it was taking up. Plus, really, doesn't it just need to be finished?!

I was really excited when I pulled it out the other day to realize that yes, in fact, it was ready to be quilted!! I had forgotten that I used my mom's nice machine to fix the star and then she helped me get it laid out with the batting and backing. The only problem: I've never machine quilted. Well, that's not true. My mom and her sisters have a long-arm Gammil. I quickly found out that process is totally different than using a walking foot on a regular machine. I just quilted along the lines of the seams, I tried a little freehand in the border and decided I wasn't ready for that yet. I think I need a different foot.
Let's just be clear - it's not perfect. And that's okay. I learned a lot of valuable lessons. Pin MORE!! Use flatter sturdier batting! Start in the middle!!! And maybe practice on a smaller project. I'm hoping once I have the binding on and it's washed it will just look like it has a lot of CHARACTER, not just a lot of mistakes.

I'll post final pics soon. I can't drag this out anymore. . . Or can I??

********
I was so frustrated the other night with aforementioned project that I decided to work on my block for A Notion or Two, the virtual quilting bee of which I am a member. Amy asked us to do a wonky log cabin with a black embroidered or appliqued bird on the block. I thought it might be satisfying to work on something and finish it in one night. It was nice!

Sarah directed me to Tallgrass Prairie Studio where there is a great tutorial for wonky log cabins. It was a lot of fun. I only had to redo two strips - one because I sewed it on the wrong way (I'm sleep deprived) and the last one because my wonkiness was too extreme and I was having a hard time squaring up the block. I'm excited to try some more. I like the possibility of variation.


I googled bird sillouhettes and found all sorts of great images - but I really liked this one. It's a mockingbird, and I just love his stature! I have definitely have room for improvement, but it was really fun to do this. I like him so much I may just use the same pattern for when I do my block for my quilt.

I know, I really should have mine done already since my month was January. But aren't you impressed that I got this block done before the middle of the month? I am! Maybe I really am a recovering procrastinator. oh wait, no I'm not. I just saw my bedroom. How many ways can you spell D-I-S-A-S-T-E-R?

But I'm just not ready to post pictures of that. I admire those of you who are.