Showing posts with label bags. Show all posts

Wednesday, September 24, 2014

go big, go bold or go home bag finish and a winner!!!!! Quick ColumnQuilts Book


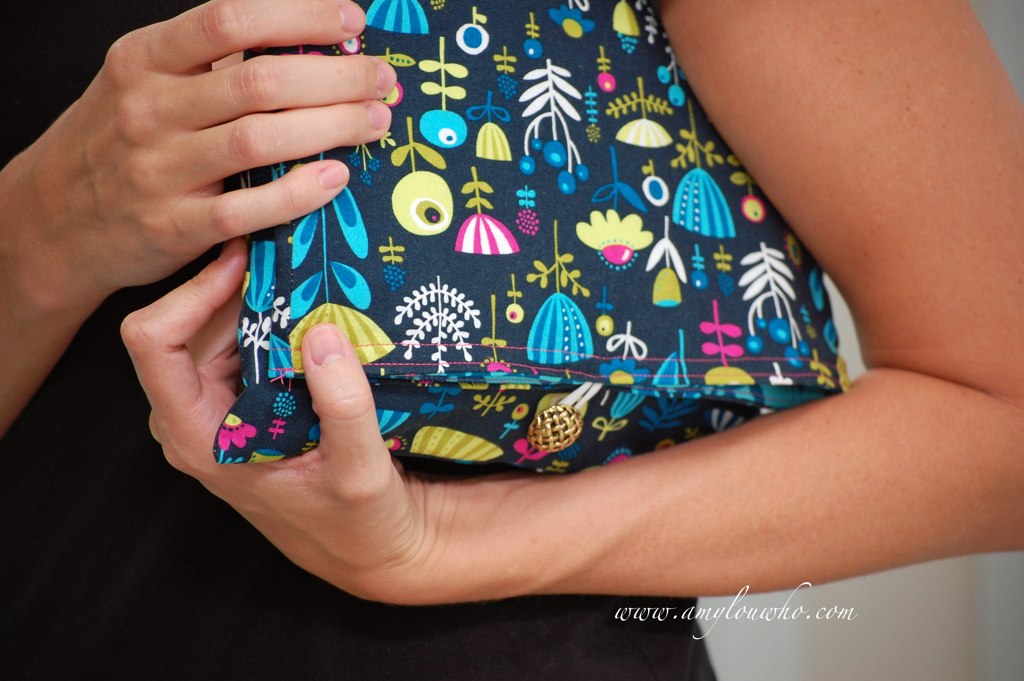
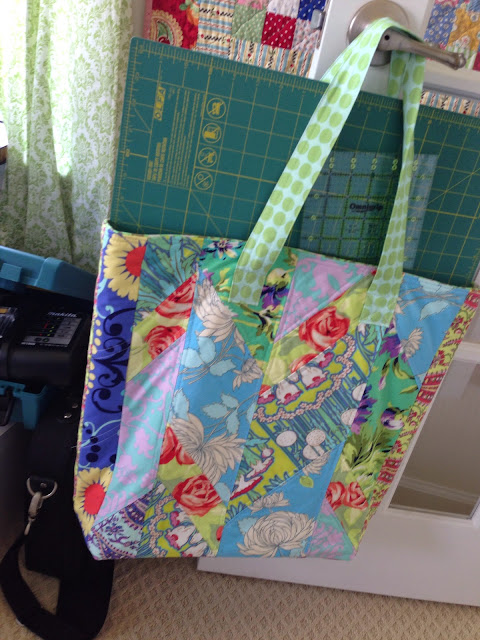
I did finish the bag!  I used it tonight to take my mat and other supplies to an activity - it was great! And here's a sneak peak -

I'm working on a tutorial - at least for the measurements and everything!  I think I'm going to really like using it!

*****

I meant to post this on Monday!  Thanks for all who entered the giveaway!  The lucky winner is #21!!!

CONGRATULATIONS KAREN PROPES!!!
I'll be in touch to get your address!

Tuesday, September 16, 2014

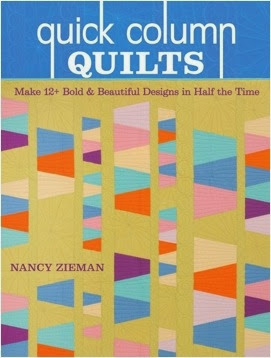
book review :: Nancy Zieman Quick Column Quilts


It's my stop on the blog tour and I am always happy to be a part of any new Nancy Zieman project! Be sure to check out the link at the end for Nancy's post and her awesome giveaway-which includes a new sewing machine!!

I've been feeling overwhelmed these days and when I got the email about this new book I thought, "oh no, how can I get a whole quilt done!?"

Then I looked at the preview of the book. Everything was beautifully illustrated and quick was in the title! So I said yes - I've got a couple of months...


And then we got home from vacation and school started. Oh the chaos!! Cue the sad music. 

I didn't want to just review the book, I wanted to make something (but there really are a lot of great patterns and techniques in there!!)!  so I took the quilt that stood out to me most and tweaked it. A bit. Or more than a bit. But I loved learning a new technique and can see how a quilt top from this pattern would work up very quickly! 

The quilt in the book is the Happy Go Lucky Chevron Column Quilt: 
Since I only have 4 solids in my stash and two of them are white and the other 2 shades of aqua/turquoise (!! shocker!!), I decided to dive into some large Amy Butler Love (and some Belle, Daisy Chain and Soul Blossoms...) scraps instead and use a more solid type print for the skinny pieces that work through the whole quilt.


One of the great things about this pattern in the pieces are big - so they show off nice big prints like these and a queen sized quilt will work up rather quickly! I followed the cutting instructions but only cut about 10 strips and cut the strips sets 1/2 the size to start with since I was going to do a smaller scale project.  

I followed the piecing instructions and then cut my strip sets in half to about 20" long.  

I had omitted the dark print in the chevron sets because I wasn't sure I wanted it to be so prominent in such a small piece - like I said the pieces are large. But then the vertical strips looked out of place. 
 So I decided to sew the strips up without the contrast. And for this project I think it works well.

I quilted the two panels. (19.5" x 21.5") in preparation for using them in a large tote bag.  I love straight line quilting a 1/4" or so on either side of the seam lines.  I think it always looks good! 

I haven't quite had time to finish the lining and the straps but I'm almost there.  And I have now affectionately named it the Go Big, Go Bold or Go Home Bag! 


I'm planning on a more detailed tutorial in another post if any one is interested - plus I need to show you what it looks like once I finish it!!

I loved the technique for stitching the chevrons and quickly piecing the columns. Everything was done in columns with out any finicky bias piecing for every block. I definitely think even I could make this quilt top pretty easily! It was fun to use the pattern in a different way as well-I might actually try reducing the size of the pieces to make a mini quilt. 

Update!!!:: I'm also giving away a copy of the book!  Go here and enter! Ends Saturday 9/20 at midnight!


This fun tour has been going on for a couple of weeks. Check out what the others have created from Nancy's book! And remember to check out this post to enter the giveaway!!


Sunday, September 7, 2014

zippies for the win!


I haven't done a swap in forever  but I saw Jennifer at Ellison Lane starting a pouch swap! I couldn't resist since I L❤️VE making zippy pouches!

Here's the inspiration board I came up with.  
I love all of these for so many reasons!! Color, pattern, dresdens...

I've been making a lot of zippies myself lately-mostly the open wide zippy pouch from Noodlehead. Awesome tutorial!! Here's a few of mine::
As much as I love the open wide pouch and a simple flat zippy-I think my partner would appreciate me branching out! Maybe a boxy pouch is in my future ... 

Do you have a favorite pouch tutorial? Would love it if you shared!

Friday, June 15, 2012

sew & tell v3.35 - teacher's gifts and a hashtag

Hello friends! Welcome to another week of sew & tell!

I was thinking it would be fun to start a hashtag for sew & tell to follow on Instagram and Twitter.  So if you don't have time to link up here or right a whole blog post, share a picture there and tag it #sewntell !! I think it will be fun!!

I'm going to be quick this week.  I've been sick all week with a horrible cold and have a lot to do today.  I'm hoping to kick this cold in the butt by the end of the day!! We'll see...

So I had to do some (last minute of course) teachers gifts for the last day of school this week.  I whipped up a  little tote bag (which I now covet)
tote bag

And some lunch box placemats!
20120615_0021

I think they all turned out pretty cute!!


What did you finish this week?
Linky Rules.  Please follow along for a fun party!
1. Please write the post for sew & tell - or add a blurb mentioning sew & tell to a post written since the last sew & tell.  If you are linking to a post with your own tutorial, please make sure it was a finish from this week and that the completed project is shown first.
2. One linky per person. (please put multiple projects in one post.)
3. Link to your specific post.  (See here for permalink instructions - or email me.)
4. Link back here with a link or a button (HTML on my sidebar).
5. Be sure to visit and leave comments on other's posts!
Please put your (blog)name instead of your project name, it helps us get to know each other better!

Friday, January 27, 2012

sew & tell v3.16 - ruffles make everything better

Hey there! I realized that I finished this project up during the holidays and never posted pictures.  I made myself a new bag.

I'm not going to lie, I'm a little tired of this bag pattern.  As much as I love it, I think I've made so many of them that I'm a little burnt out.  Plus, I had bought this lovely Secret Garden (Sandi Henderson) in Utah in October to make it with.  I've had ideas about embellishing my signature bag with some ruffles, but wasn't sure what I wanted to do exactly.  And the reality is, the bag is super functional, and I love that about it.

Then one Sunday my cute friend had a leather bag with a two toned double ruffle across the front.  I had found it! I took a picture on my iPod and figure out what to do to make it work.

sneak peak

 I really love the way it turned out, I might do a few things different the next time, like gather it a little less, it was hard to sew on without a walking foot.

double ruffle

I love this fabric! It's Sandi Henderson's Secret Garden.  The interior and contrasting ruffle and strap is one of my new favorite tone on tone prints - Garden Gate (I think).  It reminds me a bit of Henna Garden, another favorite.

ruffled signature bag
It's has a great drape and I bought enough to make some dresses/skirts for sister and babylouwho. I may have just bought some more this past week in different prints.


Your turn to share!  Show us what you've got finished!
Linky Rules.  Please follow along for a fun party!

1. Please write the post for sew & tell - or add a blurb mentioning sew & tell to a post written since the last sew & tell.  If you are linking to a post with your own tutorial, please make sure it was a finish from this week and that the completed project is shown first.
2. One linky per person. (please put multiple projects in one post.)
3. Link to your specific post.  (See here for permalink instructions - or email me.)
4. Link back here with a link or a button (HTML on my sidebar).
5. Be sure to visit and leave comments on other's posts!

Please put your (blog)name instead of your project name, it helps us get to know each other better!

Friday, January 13, 2012

sew & tell v3.14: oh my stars! and bags! etc...

Hey friends! I had every intention of sharing a fun recipe with you this week.  Unfortunately as it goes, me (aka mom) got the sickies that everyone else in my house have been sharing for the last month! I thought I had successfully avoided it this time, but alas, the ear infection would prove otherwise!

I managed to get a guest post written for my friend Vicki's Focus on Free Motion Quilting series!


She is having link ups, guest posts, and prizes at the end of the month!  Go check it out, it's sure to be a good time.

For sew & tell this week, I thought I'd share a few other finishes from some December sewing.


I have had this bag in mind for a long time. In fact I had it almost finished when I took it to a sewing group back in the fall! It sat around being neglected and I finally finished it up.

Megan's bag
The fabric is Oddysea by Momo for Moda.  I really love the shell print and the subtle colors.  It's a little change from my bright and vibrant Amy Butler and Sandi Henderson choices.

Megan's bag - interior

I love making these quilted dishmats.  I think it's very cute and kitchen-y!
quilted dish drying mat

I do love this citrus print.  It's from Patty Young's Sanctuary line.  I'd like to get my hands on some more!


I also made another quilt top this week.  I actually made the SAME one as the giant star from last week, but started with 10.5" squares, so it's finished at about 40" x 40".  It's a group effort for a mutual friend.  Another friend is quilting it and a 3rd doing the binding.  So it counts as a finish, right?

giant star round 2

It was raining the day I finished it, so I had brotherlouwho hold it up inside so you could have a little perspective as to the baby quilt size compared to the last one.

Your turn to share!  Show us what you've got finished!
Linky Rules.  Please follow along for a fun party!
1. Please write the post for sew & tell - or add a blurb mentioning sew & tell to a post written since the last sew & tell.  If you are linking to a post with your own tutorial, please make sure it was a finish from this week and that the completed project is shown first.
2. One linky per person. (please put multiple projects in one post.)
3. Link to your specific post.  (See here for permalink instructions - or email me.)
4. Link back here with a link or a button (HTML on my sidebar).
5. Be sure to visit and leave comments on other's posts!

Please put your (blog)name instead of your project name, it helps us get to know each other better!

Wednesday, October 26, 2011

{amylouwho} my super secret bag making tip

As I said yesterday, I don't really do tutorials.  I'm deathly afraid of trying to explain something I do with the right words.  I could sit down with you and show you what to do - but to write it out? scary!! It's probably the other reason I haven't worked more on the pattern for my bag.

While I was working on this bag last week I thought I might share one of my favorite discoveries when making bags.  Fusible Thermolam. It's technically not fusible fleece, even though it feels a lot like it.  I think it's a little tighter weave or something.

I used sew-in fleece when I made my first several bags, what a pain! Then I decided to try fusible fleece! Much easier.  But I found when I fused it on some things it would pucker the fabric because it was shrinking with the iron's steam, so I started using it on the lining instead of the outer fabric.  Then one day I ended up with the Thermolam instead of the fleece and I'll never go back! (btw, this is not a sponsored review - I'm not saavy enough to get offered something like that! I just really like this stuff!)
pellon thermolam

Using the interfacing on the lining provides some stability to the fabric when inserting your snaps and also for the key hook.  And I love how it stands on it's own!  Another added bonus is that it's really lightweight, so your bag isn't heavy, but still keeps it's shape. It's also flexible enough that turning the bag isn't a huge chore.
nice and sturdy

Look how sad and schlumpy it is without the interfacing! 

bag without interfacing

Once you put the interfaced lining in, the bag perks right up!
Sara's bag

I also cut my interfacing pieces a seam allowance shorter all the way around so that the seams aren't so bulky.
from the inside

It is important to follow the directions for fusing. Because the thermolam is so thick, you should press it with the fabric side up (interfacing underneath), so the heat is getting to the fusible side, otherwise your interfacing won't stick or stay in place.

I hope this helps some of you bag makers or hopeful bag makers!  I love making bags, they are so quick and satisfying to finish.

What kinds of sewing tricks have you learned making bags? Or anything for that matter! Oh! And what is your experience with Decor Bond? Is it hard to turn the bag right side out?

Friday, October 21, 2011

{amylouwhow} sew & tell v3.5

Hello Friends! Welcome to this week's sew & tell!

First off, if you missed it yesterday, go read my interview with Sara and enter to win this beautiful handmade bag!
*****
I panicked a little when I started to put this post together. Even with all the sewing I had done this week I thought that all I has to show you was a small, but very cute headband I made for sisterlouwho. Not that small finishes aren't worth celebrating...

When I started to download the photos from my camera I was reminded of a very early finish I had on Sunday night. Whew!
DSC_7214
I love that you can tie a little something on a rolled up handmade gift and it practically wraps itself.

A dear friend, and when I say dear I mean sainted (she watched my kids last night and cleaned my kitchen and mopped my floors while I was gone!!!), had a baby 4 months ago and we had picked out this fabric so I could make her a new bag. It didn't get finished for the arrival of the sweet baby, but it was her birthday Monday and I wanted to surprise her by FINALLY finishing it!
DSC_7209
When we came back Sunday afternoon from our weekend away I was overflowing with sewing motivation. I finished cutting it out and sewed it up!
DSC_7210
She replaced her fairly new Vera Bradley with this and told me she got three compliments on it the first day! That makes me feel good!

Bag details:
Pattern: amylouwho signature bag (pattern not yet available - interested?)
Fabric exterior: Dandy Damask in Avocado, Michael Miller
Fabric interior: cotton print from Joann's - printed in Japan

Finishing things makes me feel good too! What sewing project did you finish this week?

Oh! and thanks to Sara  - picture linkies are BACK!  :)
Please follow the guidelines as spaces are limited - linky will close after the first 30 entries.

Linky Rules.  Please read carefully.  The delete monster will be eating non-compliant links.
1. Please write the post for sew & tell - or add a blurb mentioning sew & tell to a post written since the last sew & tell.  If you are linking to a post with your own tutorial, please make sure it was a finish from this week and that the completed project is shown first.
2. One linky per person. (please put multiple projects in one post.)
3. Link to your specific post.  (See here for permalink instructions - or email me.)
4. Link back here with a link or a button (HTML on my sidebar).
5. Be sure to visit and leave comments on other's posts!

Tuesday, April 5, 2011

a new bag. really, a new bag!

When I say a new bag, I mean a new pattern even! If you've been around here since before I had the baby (a YEAR ago!!) you saw a lot of my bag, meaning the bag I designed, since I made a ton of them. Maybe too many of them. In fact, I think it's been a year since I made a bag. And I needed a new one.

I've had this Belle Chrysanthemum (Amy Butler) for a couple of years waiting for the perfect time to use it.  I think it's perfect for spring.  And The Abby Tote from Vanessa at  V. and Co. was a perfect fit!

So I whipped up a little bag this last weekend.  Actually, it's not little, it's a huge tote!
The Abby Tote by V. and Co.


Isn't that sash adorable!  I listened to her on Pat Sloan's internet radio show (look on the right side bar under recent shows, Vanessa Christenson) and she said the inspiration for this bag was actually the big bow and she designed the bag around that.  Love.
the sash/scarf
She suggests doubling up the sash as a scarf too. And I did today! It was perfect on this very blustery spring day. Vanessa is as sweet (and funny!) as they come.  I can't wait to make a houndstooth quilt.  Make sure you check out the rest of Vanessa's awesome patterns.

So I think it's bag season.  I helped a friend make one of my original bags the last couple of days and I can't wait to show it to you.   It was so fun to help her make something and see her get as excited about it as I do!  I have a couple of other bag ideas floating around in my head too, maybe I'll get on that.  Not to mention the curtains and quilts I'm working on.  But I just love the quick, satisfying, functional nature of a new bag.

Anyone else feel the need to finish something quick when working on longer projects?  What do you sew when you need some instant gratification?

Friday, February 25, 2011

sew & tell - february 2011

Well hello there!  I'm so happy to be back for a sew & tell today!  I have learned that I shouldn't tell you what I'm planning to post because sometimes it doesn't work out.  I have that bird quilt almost ready - but the biggest problem is that I don't have any good pictures of it!  I was going to take some pictures this morning, but it's wet and rainy outside and the quilt has a lot of white in it.  Need I say more?

I also want to wax poetic about the loveliness of the people who made the blocks for me and all the things I learned on my first real foray into free motion machine quilting.  I know, you can hardly wait!! ;0)

I've been sewing up a storm working on a few projects, including the kitchen swap and some bee blocks.  But I wanted to share this with you today!
The Favorite Bag

I love this bag! If you haven't heard of V. and Co. you need to get over there now! She's got so many ideas in her head it's amazing. Therefore she has a ton of great tutorials and patterns not to mention awesomely funny and entertaining blog posts! I made this bag from her pattern, The Favorite Bag.

It also came with the pattern for this detachable flower.
cutest fabric flower EVER.
I've always wanted to make some fabric flowers but have been too intimidated to break out my glue gun.  It wasn't really that bad.  I need to get over my unsubstantiated fear of hot glue and it's little stringy off-spring.

I haven't made a bag for a while - I kind of had bag burnout after last year.  But I think I'm going to be making some more.   And definitely more of these little flowers!  They are on a bar pin so I can take it off and wear it on my favorite cardi!

So what have you all been up to the last month or so?  Link up a finished project below and remember our Sew & Tell linky etiquette:

NEW RULES FOR LINKING UP!  Please read carefully.  The delete monster will be eating non-compliant links.
1. Please write the post for sew & tell - or add a blurb mentioning sew & tell to a post written since the last sew & tell.  If you are linking to a post with your own tutorial, please make sure it was a finish from this week and that the completed project is shown first.
2. One linky per person. (please put multiple projects in one post.)
3. Link to your specific post.  (See here for permalink instructions - or email me.)
4. Link back here with a link or a button.
5. Be sure to visit and leave comments on other's posts!


Friday, October 1, 2010

sew & tell - curtains revisted

I've been thinking about the idea that's discussed a lot that only the polished and perfect are what people show on their blogs.  I hope that by now you all now I am not always a perfectionist, but I still don't like to admit to the messes I inevitably make or ignore.  In a spirit of coming clean and keeping it real, I haven't cropped these pictures down. Now you can see what a house with 3 small children and a mom who would rather sew than pick-up every minute of the day looks like.

I had a pretty productive sewing week.  I've had projects laying around that just needed to be made so I wouldn't have to figure out where to store the materials anymore!

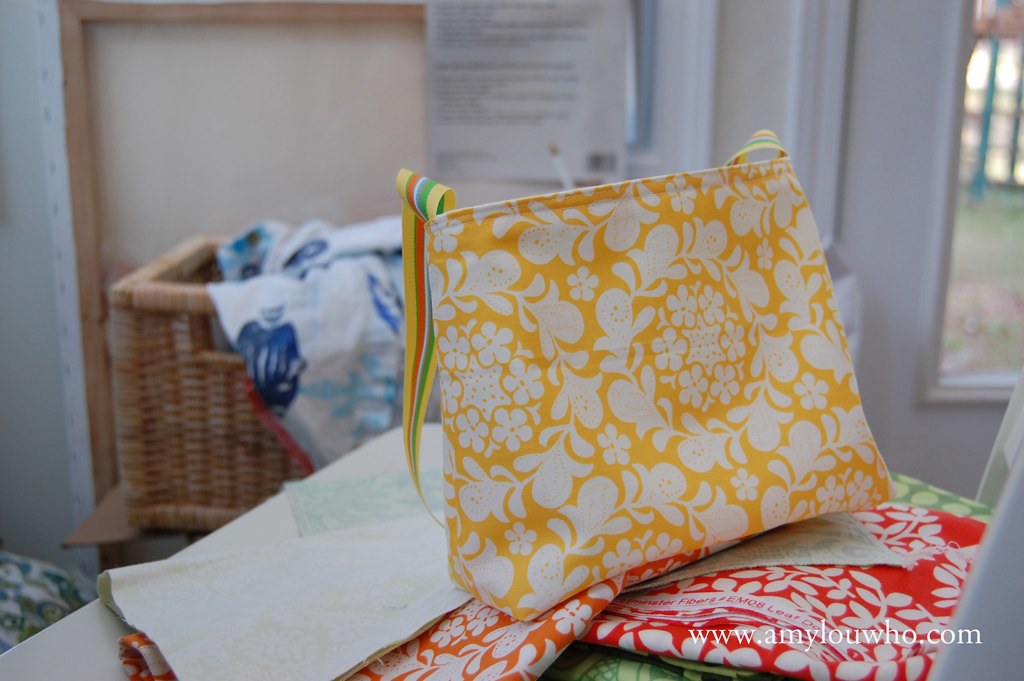
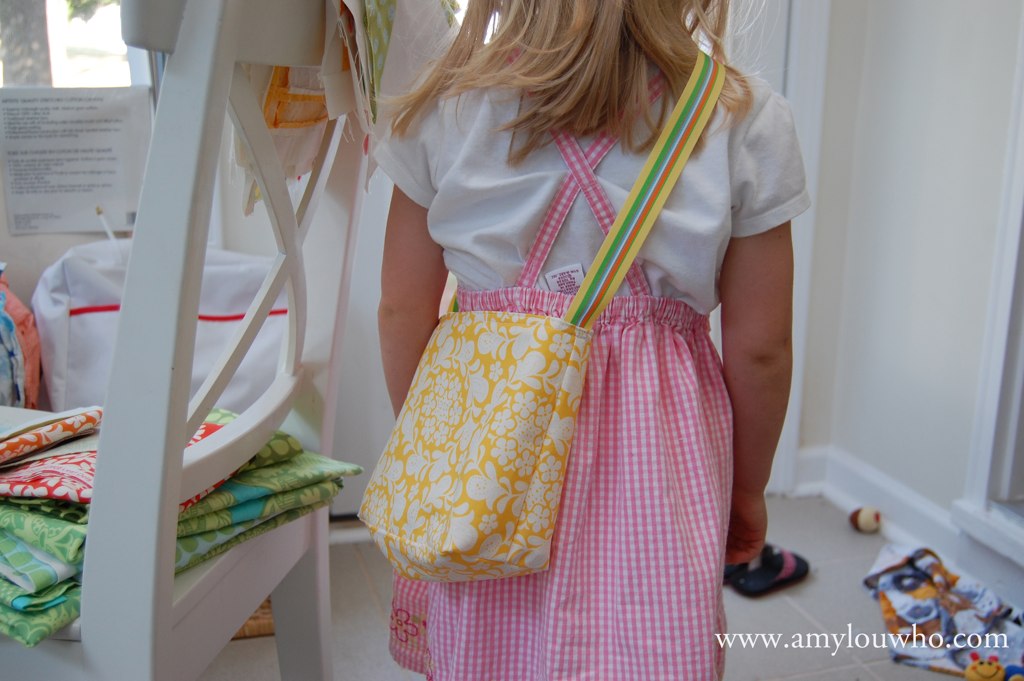
I whipped up another small tote for a neighbor's 3rd birthday party.  
I LOVE this Henna print. I *need* to buy it in every color!  Have you seen the new muted colors from Meadowsweet 2?
Please wear responsibly.

*****
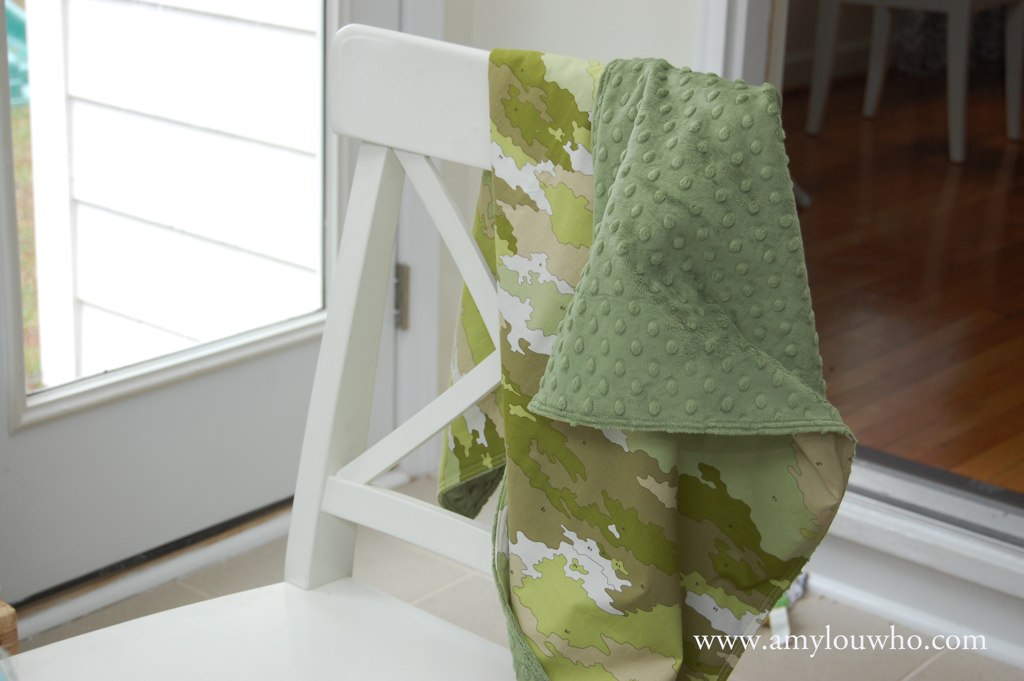
Boy fabric is hard to come by and I finally had an excuse to make this into a blanket for my friend Shayna who had her baby this week!  I love minky and camo together.  Such drama!  Such contrast!

For the record, I am a total minky snob.  I won't buy the knock-offs that are, admittedly, cheaper.  It doesn't seem to hold up as well.  Fabric.com has a great selection of the real stuff and you can always get a coupon and free shipping.
*****

Ever since my friend and interior designer, Heidi, helped me with my collage wall, I've wanted to get the curtains up in my dining room.  The rods were laying around and bugging me.  One of the curtains was already made and I just needed to make the casing on the other one.  I made one of these last year (Sept. 3) for my very first sew & tell post!  I didn't realize that I was going to be able to share them again just one year later!  At the time I cut both curtains out but never used the other one.  I put the rod up and realized it they were long enough if I let out the hem.  So did.  And I serged the edges.  And they hang just like that.  And you are the only ones who know...
And yes, that is a tray hanging on the wall over there.  I'm going to show you what I did. I just have to get the post written.  It might be a while!


NEW RULES FOR LINKING UP!  I'll explain more later.  Please read carefully.
1. One linky per person of a sewing project. 
2. Link to your specific post.  (See here for permalink instructions - or email me.)
3. Please write the post for sew & tell - or add a blurb mentioning sew & tell to a post written earlier in the week.
4. Link back here with a link or a button.
5. Comment away!
I have a back-to-school post I'm writing about sew & tell.  Bottom line, I want to make sure every minute you spend here is worthwhile!  My teacher-self from a former life is coming back to crack down!  (No smiling until Christmas.  hehe)

My husband is getting promoted today!  So I will be pinning on his new ranks this morning, but I'll be around to visit you all later.  How about another Marine Corps 101 post?

What sewing project did you finish this week?

Friday, August 13, 2010

sew & tell - a little bag

If you are new or need a refresher for Sew & Tell guidelines you can click on the tab above for details on linking up!
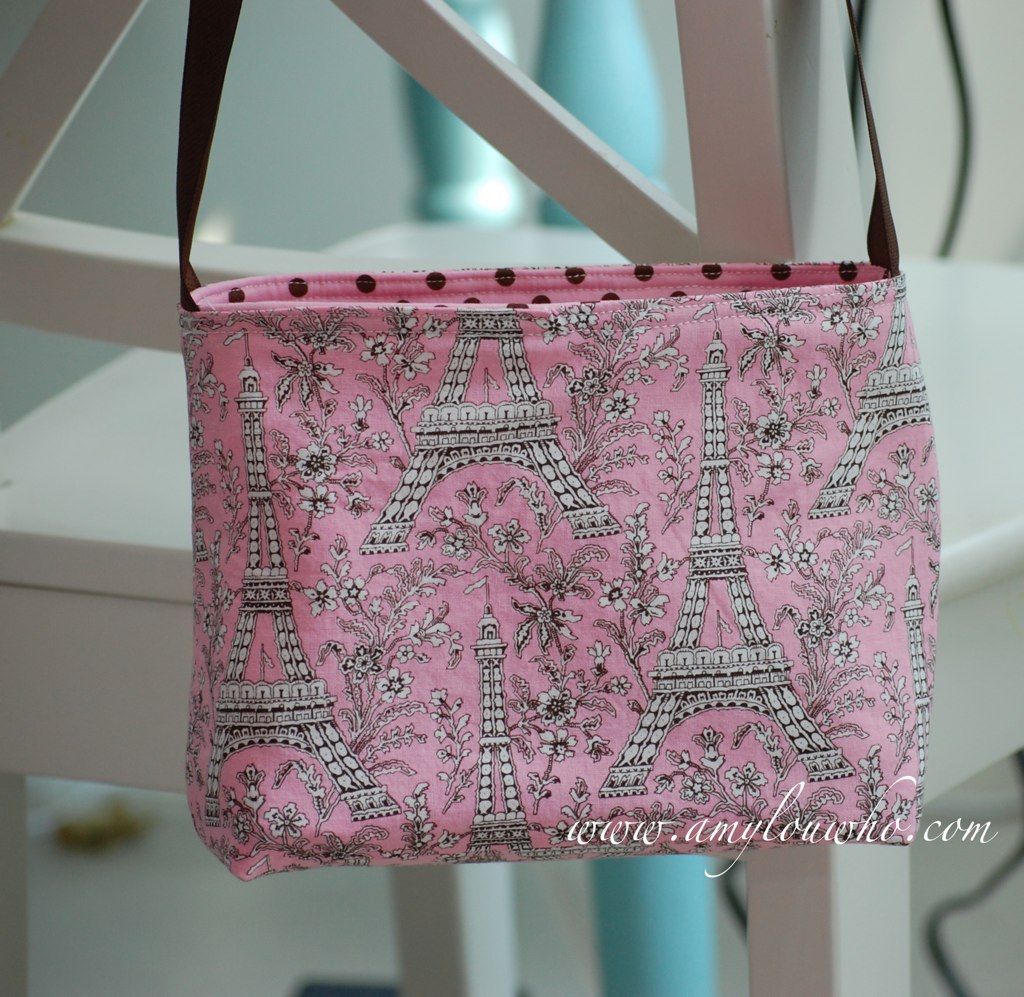
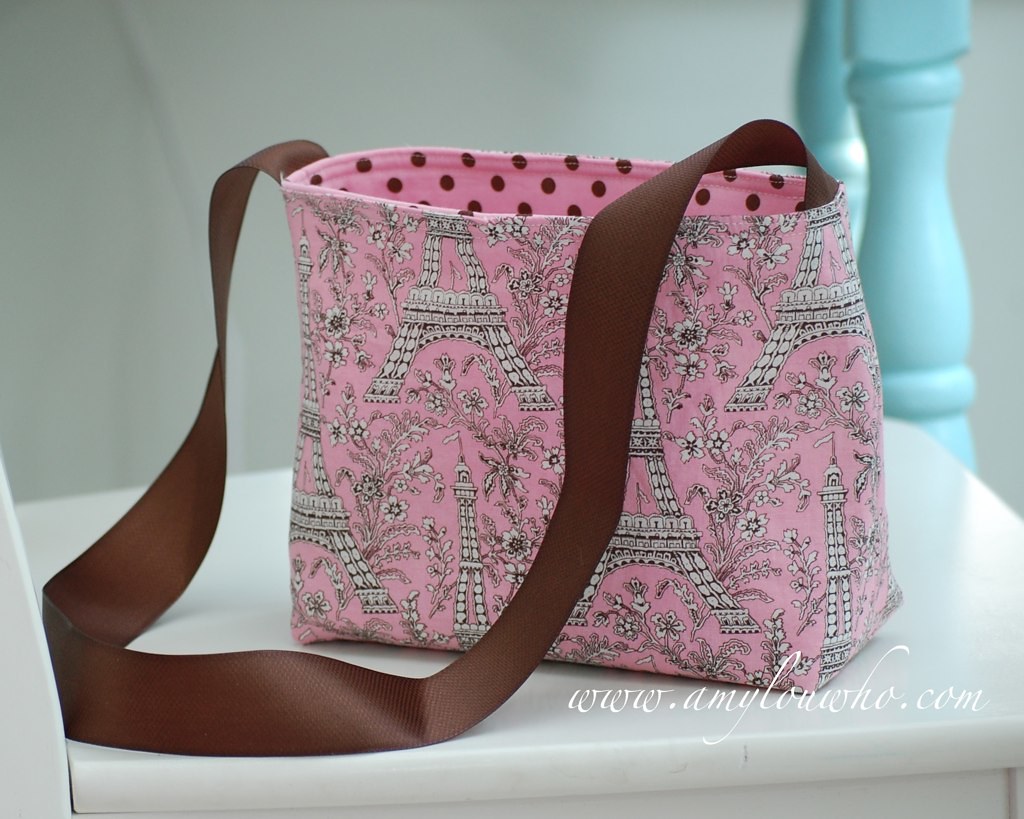
Hello friends!  I have a small little project to share with you today.  After my sewing lesson last week I got in a frenzy and cut out about 4 more clutches and a little bag (like this one) for a little birthday gift for a new little friend.  She had an amazing princess party and I thought, what better than to use some pink Eiffel tower fabric for the bag!
 This is one of my favorite prints of ALL time!  I have it in black and white too and am kicking myself for not buying the turquoise one while it was still being printed...
I used a simple brown ribbon for the strap.  And who doesn't love polka dot? 

I've been working on some other projects around the house (So I didn't get to the clutches yet).  My amazing friend Heidi (for whose daughter the bag was made) came over and helped me hang pictures and arrange some things to make things more pulled together.  I'm so happy with the results.  I have plans for that black and white Eiffel Tower fabric that I will show you soon!

I finally figured out how to take pictures of my quilt - but haven't been able to get outside and rig up the clothesline yet.  SO, I'm going to post about it next week, AND I have an AMY BUTLER surprise for all of you (maybe a giveaway?)  And another giveaway on Monday!  And maybe even ANOTHER giveaway and Amy Butler-Fest extravaganza in a few more weeks!  I know! It's all so exciting I can hardly stand it!  Just be sure you come back next week for details!

Cliff notes version of this post:
1. I want this bag it's so cute.
2. Giveaway on Monday.
3. Amy Butler Giveaway on Friday.
4. Details on an Amy Butler-fest Sew & Tell next Friday.


What sewing project did you finish this week?

Please refer to the sew & tell page   if you have any questions or wonder why your link may have been  deleted.
1. Link to your specific  post  about a sewing related finish you had THIS week.
2. Please mention sew   & tell in your post and link back to this  post (link or button) so  everyone can join in.
3.  Pat each other on the backs in the comments!


Enhanced by Zemanta

Friday, August 6, 2010

sew & tell - sewing lessons


If you are new or need a refresher for Sew & Tell guidelines you can click on the tab above for details on linking up!

My new friend Jessica confessed to me one day that she had a brand new sewing machine that she has had for several years and had never used it!!  Of course I couldn't let that continue - so I offered to help her learn how to use it.  You know my secret plan to take over the world involves converting unsuspecting women into happy-fabric-loving sewers, right?  Who needs anti-depressants when you can have a fabric fix?  Or the thrill of a finish!?

She wouldn't let me take her picture, but this is what it would have looked like.  Except Jessica has better hair.  And I don't have wood paneled walls. . . but I digress.
NYA: Minnesota:young woman learning to sew.
image via Wikipedia
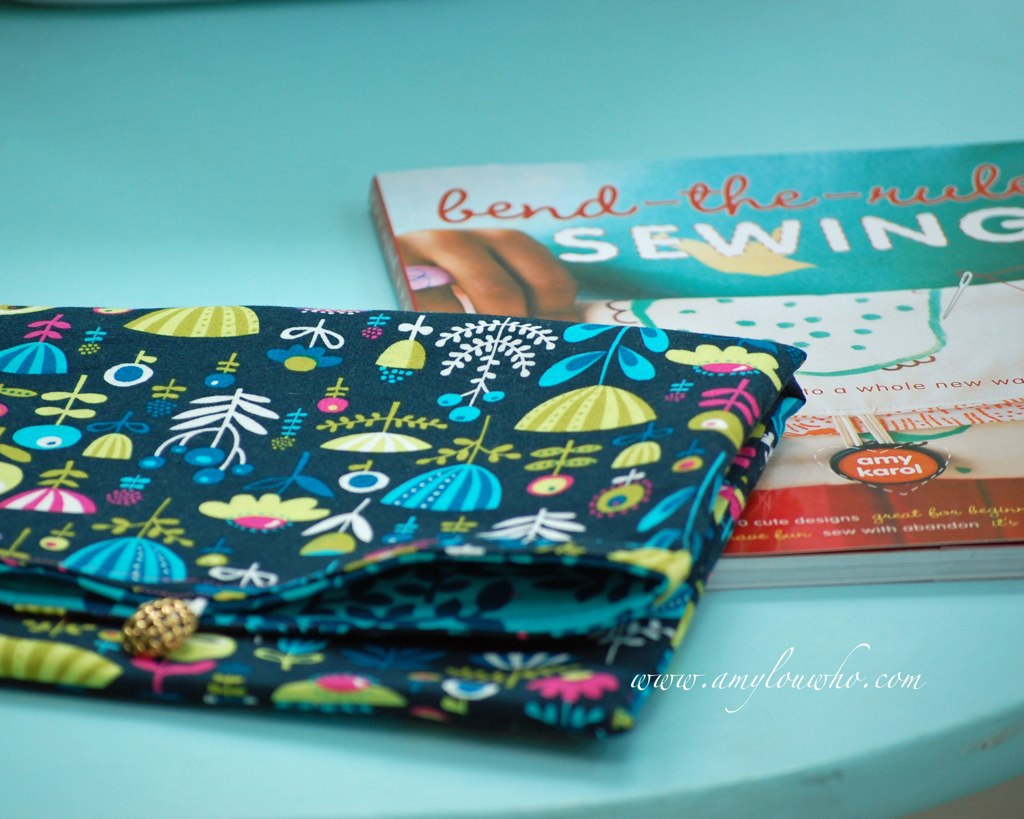
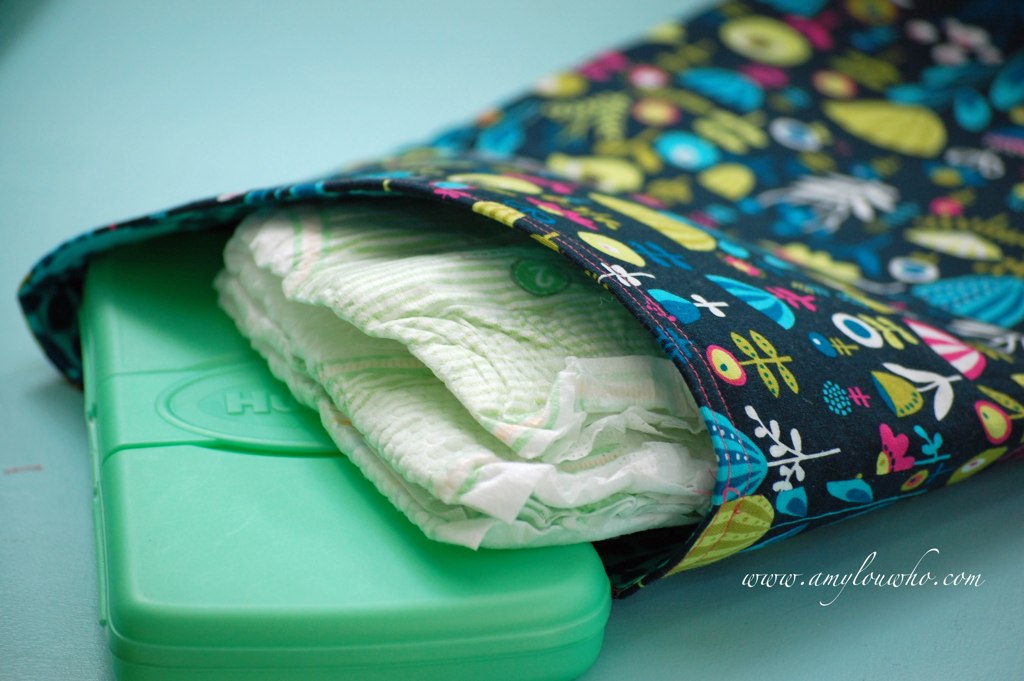
I had been wanting to make a simple diaper clutch for myself and thought this would be the perfect project for a newbie to learn how to use her machine!  (If you go to Jessica's blog, you will see why she needs one too!  And you will probably laugh a lot while you are there.  Plus leave her some bloggy love - they are about to go through their first deployment.) 

Jess told me at one point that she had the book Bend the Rules Sewing by Amy Karol - which is a delightful book!  side note: One of the things I love about it is the section in the beginning explaining basic sewing concepts.  Even though I've been sewing for a long time I learned a lot of good things there.  It's where I first read about beeswax!  (Which does make hand sewing so much better.)

When she came with the book I remembered that the clutch I wanted to make was actually in this book.  And then realized it's the one on the cover!!
She picked out my scraps of Park Slope by Erin McMorris,
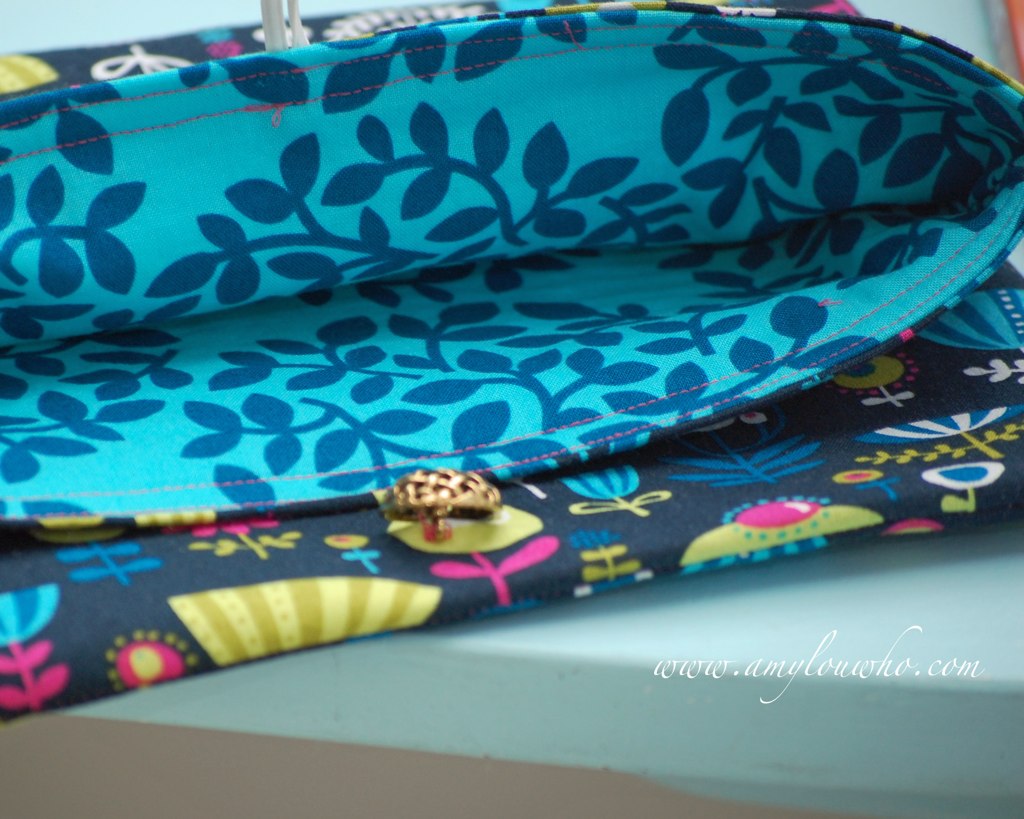
 and a button from my stash to add a little vintage-y interest.
We changed the measurements a tad,
so that these would fit perfectly.
I love how it turned out!  And look at that sweet bicep.  She did let me take an artsy action shot!

I love this quick little project so much I have 4 cut out and ready to sew up!  You will see them here soon.  And I found the cure for my sewer's block - spend some time sewing with a friend, make a mess on your dining room table and JUST. START. CUTTING.

I have a few fun giveaways up my sleeve for the next little bit.  So please stay tuned!  Hint: I got a nice package from none other than AMY BUTLER'S studio that I'm going to share with you.  So get out your Amy Butler patterns and fabric and get your projects ready to share!


What sewing project did you finish this week?

Please refer to the sew & tell page   if you have any questions or wonder why your link may have been  deleted.
1. Link to your specific  post  about a sewing related finish you had THIS week.
2. Please mention sew   & tell in your post and link back to this  post (link or button) so  everyone can join in.
3.  Pat each other on the backs in the comments!

Enhanced by Zemanta